
uPVC windows ventilation refers to the controlled exchange of indoor and outdoor air in homes fitted with unplasticized polyvinyl chloride window frames. These modern frames are prized for their durability, low maintenance, and excellent thermal performance. However, their very efficiency creates a unique challenge: they seal so tightly that natural airflow is virtually eliminated.
When you install uPVC windows, you're essentially wrapping your home in an airtight envelope. This is fantastic for keeping heating bills down and blocking draughts. But here's the catch: without deliberate ventilation design, moisture from cooking, showering, and even breathing gets trapped inside. Stale air lingers. Condensation builds on cold surfaces. Over time, this can lead to mould growth and poor indoor air quality.
Imagine an older home with traditional timber frames. Those windows, charming as they were, leaked air through countless tiny gaps around the frame, through the sash joints, and even through the wood grain itself. This uncontrolled air exchange wasn't efficient, but it did provide a constant trickle of fresh air.
Modern uPVC frames work differently. They're engineered with precision seals, multi-point locking systems, and weather-resistant gaskets that eliminate those accidental air pathways. The typical British home can lose up to half its heat through uncontrolled air leakage in older construction. uPVC windows dramatically reduce this loss, but they also remove the passive ventilation that older buildings relied upon.
This airtightness is a double-edged sword. You'll notice warmer rooms in winter and lower energy bills. But you'll also notice condensation forming on window panes, a stuffy feeling in bedrooms, and potentially that musty smell that signals moisture problems.
So how do you get fresh air into an airtight home without opening windows and losing all that hard-won thermal efficiency? This is where a uPVC window ventilator comes in, specifically the trickle vent.
Trickle vents are small, controllable openings typically installed along the top of the window frame. They allow a continuous flow of fresh air to enter while stale air exits, all without compromising security or creating noticeable draughts. Think of them as a controlled breathing system for your home.
Airtight windows improve energy efficiency but require deliberate ventilation design to maintain healthy indoor air quality.
These unassuming devices provide what's called background ventilation. They work passively, requiring no electricity or mechanical parts. You can open or close them depending on conditions, giving you control over your home's airflow without sacrificing the benefits of your energy-efficient uPVC ventilation window installation.
For homeowners today, understanding this balance between airtightness and ventilation isn't just about comfort. It's about protecting your property from moisture damage and ensuring the air your family breathes is fresh and healthy.
Understanding the comfort benefits of uPVC windows with ventilation is one thing. Knowing what the law actually requires is another. If you're planning a window replacement project or building an extension, the regulatory landscape around ventilation can feel confusing. Let's break it down.
Part F of the Building Regulations governs ventilation in dwellings across England and Wales. In plain terms, it sets out the minimum amount of fresh air that must be able to enter habitable spaces to protect occupant health and prevent moisture damage.
The regulations recognise several ways to achieve compliant ventilation. Trickle vents fitted into window frames are one of the most common solutions for background ventilation. They're not the only option, but they're often the simplest and most cost-effective for residential properties.
Part F doesn't mandate a specific product or brand. Instead, it specifies performance requirements measured in equivalent area, or EA. This measurement, expressed in square millimetres, represents the effective open area through which air can pass. A uPVC ventilator window with a higher EA rating allows more airflow than one with a lower rating. The required EA depends on the room type, size, and purpose.
The 2022 update to the Building Regulations tightened these requirements significantly. The changes reflected growing awareness that modern airtight construction needs deliberate ventilation strategies. For homeowners and installers alike, this means paying closer attention to ventilation compliance than ever before.
Here's where things get interesting for homeowners mid-project. Replacement windows aren't treated the same as windows in new builds under building regulations.
When you're replacing existing windows, the general principle works like this: if your original windows had trickle vents, your replacement windows must also include them. If the originals didn't have vents, the situation becomes more nuanced. The regulations consider factors like whether the replacement improves or maintains the building's overall ventilation provision.
This creates a practical question many homeowners face. You might be replacing old uPVC frames from the 1990s that never had trickle vents. Does that mean you can skip them now? Not necessarily. The 2022 regulatory update shifted the baseline expectations. Even like-for-like replacements may now require ventilation provisions that weren't mandatory when the original windows were installed.
The compliance risk here is real. Fitting replacement windows without required trickle vents creates potential legal liability for both installers and homeowners. Building control can require remedial work if installations don't meet current standards. Some window installers have faced enforcement action for systematically omitting vents to reduce costs.
For homeowners considering ventilation locks for uPVC windows as an alternative to trickle vents, it's worth noting that window ventilation locks for uPVC windows serve a different purpose. These locks allow you to secure a window in a slightly open position, providing ventilation while maintaining security. However, they don't typically satisfy Part F requirements for background ventilation on their own. They're better understood as a supplementary option rather than a regulatory compliance solution.
The safest approach? Discuss ventilation requirements with your installer before signing any contract. A reputable company will explain exactly how your new windows will meet Part F requirements and document this in writing. This protects you from future compliance issues and ensures your home benefits from proper airflow once the installation is complete.
You know trickle vents exist. You understand the regulations require them. But have you ever wondered what actually makes air move through these small openings? Understanding the mechanics helps you appreciate why a uPVC window with ventilation performs so differently from one without.
Trickle vents don't use fans. They don't consume electricity. They work entirely through physics, specifically the natural pressure differences that exist between the inside and outside of your home.
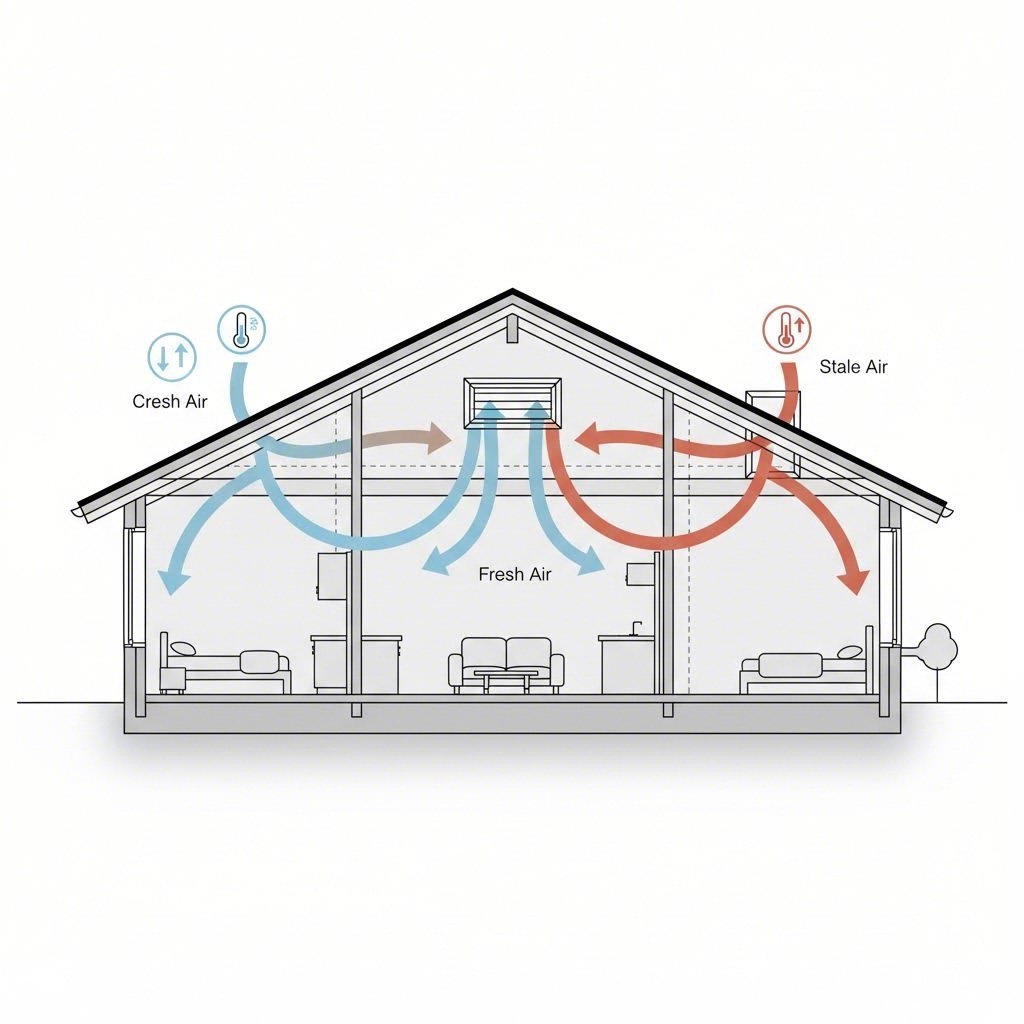
Here's what happens. When wind blows against your house, it creates higher pressure on the windward side and lower pressure on the sheltered side. Inside your home, activities like heating, cooking, and even the warmth from occupants create slightly higher air pressure compared to outdoors. This pressure imbalance is the engine that drives passive ventilation.
When you open a trickle vent, air naturally flows from the high-pressure zone to the low-pressure zone. Fresh outdoor air enters through vents on one side of the building while stale indoor air exits through vents on the opposite side or through extract points like bathroom fans. No mechanical assistance needed.
Temperature differences amplify this effect. Warm air rises, creating what's called stack effect. In winter, heated indoor air rises and creates positive pressure at ceiling level. Trickle vents positioned at the top of window frames take advantage of this, allowing warm, moisture-laden air to escape while cooler fresh air enters lower down or through other openings.
This passive system works around the clock without any input from you. Even when you're asleep or away from home, your uPVC window ventilation locks in this continuous air exchange, maintaining indoor air quality without wasting energy.
Not all ventilation strategies are equal when it comes to preventing condensation and maintaining healthy air. The distinction between continuous and intermittent ventilation explains why trickle vents outperform occasional window opening or relying solely on extractor fans.
Continuous ventilation, which trickle vents provide, delivers a steady, low-level exchange of air throughout the day and night. Think of it like breathing: constant, gentle, and consistent. This approach keeps relative humidity stable and prevents moisture from accumulating on cold surfaces.
Intermittent ventilation, by contrast, happens in bursts. You switch on the bathroom fan during a shower. You open a window while cooking. These actions remove moisture quickly but only for short periods. Between those bursts, humidity levels climb again.
Why does this matter? Condensation forms when warm, moist air contacts a cold surface and the air temperature drops below its dew point. If humidity spikes between ventilation events, condensation has time to form on window glass, external walls, and other cold spots. By the time you run the extractor fan again, the damage is already done.
Continuous background ventilation through a uPVC window ventilation lock system prevents these humidity spikes. The steady airflow keeps moisture levels consistently lower, so the dew point is rarely reached. Your windows stay clear. Your walls stay dry.
The airflow cycle in a properly ventilated room follows a predictable pattern:
This cycle repeats continuously, maintaining equilibrium without any action required from you. Extractor fans still play a role, particularly in high-moisture areas, but they work best as a supplement to background ventilation rather than a replacement for it.
Understanding this principle helps explain why simply opening windows occasionally isn't enough in modern airtight homes. The question then becomes: which type of trickle vent works best with your specific window frames?
So you've decided your uPVC windows need trickle vents. Great. But walk into any building supplies store or browse online, and you'll quickly discover there's more than one type. Which one actually fits your frames? This is where most homeowners get stuck, and it's a question that rarely gets a straight answer.
The truth is, not every uPVC windows ventilator works with every frame profile. Compatibility depends on your frame's construction, dimensions, and whether you're fitting vents during manufacture or retrofitting them later. Let's break down the three main types so you can make an informed choice.
Each ventilator type takes a different approach to creating an airflow pathway through or around your window frame. Understanding these differences helps you match the right product to your situation.
Slot vents are the most common type fitted to new uPVC windows. They sit inside a pre-cut slot machined into the frame head during manufacture. The vent body slots into this opening, creating a neat, integrated appearance. From the outside, you'll see a slim grille that sits almost flush with the frame. Inside, a controllable flap lets you adjust airflow or close the vent entirely.
Over-frame vents take a different approach. Instead of cutting into the frame, they mount on top of the existing head rail. The vent body sits proud of the frame surface, with air passing through a gap created between the vent and the frame or through channels in the vent itself. This design makes them ideal for retrofit situations where cutting into an existing frame isn't practical or desirable.
Through-frame vents pass completely through the frame depth, creating a direct air pathway from outside to inside. They require drilling or routing through the full thickness of the uPVC profile. This type typically offers higher airflow capacity but demands more invasive installation work.
Each type serves the same fundamental purpose: allowing controlled background ventilation. The difference lies in how they integrate with your specific window profile and what installation work they require.
Choosing the right ventilator uPVC windows solution comes down to three key factors: your frame dimensions, whether you're working with new or existing windows, and how much airflow capacity you need.
Frame depth matters most for slot vents. Standard uPVC profiles from major manufacturers typically have head rails deep enough to accommodate slot vents, but dimensions vary. A frame with a shallow head rail may not have enough material to machine a slot without compromising structural integrity. Before purchasing, measure your frame's head rail depth and compare it against the vent manufacturer's requirements.
Head rail width determines how long a vent you can fit. Longer vents provide higher equivalent area and therefore more airflow. If your windows have narrow frames, you may need to fit multiple shorter vents or choose a vent type with higher airflow per unit length.
For retrofit projects, over-frame vents often make the most sense. They don't require cutting into your existing frames, which means no risk of voiding warranties or weakening the profile. Installation is straightforward: clean the surface, position the vent, and secure it with screws or adhesive depending on the product design. A uPVC window ventilation restrictor can also be added to control maximum opening if needed.
The following table compares the three vent types across the attributes that matter most for your purchase decision:
| Attribute | Slot Vents | Over-Frame Vents | Through-Frame Vents |
|---|---|---|---|
| Installation Method | Inserted into pre-cut slot in frame head | Mounted on top of existing frame | Drilled or routed through full frame depth |
| Frame Modification Required | Yes - slot must be machined | No - surface mount only | Yes - drilling through frame |
| Suitable for Retrofit | Possible but requires specialist cutting | Yes - most DIY-friendly option | Possible but invasive |
| Typical Equivalent Area Range | Moderate to higher | Lower to moderate | Higher |
| Visual Integration | Flush, integrated appearance | Sits proud of frame surface | Integrated but visible grilles both sides |
| Best Use Case | New installations or factory-fitted retrofit | DIY retrofit on existing windows | High-airflow requirements |
If you're ordering new windows, slot vents are typically the cleanest solution. Specify them at the point of order, and the manufacturer will machine the slots and fit the vents before delivery. This ensures proper integration and maintains any product warranties.
For homeowners in regions like Chennai seeking a uPVC ventilator window in Chennai or similar climates, consider that higher temperatures and humidity may demand vents with greater equivalent area. Over-frame vents can be added to existing installations without waiting for full window replacement, offering a practical interim solution.
Whatever type you choose, always verify compatibility with your specific frame profile before purchasing. Measure twice, order once. A quick call to the vent manufacturer's technical support can save you from buying a product that won't fit your windows.
Once you've identified the right vent type for your frames, the next question is how many you actually need and what size they should be for each room in your home.
You've picked the right vent type for your frames. Now comes the practical question every homeowner asks: how many vents do I actually need? And does my bathroom need more ventilation than my bedroom? The answer lies in understanding a measurement called equivalent area, and how it applies differently across your home.
When shopping for trickle vents, you'll encounter a specification called equivalent area, often abbreviated as EA. This number, measured in square millimetres, tells you how much air can effectively pass through the vent opening. Sounds straightforward, right? Here's where it gets interesting.
Equivalent area isn't the same as the physical size of the vent. A vent might measure 400mm long and 12mm tall, but its EA could be significantly smaller. Why? Because the internal baffles, mesh screens, and controllable flaps all restrict actual airflow. The EA represents the effective open area after accounting for these obstructions.
Think of it like a garden hose with a nozzle. The hose diameter might be 15mm, but if you partially close the nozzle, less water flows through. The EA is essentially measuring how open that nozzle is, not the hose diameter itself.
This distinction matters when you're trying to meet Part F requirements. The regulations specify minimum EA values, not physical vent dimensions. A compact vent with clever internal design might deliver the same EA as a larger, simpler vent. When comparing products, always check the EA rating rather than assuming bigger means better airflow.
Different rooms in your home generate different amounts of moisture and have different occupancy patterns. Part F recognises this by setting varying ventilation requirements based on room type. While specific EA thresholds depend on room size and other factors, the underlying principle is consistent: rooms that produce more moisture need more ventilation capacity.
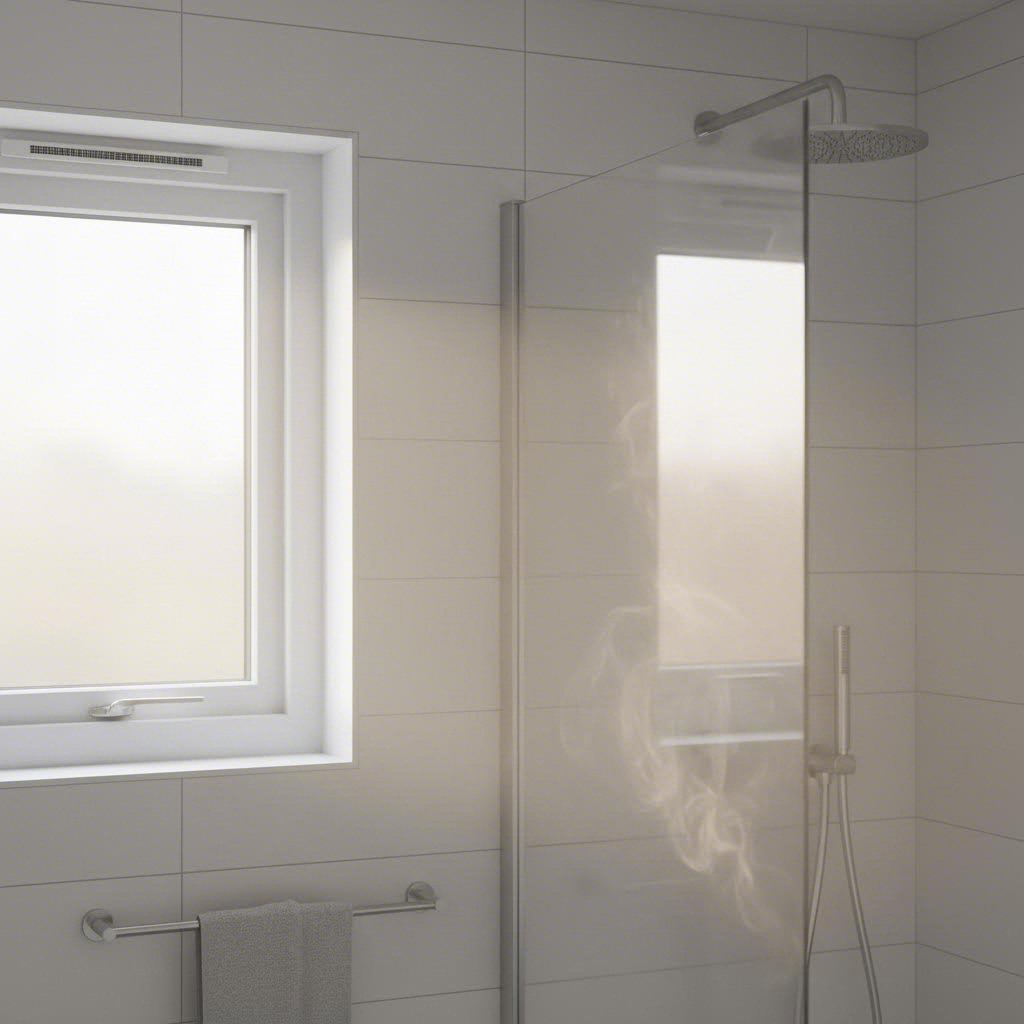
Kitchens and bathrooms sit at the top of the ventilation priority list. Every time you boil a kettle, run a dishwasher, or take a shower, you're releasing significant moisture into the air. A uPVC bathroom ventilation window needs higher EA capacity than a bedroom window of similar size. The same applies to kitchens, where cooking activities generate both moisture and airborne pollutants.
Habitable rooms like bedrooms and living rooms have lower moisture loads but still need adequate background ventilation. People exhale moisture with every breath, and overnight a bedroom can accumulate surprising humidity levels. The ventilation requirement here focuses on maintaining air quality and preventing the stuffy feeling that comes from inadequate fresh air supply.
When determining the right uPVC bathroom ventilation window size or kitchen ventilation provision, consider that these spaces often have smaller windows than living areas. A small bathroom window uPVC ventilators with exhaust fan combination might be necessary when window-based ventilation alone can't meet the room's needs. The trickle vent handles background ventilation while the extract fan deals with peak moisture events like showering.
Several factors influence how many vents a particular room needs:
For a bathroom ventilation window uPVC installation, the combination of high moisture generation and typically small window sizes creates a particular challenge. You might need a vent with higher EA per unit length, or you might supplement window ventilation with wall-mounted vents or mechanical extraction.
The practical approach? Work with your window installer or a ventilation specialist to calculate the total EA required for each room based on its specific characteristics. They can then recommend the right number and size of vents to meet that requirement. This ensures compliance with regulations while actually solving the moisture and air quality problems that prompted you to consider ventilation in the first place.
Of course, trickle vents aren't the only way to ventilate a home. How do they compare against mechanical alternatives like extractor fans or whole-house ventilation systems?
Trickle vents are popular, affordable, and effective for most homes. But are they always the best choice? Not necessarily. Depending on your building type, moisture levels, and budget, mechanical ventilation systems might serve you better. Let's compare your uPVC window passive ventilation options honestly, without the sales pitch.
When weighing mechanical extract ventilation vs trickle vents, you're essentially comparing passive simplicity against active control. Each approach has genuine strengths and limitations.
Trickle vents use zero electricity. They rely entirely on natural pressure differentials to move air, which means no running costs and no carbon footprint from operation. Installation costs are minimal, especially when specified during window manufacture. Maintenance? Occasional cleaning with a soft brush. That's it.
Mechanical Extract Ventilation (MEV) systems use electric fans to actively pull stale air from wet rooms like kitchens and bathrooms. They're more powerful than passive vents and can handle higher moisture loads. However, they consume electricity continuously, require periodic filter changes, and eventually need motor replacement.
Mechanical Ventilation with Heat Recovery (MVHR) takes things further. These whole-house systems extract stale air while simultaneously drawing in fresh air through a heat exchanger. The clever part? They recover heat from outgoing air and transfer it to incoming air, reducing heating costs. For uPVC window MVHR ventilation setups, the windows themselves may not need trickle vents at all since the MVHR system handles all air exchange.
The trade-off is significant. MVHR systems cost substantially more to purchase and install than trickle vents. They require dedicated ductwork throughout the building, professional commissioning, and regular maintenance. In a typical retrofit scenario, installing MVHR can mean major disruption to ceilings and walls.
For most standard residential properties with uPVC windows, trickle vents provide adequate background ventilation at a fraction of the cost. MVHR makes more sense in new builds designed around the system, or in highly airtight properties where passive ventilation simply can't keep up with moisture generation.
Sometimes trickle vents aren't the right tool for the job. Recognising these scenarios helps you make smarter ventilation decisions.
Extractor fans excel in high-humidity spaces. Think bathrooms during showers or kitchens during heavy cooking. A louvers small bathroom window uPVC ventilators with exhaust fan combination often works better than relying on trickle vents alone. The fan handles peak moisture events while the trickle vent maintains background airflow between those events.
Positive Input Ventilation (PIV) systems work differently. They push filtered fresh air into the property from a central unit, typically installed in the loft. This creates slight positive pressure that forces stale air out through gaps and vents. PIV suits older properties with some natural air leakage, and it's particularly effective at reducing condensation throughout the home. For buildings where frame modification isn't possible, PIV offers ventilation without touching the windows at all.
Passive stack ventilation uses vertical ducts to exploit the stack effect, drawing warm air upward and out through roof terminals. This approach works well in multi-storey buildings and can handle higher airflow rates than window-mounted trickle vents. However, it requires dedicated ductwork and careful design to function properly.
Very large open-plan spaces present another challenge. A single trickle vent, or even several, may not provide enough air exchange for a warehouse conversion or commercial space. These environments often need mechanical systems sized to the actual volume and occupancy.
The following table compares your main ventilation options across the factors that matter most:
| System Type | Typical Cost | Energy Use | Installation Complexity | Maintenance | Best Use Case |
|---|---|---|---|---|---|
| Trickle Vents | Low | None | Simple (especially factory-fitted) | Minimal - occasional cleaning | Standard residential uPVC windows |
| Extractor Fans | Low to moderate | Intermittent | Moderate - requires electrical connection | Filter cleaning, eventual motor replacement | Bathrooms, kitchens, utility rooms |
| PIV Systems | Moderate | Continuous (low) | Moderate - loft installation typical | Annual filter replacement | Whole-house condensation control, older properties |
| MVHR Systems | High | Continuous (moderate, offset by heat recovery) | Complex - requires ductwork throughout | Regular filter changes, periodic servicing | New builds, highly airtight properties, energy-conscious projects |
The honest assessment? Trickle vents are the lowest-cost, lowest-maintenance option for standard residential uPVC windows. They meet Part F requirements, prevent condensation in typical homes, and require almost no ongoing attention. But they're not a universal solution.
If you're dealing with persistent condensation despite having trickle vents, or if your property has unusually high moisture loads, consider supplementing with mechanical extraction or exploring whole-house systems. The best ventilation strategy often combines passive background ventilation with targeted mechanical extraction where moisture generation is highest.
With your ventilation method chosen, the next practical question is what it actually costs to add trickle vents to existing windows, and whether you can do it yourself.
So you've got existing uPVC windows without trickle vents, and you want to add them. Good news: it's entirely possible. The process varies depending on which vent type you choose, and so does the cost. Let's walk through what's actually involved so you can decide whether this is a DIY trickle vent uPVC window project or one for the professionals.
The retrofit process follows a logical sequence, though the specific steps depend on whether you're fitting slot vents, over-frame vents, or through-frame vents.
Start by measuring your frame head. You'll need to know the depth of the head rail, its width, and whether there's already a pre-cut slot from a previous vent installation. These measurements determine which products will actually fit your windows.
For slot vents, the installation requires cutting a slot into the frame head. This isn't a casual DIY job. You'll need a router or specialist cutting tool designed for uPVC, plus the confidence to make a precise cut without damaging the frame's structural integrity. Most homeowners hire a professional for this step. The installer positions the vent body into the slot, secures it with screws or clips, and fits the internal cover. Finally, they check the seal to ensure no water can penetrate around the vent edges.
Over frame trickle vent uPVC installations are far more forgiving. These vents mount on top of your existing frame without any cutting. The process is straightforward: clean the mounting surface thoroughly, position the vent body, mark your screw holes, drill pilot holes, and secure the vent in place. Some products use adhesive strips instead of screws, making installation even simpler. This is the most DIY-friendly option by far.
Through-frame vents sit somewhere in between. They require drilling through the full depth of the frame, which demands precision and the right tools. While technically possible as a DIY project, most homeowners find the risk of damaging their frames outweighs the cost savings of doing it themselves.
Whichever type you choose, the final step is always the same: test the vent. Open and close the controllable flap to ensure smooth operation. Check for any gaps around the edges that might let water in. And verify that airflow is actually happening by holding a tissue near the opening on a breezy day.
When budgeting to retrofit trickle vents uPVC windows, you're dealing with three cost components: the vent units themselves, any tools or materials needed, and professional labour if you're not doing it yourself.
Vent unit costs vary based on type and equivalent area rating. Over-frame vents typically sit at the lower end of the price range since they're simpler in design. Slot vents occupy the middle ground. Through-frame vents with higher EA ratings tend to cost more due to their more complex construction and greater airflow capacity.
The uPVC window trickle vent installation cost rises significantly when you factor in professional labour. A tradesperson fitting slot vents needs to bring specialist cutting equipment and has liability for any damage to your frames. That expertise and risk coverage gets reflected in the price. Over-frame vents, by contrast, require minimal labour time and no specialist tools, so professional installation costs less.
Here's the key insight: retrofitting existing windows always costs more than specifying vents during manufacture. When you order new windows with trickle vents included, the manufacturer machines the slots as part of their production process. It's efficient and adds relatively little to the overall window cost. Retrofitting means paying separately for the vent, the installation, and potentially remedial work if anything goes wrong.
Before purchasing any vents, check these essentials:
If cutting into your frames feels too risky or your windows are still under warranty, consider ventilation locks as an alternative or supplement. These locks allow you to secure your window in a slightly open position, providing ventilation while maintaining security against intruders. They won't satisfy Part F requirements on their own, but they offer a practical way to increase airflow without modifying your frames.
The bottom line? Over-frame vents offer the lowest total cost for retrofit projects, combining affordable unit prices with simple installation that most competent DIYers can handle. Slot vents deliver a cleaner look but require professional installation in most cases. Through-frame vents make sense only when you need maximum airflow and are prepared to pay for specialist fitting.
Once your vents are installed, you might encounter some common issues. Knowing how to troubleshoot problems like whistling, draughts, or blocked airflow keeps your ventilation system working as intended.

Your trickle vents are installed. They should be working quietly in the background, providing that steady airflow we've discussed. But what happens when they don't? Maybe you're hearing an annoying whistle on windy days. Perhaps you've noticed uPVC window vent draught problems even when the vent is supposedly closed. Or the airflow seems weaker than it used to be.
These issues crop up regularly in homeowner forums, yet they're rarely addressed in official guidance. The good news? Most trickle vent problems have straightforward solutions once you understand what's causing them.
That high-pitched whistle coming from your windows on blustery days isn't just annoying. It's telling you something about how air is moving through your vents. Understanding the cause points you toward the uPVC trickle vent whistling fix.
Whistling typically happens when wind pressure forces air through a restricted opening at high speed. Think of it like blowing across the top of a bottle. The narrower the gap, the higher the pitch. In trickle vents, this restriction usually comes from one of three sources: the vent isn't fully open, debris is partially blocking the airway, or the vent body isn't seated correctly in its housing.
Start with the obvious. Check that the controllable flap is in the fully open position. Many homeowners accidentally leave vents half-closed, creating exactly the kind of narrow gap that produces whistling. Slide the control fully open and see if the noise stops.
If the vent is already open, inspect the slot for debris. Dust, dead insects, and even paint flakes can accumulate in the airway over time. A soft brush or vacuum cleaner attachment usually clears minor blockages. For stubborn debris, a thin piece of card can dislodge material without damaging the vent components.
Poorly fitted vent bodies create another common whistling scenario. DraughtBusters documented cases where trickle vents installed years ago never properly covered the holes cut in the frame. The result? Gaps at both ends that whistle constantly, even with the vent in the closed position. If your vent body doesn't fully cover the frame opening, you may need to replace it with a correctly sized unit or seal the gaps with appropriate filler.
For persistent whistling that none of these fixes resolve, consider upgrading to a vent with built-in acoustic baffles. These internal features disrupt the airflow pattern that creates whistling without significantly reducing ventilation capacity. Some manufacturers offer acoustic inserts that retrofit into existing vents.
Beyond noise issues, three other problems regularly frustrate homeowners: unwanted visitors, reduced airflow, and vents that simply stop working after redecoration.
Insects finding their way indoors through trickle vents is a common complaint, especially in summer. Flies, wasps, and even small moths can squeeze through standard vent openings. The solution? Look for vents with integrated insect mesh. A trickle vent insect mesh uPVC design incorporates fine screening that blocks insects while still allowing adequate airflow. If your existing vents lack mesh, some manufacturers sell retrofit mesh inserts that fit inside the vent body.
Blocked vents causing uPVC window vent blocked airflow problems often go unnoticed until condensation returns to your windows. The culprits are usually dust accumulation, cobwebs, or debris blown in from outside. Regular cleaning prevents this. Every few months, open the vent fully and brush out any visible material. A vacuum cleaner on low suction works well for reaching inside the slot. Pay attention to the external grille too, where leaves and dirt can accumulate.
Painted-over vents represent a surprisingly common issue. During redecoration, it's easy to accidentally paint over the vent slot or seal the controllable flap shut with dried paint. If your vents stopped working after painting, inspect them carefully. You may need to score around the edges with a craft knife to free the moving parts, or carefully scrape paint from the airway. In severe cases, replacing the vent cover is simpler than trying to restore the original.
Some homeowners discover their vents were never functional in the first place. The DraughtBusters case study revealed vents that appeared normal when open but still allowed draughts when closed because the vent body didn't properly cover the frame opening. In such situations, sealing the faulty vent permanently and relying on window ventilation locks for controlled opening may be the practical solution.
When your trickle vents aren't performing as expected, work through this systematic checklist before calling a professional:
Working through these steps identifies most common problems. If your vents pass all five checks but still underperform, the issue may lie elsewhere in your home's ventilation system, or the vents themselves may be undersized for your needs.
Properly functioning trickle vents do more than just move air. They play a direct role in protecting your health by preventing the conditions that lead to damp and mould growth.
We've covered how trickle vents work, which types fit your frames, and how to troubleshoot common problems. But there's a bigger question lurking behind all this technical detail: why does any of it actually matter for your health? The connection between uPVC windows condensation ventilation and respiratory wellbeing is more direct than most homeowners realise.
When ventilation fails, moisture accumulates. When moisture accumulates, mould grows. And when mould grows, people get sick. This isn't speculation. It's a well-documented chain of cause and effect that makes proper ventilation a genuine health priority, not just a building regulation checkbox.
Ever noticed that musty smell in a poorly ventilated room? That's not just unpleasant. It's a warning sign. Moulds produce allergens, irritants, and sometimes toxic substances that affect everyone who breathes them in. The health consequences range from mild annoyance to serious respiratory conditions.
NHS Scotland guidance identifies clear links between damp and mould exposure and respiratory problems, respiratory infections, allergies, and asthma. Inhaling or touching mould spores can trigger allergic reactions including sneezing, runny nose, red eyes, and skin rashes. For asthma sufferers, mould exposure can provoke attacks.
Some people face higher risks than others. Babies, children, and older adults are more sensitive to damp and mould. So are people with existing skin conditions like eczema, those with respiratory problems, and anyone with a weakened immune system. For these groups, living in a poorly ventilated home isn't just uncomfortable. It's genuinely harmful.
The root cause? Too much moisture. In buildings, this typically comes from condensation, which forms when warm, humid indoor air meets cold surfaces. Every shower, every boiling kettle, every breath you take adds moisture to your indoor air. Without adequate ventilation, that moisture has nowhere to go.
Professional standards reinforce this connection. CIBSE's guidance on indoor air quality and ventilation establishes that ventilation must be sufficient to remove pollutants and humidity generated indoors, or dilute their concentrations to acceptable levels for occupant health. Research consistently shows associations between ventilation rates and health outcomes, with inadequate ventilation linked to higher prevalence of symptoms and worse perceived air quality.
The uPVC window ventilation health benefits become clear when you understand this chain. Continuous background ventilation through trickle vents removes moisture before it can condense. No condensation means no damp surfaces. No damp surfaces means no mould growth. No mould means healthier air for everyone in your home.
Understanding the mechanism helps you appreciate why uPVC window ventilation mould prevention actually works. It comes down to relative humidity and something called the dew point.
Relative humidity measures how much moisture the air contains compared to the maximum it could hold at that temperature. Warm air holds more moisture than cold air. When warm, humid air contacts a cold surface like a window pane or external wall, its temperature drops. If it drops below the dew point, the air can no longer hold all its moisture. Water condenses out onto the cold surface.
This is why you see condensation on windows on cold mornings. The glass is colder than the room air. Moisture-laden air touching that cold glass releases its water as visible droplets. Over time, this moisture soaks into window frames, walls, and soft furnishings. Mould spores, which are present everywhere, find the damp conditions they need to germinate and grow.
Continuous ventilation through trickle vents interrupts this process at the source. By maintaining steady airflow, vents carry moisture-laden air out of your home before it can accumulate. Fresh outdoor air, which typically contains less absolute humidity than indoor air, replaces it. The result? Lower indoor relative humidity overall.
When relative humidity stays lower, the dew point drops too. Your window glass and walls would need to be even colder before condensation could form. In practice, this means condensation rarely happens at all in well-ventilated rooms.
Preventing condensation is more effective than treating mould after it forms.
This principle matters because mould remediation is expensive, disruptive, and often incomplete. Once mould establishes itself in building materials, removing it entirely can require professional intervention. Prevention through proper ventilation costs far less and protects your health continuously rather than reactively.
Bathrooms and kitchens represent the highest-risk zones in any home. These spaces generate the most moisture through showering, bathing, cooking, and washing. They also tend to have smaller windows, limiting natural ventilation capacity. A small bathroom window uPVC ventilator becomes especially important in these spaces, providing continuous background airflow that supplements extractor fans.
The indoor air quality uPVC windows provide depends entirely on how well you manage this moisture balance. Airtight frames keep heat in and draughts out, but they also trap moisture unless you provide deliberate ventilation pathways. Trickle vents offer that pathway without sacrificing the energy efficiency benefits that made uPVC windows attractive in the first place.
For homeowners serious about protecting both their property and their family's health, properly sized and maintained trickle vents aren't optional extras. They're essential components of a healthy home environment. The question then becomes: how do you choose the right vents for your specific situation?
You understand why ventilation matters. You know the regulations. You've learned how trickle vents work and what problems to watch for. Now comes the practical decision: which vent should you actually buy? With dozens of products on the market, making the right choice requires knowing what separates a quality vent from a mediocre one.
Finding the best trickle vent for uPVC windows isn't about picking the cheapest option or the one with the flashiest packaging. It's about matching specific performance criteria to your home's needs. Here's what matters most when evaluating your options:
A Wickes uPVC window ventilation lock or similar retail product might work for basic needs, but trade buyers and professionals often require more robust specifications. The difference shows in long-term performance, warranty coverage, and technical support availability.
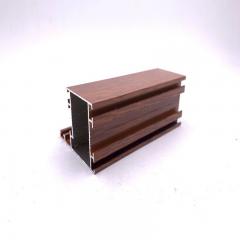
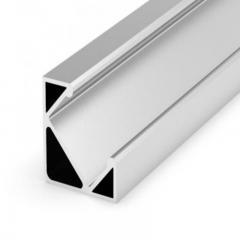
When you need a uPVC aluminium frame trickle vent that ticks all these boxes, sourcing directly from a specialist manufacturer offers distinct advantages. You get access to professional-grade products designed for demanding applications, plus the technical support that retail channels rarely provide.
Shengxin's window trickle vents illustrate what manufacturer-direct sourcing looks like in practice. Their vents integrate seamlessly into both uPVC and aluminium frames, providing continuous draft-free airflow that protects building interiors while maintaining thermal comfort. The design focuses on energy-efficient passive ventilation that works around the clock without electricity consumption.
For trade buyers seeking a uPVC window trickle vent OEM supplier, Shengxin's comprehensive OEM capabilities mean you can specify vents tailored to your project requirements. Whether you're fitting out a new development or managing a retrofit programme across multiple properties, manufacturer-direct access provides flexibility that standard distribution channels can't match.
Their products undergo rigorous quality testing before leaving the factory. This matters because ventilation components need to perform reliably for decades, not just pass initial inspection. Backed by proper testing protocols, these vents deliver the moisture control and air quality benefits we've discussed throughout this guide.
The practical takeaway? Don't treat trickle vents as an afterthought. They're a critical component of your home's ventilation system, directly affecting indoor air quality, condensation control, and long-term building health. Invest in quality products from reputable sources, verify they meet your specific requirements, and you'll enjoy the benefits of proper ventilation for years to come.
Under Part F of the Building Regulations, trickle vents are one accepted method for achieving minimum background ventilation in habitable spaces. The 2022 update tightened requirements significantly. For replacement windows, if your originals had trickle vents, replacements must include them too. Even like-for-like replacements may now require ventilation provisions that weren't mandatory previously. Professional-grade options like Shengxin's trickle vents offer Part F compliant solutions with documented testing for both new builds and retrofit projects.
Trickle vents operate through passive physics using natural pressure differentials between indoor and outdoor air. Wind creates higher pressure on one side of your home and lower pressure on the sheltered side. Temperature differences amplify this through stack effect, where warm air rises and creates positive pressure at ceiling level. Fresh air enters through vents while stale, moisture-laden air exits through opposite vents or extract points. This continuous cycle requires zero energy consumption while maintaining healthy indoor air quality around the clock.
Sizing depends on equivalent area (EA), measured in square millimetres, which represents effective airflow capacity rather than physical dimensions. Kitchens and bathrooms require higher EA than bedrooms due to greater moisture generation from cooking, showering, and washing. Factors influencing vent quantity include room volume, occupant numbers, moisture-generating activities, and available window space. Standard trickle vents typically cover 2000-8000mm² ventilation area. For high-moisture spaces, combining trickle vents with extractor fans often provides optimal results.
Over-frame vents are the most DIY-friendly option since they mount on top of existing frames without cutting. Simply clean the surface, position the vent, drill pilot holes, and secure with screws or adhesive. Slot vents require specialist cutting equipment and professional installation to avoid damaging frame integrity. Through-frame vents demand precision drilling through full frame depth. Before purchasing, measure head rail depth and width, check for existing slots, and verify warranty terms since cutting may void coverage.
Whistling occurs when wind forces air through restricted openings at high speed. Common causes include partially closed controllable flaps, debris blocking the airway, or poorly seated vent bodies that don't fully cover frame openings. Start by ensuring the flap is fully open, then clear any dust or debris with a soft brush. Check that the vent body sits correctly without gaps at the ends. For persistent whistling, consider upgrading to vents with built-in acoustic baffles or retrofit acoustic inserts that disrupt the airflow pattern causing noise.


 Onlineservice
 0086 136 3563 2360
 sales@sxalu.com
 +86 136 3563 2360
 Deutsch
 English
 français
 русский
 español
 português
 العربية
 ไทย
ไทย Việt
Việt Українська