
Searching for a window frame vent? You might be surprised to learn that this single term covers two very different products. Some people need a small slot fitted into their home's window to improve window ventilation. Others are looking for a louvre or mesh panel to ventilate a shed, greenhouse, or chicken coop. Both are valid searches, but the solutions are worlds apart.
So, what exactly is a window vent? In simple terms, it is a ventilation component integrated into or fitted onto a window frame that allows controlled airflow without opening the window itself. These vents let fresh outdoor air trickle in while stale, humid air escapes, all while keeping rain, insects, and excessive noise out.
A window frame vent is not a single product — it describes two distinct solutions serving very different needs, and knowing which one you need changes everything about your buying decision.
At its core, a window frame vent provides background ventilation. In residential settings, this typically means trickle vents — small openings built into window frames that allow minimum ventilation when windows and doors are closed. These are used extensively across Europe and are integrated into frames to meet building regulations for naturally ventilated spaces.
For DIY structures like sheds or greenhouses, the term often refers to louvre vents, fixed mesh panels, or adjustable frame vents. These serve a similar purpose — regulating temperature and humidity — but are designed for unheated, non-residential spaces where condensation and rot are major concerns.
Why does this matter? Because the product you need, the installation method, and even the regulations that apply depend entirely on your situation. Homeowners replacing vented windows or specifying new builds face UK Building Regulations requirements. DIY enthusiasts ventilating an outbuilding have more flexibility but still need to size and position vents correctly.
Proper window ventilation helps avoid problems linked to poor indoor air quality, including reduced risk of condensation, mould growth, and the buildup of pollutants and allergens. Without adequate airflow, indoor humidity rises, cold surfaces attract moisture, and structural damage can follow. For homes, trickle vents also help avoid over-ventilation, minimising energy consumption while improving comfort through draft avoidance.
Throughout this guide, you will find detailed information on both residential and structural applications. Whether you need trickle vents for a new build, want to understand Part F compliance, or are planning ventilation for a garden workshop, the sections ahead will help you make the right choice.
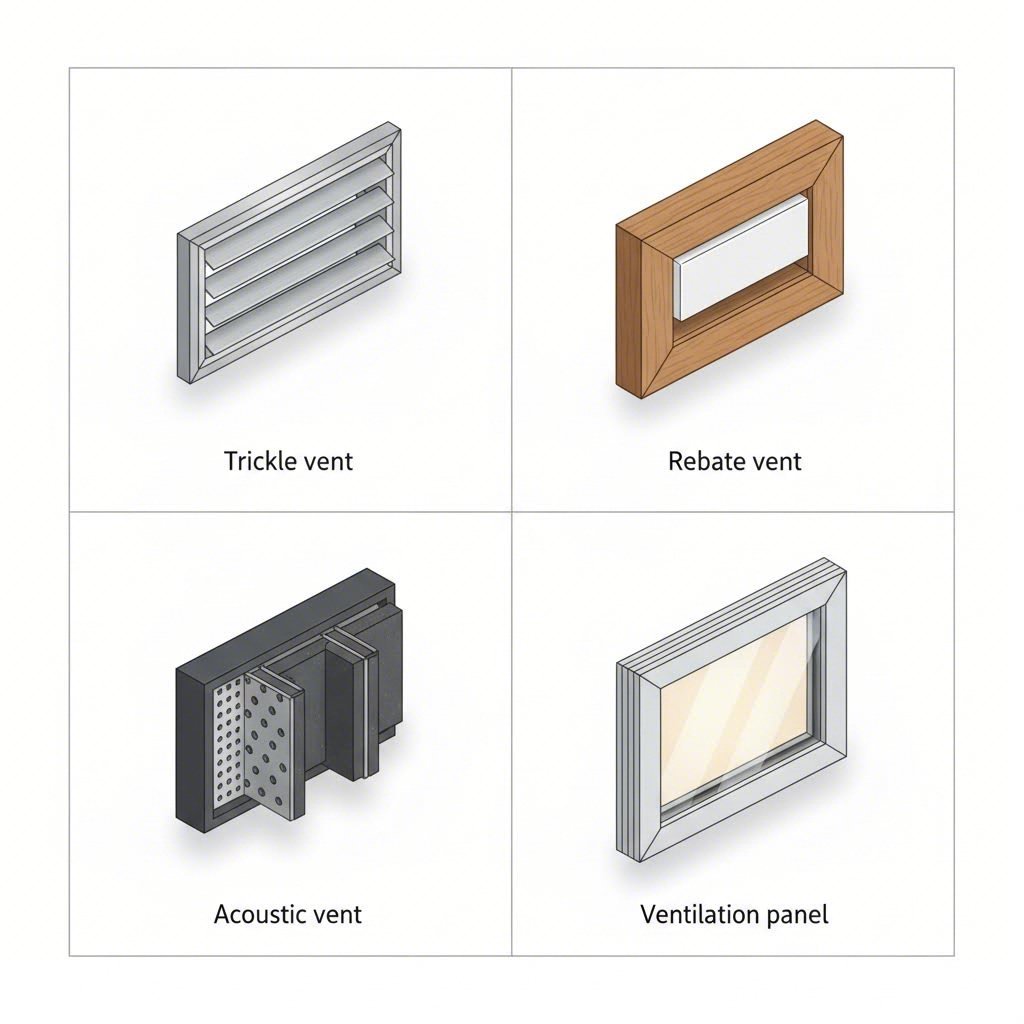
Not all window vents are created equal. When you start shopping for trickle air vents for windows, you will quickly notice that several distinct types exist, each designed for specific situations. Understanding these differences helps you match the right vent to your frame material, your room's ventilation needs, and any regulatory requirements you need to meet.
Let's break down the four main categories you will encounter in residential and commercial buildings.
Window trickle vents are the most common type found in UK homes. These slot-shaped devices sit at the top of the window frame or sash, allowing a controlled trickle of fresh air to enter even when the window is fully closed. Most feature a manual slider or flap that lets you open, close, or partially adjust the airflow depending on weather conditions.
Standard trickle vents typically cover a ventilation area between 2000mm² and 8000mm², measured as equivalent area (EA). This rating determines how much air can pass through and is a key factor in meeting Building Regulations requirements. You will find them fitted in uPVC, aluminium, vinyl, and timber frames, making them versatile for most window types.
Installation methods vary. Through-frame designs route ventilation directly through the head of the frame. Over-frame designs sit above the frame when space is limited. Glazed-in versions fit into the sealed glass unit itself. Each approach suits different frame profiles and aesthetic preferences.
Rebate vents fit into the window rebate — the recessed channel where the sash meets the frame. This design is particularly common in timber windows, where the deeper rebate provides enough space for the vent without altering the external appearance of the window.
These vents work well when you want ventilation without visible slots on the frame face. They are adjustable, typically using a simple open-close mechanism, and can be retrofitted to existing timber frames with careful routing. However, they are less common in uPVC and aluminium windows, where through-frame trickle vents dominate.
Rebate vents are a practical choice for period properties or conservation areas where maintaining the original window profile matters. They meet the same regulatory requirements as standard trickle vents when correctly sized.
Here is where things get interesting. If you live near a busy road, flight path, railway line, or entertainment district, standard window vents may let in more noise than you would like. Acoustic trickle vents solve this problem by incorporating sound-absorbing materials and complex internal chambers that dampen noise as air passes through.
These specialised vents look similar to standard models but feature a more sophisticated internal design. Sound waves are forced through multiple turns and baffles, dissipating their energy before reaching your interior. High-performing gaskets improve sealing when the vent is closed, blocking external noise decisively.
Acoustic performance is measured using the Dn,e,w rating, expressed in decibels. A vent rated at 44 dB provides significantly better sound attenuation than one rated at 35 dB. For context, BS 8233:2014 recommends that noise levels in habitable rooms should not exceed 35 dB, and restful sleep requires ambient noise below 30 dB.
Acoustic vents often require a dual attenuator system — a vent inside the window paired with an external canopy — to achieve optimal noise reduction while maintaining adequate airflow. This makes them a distinct purchase decision for urban properties, and one that many homeowners overlook until noise becomes a problem.
A ventilation panel is a larger, often fixed or semi-adjustable unit that provides higher airflow capacity than a standard trickle vent. These are typically used in commercial buildings, schools, or residential projects where greater background ventilation is required without relying on openable windows.
Ventilation panels can be integrated into window frames or installed as separate units within the building envelope. They suit aluminium and uPVC frames well and are often specified in new builds where Part F requirements demand higher equivalent area ratings per room.
Unlike trickle vents, some ventilation panels are designed for continuous operation and may include filters or weather protection features. They are less common in standard domestic retrofits but worth considering for extensions, loft conversions, or rooms with limited openable window area.
| Vent Type | Typical Use Case | Compatible Frame Materials | Adjustable | Regulatory Context |
|---|---|---|---|---|
| Trickle Vents | General residential and commercial background ventilation | uPVC, aluminium, timber, vinyl | Yes (manual slider or flap) | Meets Part F requirements when correctly sized |
| Rebate Vents | Timber windows, period properties, conservation areas | Primarily timber | Yes (open/close mechanism) | Meets Part F requirements when correctly sized |
| Acoustic Vents | Urban properties, homes near roads, railways, or flight paths | uPVC, aluminium, timber | Yes (manual control) | Meets Part F and Part E (sound insulation) requirements |
| Ventilation Panels | Commercial buildings, high-ventilation residential projects | Aluminium, uPVC | Varies (some fixed, some adjustable) | Meets Part F requirements for higher EA ratings |
Choosing the right type depends on your frame material, your location, and whether noise is a concern. For most homes, standard window trickle vents do the job. But if you are battling traffic noise or specifying for a dense urban development, acoustic vents deserve serious consideration — they are an underserved topic that can make a real difference to daily comfort.
With the types covered, the next question is what happens when these vents are blocked or missing altogether.
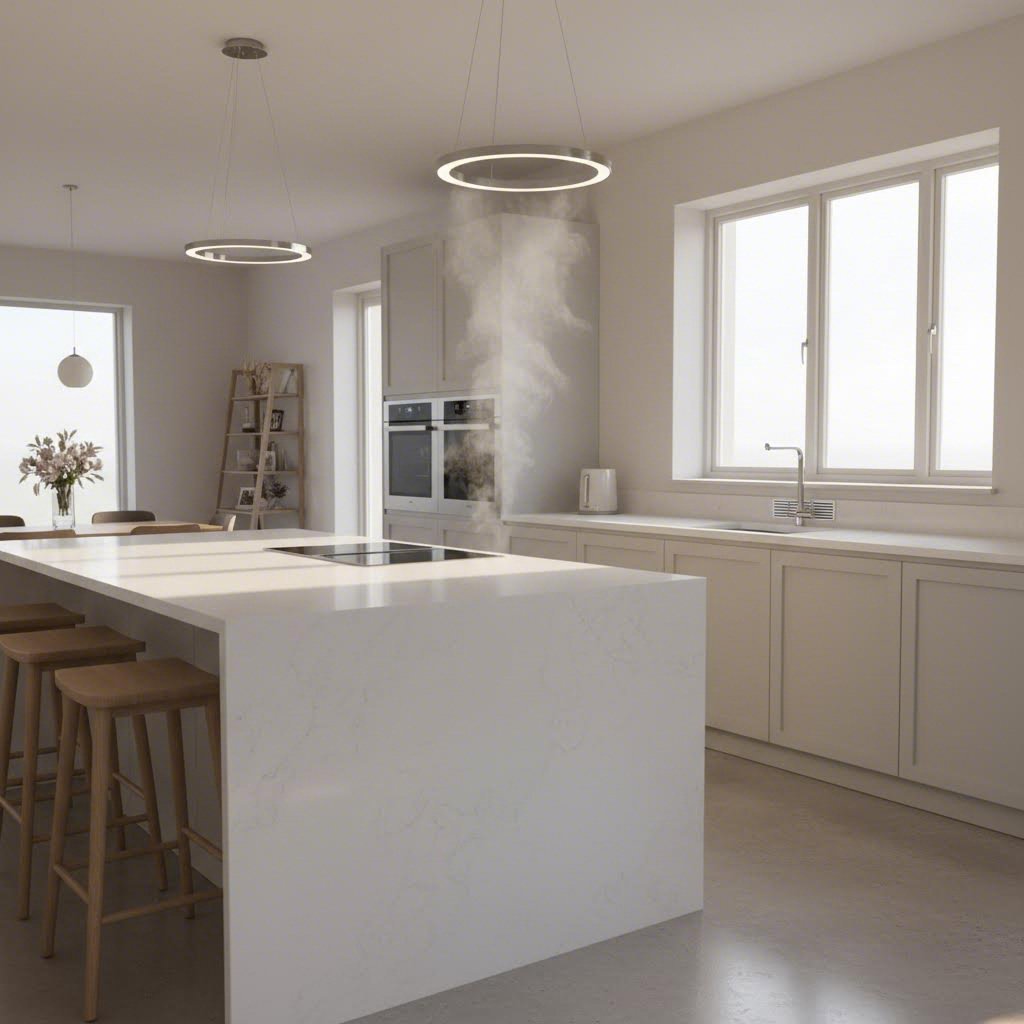
Ever wiped condensation off your windows in the morning, only to find them streaming again the next day? Or noticed black spots creeping into the corners of your window frames? These frustrating patterns often trace back to a single overlooked culprit: blocked or missing window air vents.
When trickle ventilation stops working, your home loses its ability to breathe. The consequences unfold in a predictable chain reaction that affects everything from your window frames to your family's health.
Imagine your home as a closed container. Every day, you add moisture to the air through cooking, showering, boiling kettles, breathing overnight, and drying clothes. In a well-ventilated space, this moisture escapes through window air vents and extractor fans. But when house window vents are sealed, painted over, or simply missing, that moisture has nowhere to go.
The result? Indoor humidity climbs. When this warm, moisture-laden air meets cold surfaces like window glass or external walls, it cools rapidly and releases water droplets. This is surface condensation — the visible moisture you see streaming down your windows on cold mornings.
Left unchecked, the cycle repeats daily. Surfaces stay damp long enough for mould spores to take hold. Black mould appears at frame corners, in window reveals, and behind furniture pushed against external walls. Indoor air quality degrades as spores circulate through your living spaces. For children, older adults, and anyone with respiratory conditions, this creates genuine health risks.
But visible condensation is only part of the story.
There is another form of moisture damage that happens out of sight: interstitial condensation. This occurs when humid air penetrates the building fabric itself and condenses within wall cavities, roof voids, or between insulation layers. Unlike surface condensation, you cannot wipe it away because it forms inside the structure. Over time, it can cause timber rot, corrosion, insulation failure, and serious structural damage — all without any visible warning until the problem becomes severe.
Modern homes are particularly vulnerable. When you upgrade to double glazing, add draught-proofing, or improve insulation, you make your home more airtight. This is great for energy efficiency, but it also removes the accidental ventilation that older buildings relied on. If your replacement windows lack drip vents in windows or if existing trickle vents are blocked, you have effectively sealed in the moisture your household produces every day.
A common scenario plays out in double-glazed homes across the UK: homeowners close their trickle vents to reduce draughts in winter, or curtains and blinds press against them, blocking airflow. Within weeks, condensation appears. Mould follows. The pattern repeats each winter, and many people assume it is simply a fact of life in colder months. In reality, it is a ventilation imbalance that can be fixed.
How do you know if blocked or missing house window vents are causing problems in your home? Look for these visible indicators:
If you notice these signs returning in the same locations despite cleaning, treat it as a signal that your trickle ventilation is compromised. The moisture driver is still active, and cosmetic fixes will not solve the underlying problem.
Understanding why these issues occur is the first step. The next is knowing what the regulations require — and that is where UK Building Regulations Part F comes into play.
Planning to replace your windows or specify ventilation for a new build? Then you need to understand Part F of the Building Regulations. This is the section that governs how homes in England must be ventilated, and it has direct implications for whether your trickle vents windows meet legal requirements.
Sounds complex? It does not have to be. Let's break down what Part F actually requires and how it affects your window ventilation system choices.
Part F of the Building Regulations exists for one core reason: to ensure adequate ventilation for people in buildings. The approved guidance — Approved Document F — explains how to achieve this through a combination of extract ventilation, background ventilation, and whole-dwelling airflow.
For dwellings, the relevant document is Approved Document F Volume 1. Volume 2 covers buildings other than dwellings, such as offices, schools, and commercial premises. If you are working on a residential project, Volume 1 is your reference point.
In new builds, the regulations require background ventilation to meet specific equivalent area thresholds for each room type. Equivalent area, measured in mm², indicates how much air can pass through a ventilator. The higher the number, the greater the airflow capacity. Trickle ventilation windows must be sized to meet these minimums, and the values should be marked on the ventilator itself so compliance can be verified during inspection.
The guidance also sets minimum whole-dwelling ventilation rates based on floor area and bedroom count. This means your window ventilation system needs to work alongside extract fans in wet rooms to deliver adequate fresh air throughout the home. A ventilation kit that includes both background ventilators and extract components is often the simplest way to meet these combined requirements.
Here is where many homeowners get caught out. Replacement windows are classified as a "controlled fitting" under the Building Regulations, which means they must comply with Part F requirements. The key principle is straightforward: replacing windows must not make the ventilation provision worse than it was before.
What does this mean in practice? If your existing windows have trickle vents, the replacements must also include them. The new vents should be at least as large as the originals and must be controllable — either manually by the occupant or automatically. You cannot simply omit them because you find them draughty or unsightly.
If your existing windows do not have trickle vents, the situation is more nuanced. Replacing old, leaky frames with modern airtight double glazing increases the overall airtightness of your home. This can reduce beneficial background ventilation unless you compensate by adding trickle vents to the new windows. The LABC guidance confirms that in these circumstances, you must ensure ventilation is no worse than before the work was carried out.
There are three main ways to demonstrate compliance when replacing windows in homes without existing vents:
One common misconception: a window with a night-latch position is not a substitute for trickle vents. Night latches are not treated as compliant background ventilation because they create security concerns and cannot be measured or controlled in the same way as a dedicated ventilator. Similarly, signing a disclaimer to install vents later or opting out entirely is not permitted — all requirements must be met in full for the work to comply.
If you are installing a window duct kit for a portable air conditioner or similar appliance, this does not replace the need for background ventilation. Such kits serve a different purpose and do not provide the continuous, controllable airflow that trickle vents deliver.
The approved guidance specifies minimum equivalent area values for background ventilators based on room type. These figures apply when using natural ventilation with intermittent extract fans — the most common setup in UK homes.
| Room Type | Minimum Equivalent Area (mm²) | Notes |
|---|---|---|
| Habitable rooms (living rooms, bedrooms, dining rooms) | 8000 | Applies to each habitable room; higher values may apply depending on dwelling type |
| Kitchen | 8000 | Background ventilation in addition to extract fan or cooker hood |
| Bathroom (with or without WC) | 4000 | Background ventilation in addition to extract fan |
| Utility room | 8000 | Background ventilation in addition to extract fan |
These values are drawn from the approved document guidance and represent the baseline for compliance. In some dwelling types or ventilation strategies, higher equivalent areas may be required. Always reference the current edition of Approved Document F Volume 1 for the specific figures applicable to your project.
If it is not technically feasible to achieve the minimum equivalent area — for example, due to frame size constraints — the trickle vents should have equivalent areas as close to the minimum as possible. In such cases, it is advisable to agree the approach with your Local Authority Building Control team before ordering materials.
Not every property must comply fully with the ventilation standards in Approved Document F. Work to the following types of dwellings may qualify for a more flexible approach:
Even in these cases, the work should comply with Part F standards where reasonably practicable. Early engagement with your local authority's conservation officer and Building Control surveyor is recommended to agree a practical solution that balances heritage considerations with ventilation needs.
If your home uses mechanical ventilation with heat recovery (MVHR), the background ventilation requirements differ. MVHR systems provide controlled supply and extract airflow, which can reduce or eliminate the need for trickle vents. However, this depends on the system design and must be assessed on a case-by-case basis.
Understanding Part F is essential, but trickle vents are just one layer of a broader window ventilation system. The next section explores how they fit alongside mechanical ventilation strategies for whole-house performance.
Think of your home's ventilation as a team effort. Trickle vents in windows handle one part of the job, but they rarely work alone. To keep indoor air fresh and moisture under control, most dwellings need a coordinated strategy that combines background ventilation with extract systems in wet rooms.
So where exactly do window frame vents fit in the bigger picture? And when might you need something more sophisticated? Let's walk through the main ventilation strategies used in UK homes and see how they work together.
Every ventilation strategy falls somewhere on a spectrum from fully passive to fully mechanical. At one end, you have natural ventilation — air moving through openings like venting windows and trickle vents, driven by wind pressure and temperature differences. At the other end, you have powered systems that actively push or pull air through ducts using fans.
Here is how the main approaches compare:
| Ventilation Strategy | How It Works | Best Suited For | Energy Impact | Works Alongside Trickle Vents |
|---|---|---|---|---|
| Natural Ventilation (trickle vents + intermittent extract fans) | Background air enters through trickle vents in windows; extract fans in wet rooms remove stale air when triggered | Less airtight dwellings; older properties; standard retrofits | Low running cost; potential heat loss through uncontrolled air exchange | Yes — trickle vents are essential for air replacement |
| Continuous Mechanical Extract Ventilation (MEV/dMEV) | Central or decentralised fans run continuously at low speed, boosting when needed; fresh air drawn in through background ventilators | All dwellings; particularly effective in moderately airtight homes | Modest electricity use; heat loss occurs as incoming air is untempered | Yes — background ventilators required in habitable rooms |
| Mechanical Ventilation with Heat Recovery (MVHR) | Balanced system extracts stale air and supplies fresh air through ducts; heat exchanger recovers warmth from outgoing air | Airtight new builds; energy-efficient renovations; Passivhaus projects | Higher upfront cost; up to 90% heat recovery reduces heating demand | No — MVHR provides controlled supply air, eliminating the need for trickle vents |
| Passive Stack Ventilation (PSV) | Warm air rises through vertical ducts from wet rooms; fresh air enters through background ventilators | Retrofits; older properties; situations where mechanical systems are impractical | No running cost; effectiveness depends on weather and building design | Yes — background ventilators provide replacement air |
You will notice a pattern here. Most strategies — except MVHR — rely on trickle vents in windows or wall-mounted background ventilators to supply replacement air. When extract fans pull stale air out of kitchens and bathrooms, fresh air needs to enter somewhere. Without adequate background ventilation, the system becomes unbalanced, and you may experience draughts, negative pressure, or poor air quality.
This is why a window ventilation kit that includes both trickle vents and extract components often makes sense for standard residential projects. The two elements work as a pair.
For many UK homes, trickle vents in windows combined with intermittent extract fans provide perfectly adequate ventilation. This approach — classified as natural ventilation under current Building Regulations — suits properties that are not highly airtight.
Imagine a typical semi-detached house with replacement double glazing. The windows include trickle vents sized to meet Part F requirements. The kitchen has an extract fan or cooker hood venting to outside. The bathroom has a humidity-controlled fan that runs when moisture levels rise. In habitable rooms like bedrooms and living areas, the trickle vents provide continuous background airflow without any mechanical assistance.
This setup works well because:
The key limitation? Natural ventilation depends on external conditions. Wind speed, temperature differences, and even the orientation of your windows affect how much air actually moves through. On still, mild days, airflow drops. In winter, cold air entering through trickle vents can feel draughty, tempting occupants to close them — which defeats the purpose.
For less airtight properties with air permeability above 5 m³/(h.m²) at 50 Pa, natural ventilation remains a compliant and cost-effective choice. But if you are building or renovating to higher airtightness standards, you will likely need a mechanical solution.
Modern homes are increasingly airtight. Improved insulation, better seals around windows and doors, and vapour barriers all reduce uncontrolled air leakage. This is excellent for energy efficiency — but it also means you cannot rely on accidental ventilation to keep air fresh.
In airtight dwellings, extract-only systems like MEV or dMEV still require background ventilators. The 2021 changes to Approved Document F increased the minimum equivalent area for background ventilators in rooms served by continuous mechanical extract from 2500 mm² to 4000 mm² per room. This reflects the need for more controlled air replacement as buildings become tighter.
However, extract-only systems have a weakness: the incoming air arrives at outdoor temperature and humidity. On a cold January morning, that fresh air is cold. It enters through trickle vents, mixes with room air, and your heating system works harder to compensate. Industry estimates suggest 35% of heat loss in modern buildings can be attributed to ventilation and air leakage.
This is where MVHR changes the equation. By passing outgoing stale air and incoming fresh air through a heat exchanger, MVHR systems recover the majority of the heat that would otherwise escape. Supply air enters the home only slightly cooler than the extracted air — typically within 1 to 1.5 degrees. No trickle vents are needed because the system provides controlled, filtered, tempered air directly to habitable rooms.
For self-builders and those pursuing Passivhaus or low-energy standards, MVHR is often the preferred choice. Running costs for a well-designed system in a typical four-bedroom home sit around £60 to £80 annually, with filter changes twice a year as the main maintenance task.
But MVHR is not always practical. Retrofit projects face challenges with duct routing. Older properties may lack the space for a central unit. Budget constraints matter too — supply-only costs for a four-bedroom system typically range from £5000 to £6000 before installation.
In these situations, a hybrid approach often makes sense:
The principle is straightforward: controlled ventilation equals controlled heat loss. Whether you achieve that control through a sophisticated MVHR system or a well-designed combination of trickle vents and extract fans depends on your building, your budget, and your energy goals.
With the whole-house picture clear, the next section shifts focus to a different audience entirely — those ventilating sheds, greenhouses, and other DIY structures where the rules and products differ significantly.

Ever walked into your garden shed on a summer afternoon and felt like you stepped into a sauna? Or noticed damp patches creeping across the timber walls of your workshop? These are telltale signs that your outbuilding needs better airflow. While residential trickle vents handle ventilation in homes, sheds, greenhouses, and chicken coops require a different approach — one that prioritises robust, weather-resistant solutions designed for unheated spaces.
The good news? Ventilating a DIY structure is simpler than you might think. You do not need to navigate Building Regulations or worry about equivalent area ratings. What you do need is a basic understanding of why airflow matters and how to position vents for maximum effect.
Why does ventilation matter so much in these structures? The answer comes down to three factors: temperature, humidity, and the materials you are trying to protect.
In summer, an unventilated shed can reach temperatures well above 40°C. Tools rust faster, paint tins swell, and anything stored inside suffers. Greenhouses face the opposite problem — they are designed to trap heat, but without airflow, temperatures can spike high enough to damage plants. For chicken coops, the stakes are even higher. Poor ventilation leads to ammonia buildup from droppings, which irritates birds' respiratory systems and creates a breeding ground for disease.
Humidity is the other silent threat. Timber sheds are particularly vulnerable. When moist air gets trapped inside, it condenses on cold surfaces — walls, roof panels, stored items. Over time, this leads to rot and decay in wooden frames, mould growth on contents, and a generally unpleasant environment. A window duct or simple wall vent can break this cycle by allowing damp air to escape before it causes damage.
For animal housing, ventilation is not optional — it is essential for welfare. Chickens release a surprising amount of moisture through breathing and droppings. A single bird can add up to a cup of water to the coop's atmosphere in 24 hours. Without adequate airflow, this moisture condenses in winter, dripping back onto birds and bedding. The result? Frostbitten combs, wet litter, and increased disease risk.
The vents used in outbuildings differ from residential trickle vents. They are typically larger, more robust, and designed to handle exposure to weather without mechanical parts that can seize or fail. Here are the main types you will encounter:
Louvre vents are the workhorses of shed ventilation. These consist of angled slats arranged in a frame, allowing air to pass through while deflecting rain and debris. Louvred panels come in metal, plastic, or composite materials and can be mounted on walls or gable ends. The angled slats prevent direct water ingress, making them suitable for exposed locations. Some models feature adjustable louvres for seasonal control.
Fixed mesh vents offer a simpler solution. These are essentially protected openings covered with fine mesh or hardware cloth. They provide continuous airflow with no moving parts to maintain. The mesh keeps out insects, rodents, and debris while allowing air to circulate freely. For chicken coops, half-inch hardware cloth is the standard — small enough to block predators like raccoons while still permitting good airflow.
Adjustable frame vents give you more control. These window vent insert options can be opened or closed depending on conditions. In summer, you open them fully for maximum airflow. In winter, you can close lower vents to prevent drafts while keeping high vents open for moisture escape. This flexibility is particularly valuable for animal housing, where you need ventilation year-round but want to avoid cold air blowing directly on roosting birds.
Ridge vents run along the peak of a sloped roof, providing an exit point for rising hot air. As warm air escapes through the ridge, cooler air is drawn in through lower openings — a natural circulation pattern called the stack effect. Ridge vents are especially effective in greenhouses and workshops where heat buildup is a primary concern.
Turbine vents (whirlybirds) spin in response to wind or rising warm air, actively drawing stale air out of the structure. They require no electricity and work passively, making them a cost-effective option for larger sheds or steel buildings where heat accumulation is significant.
Getting the right vents is only half the job. Where you place them determines how well they work. The goal is to create a continuous path for air to flow through the structure, entering low and exiting high.
This principle — called the stack effect — relies on basic physics. Warm air rises. If you place vents high on the walls or at the roof peak, that warm, moisture-laden air has a natural exit route. As it leaves, it creates a slight vacuum that pulls fresh, cooler air in through lower openings. The result is gentle, continuous circulation without any mechanical assistance.
For most sheds and workshops, aim for vents on opposite walls to enable cross-ventilation. When a breeze blows, air enters one side and exits the other, flushing out stale air and regulating temperature. On still days, the stack effect takes over, with high vents handling the exhaust and low vents providing intake.
A practical rule of thumb: provide at least one square foot of vent space for every ten square feet of floor area. For a typical 8x6 shed, that means roughly five square feet of total ventilation — split between intake and exhaust openings. Larger structures or those used for activities that generate heat or moisture (like a workshop with power tools) may need more.
Avoid placing vents where they will create direct drafts on animals or stored items. In a chicken coop, high vents should sit well above roosting height so birds are not exposed to cold air currents while sleeping. In a greenhouse, position vents to avoid blasting delicate seedlings with hot or cold air.
Different structures have different ventilation priorities. Here is a quick guide to matching your approach to your project:
Whatever your structure, the fundamentals remain the same: create a path for air to flow, position vents to exploit natural convection, and size your openings to match the space. Get these basics right, and your outbuilding will stay cooler in summer, drier in winter, and healthier for anything — or anyone — inside.
Once your vents are in place, keeping them working properly becomes the next priority. The following section covers installation, maintenance, and replacement for both residential and DIY applications.
Got your vents in place but wondering how to keep them working? Or perhaps you are staring at windows without any ventilation and asking whether you really need to replace the whole frame? Good news: trickle window vents are surprisingly low-maintenance, and adding them to existing windows is often simpler than you might expect.
This section walks you through the practical side — how vents get installed, what keeps them performing well, and when it is time for a vent window replacement.
When you order new windows, trickle vents can be specified at manufacture. The factory cuts precise slots into the frame head, installs the internal vent housing, and fits a matching external canopy. Everything arrives ready to install, with the ventilation already integrated into the window unit.
This factory-fitted approach is standard for new builds and full window replacements. The slots are routed cleanly, the vent sits flush, and the equivalent area rating is guaranteed to match the specification. If you are working with a window supplier on a new project, this is the simplest route.
But what if your existing windows lack ventilation? Replacing the entire frame just to add a vent feels excessive — and often it is unnecessary.
Retrofitting trickle vents is possible in nearly all windows. The method depends on the frame material and available space:
Easy glaze trickle vents are particularly useful for heritage properties or aluminium frames where drilling would compromise the structure or appearance. Many homeowners who were told retrofitting was impossible discover that glazed-in solutions work perfectly well.
For uPVC windows, slimline vents often fit above the steel or aluminium reinforcement inside the frame. The key is checking the reinforcement position before assuming it blocks installation. Older uPVC windows can usually be adapted without full replacement.
Timber windows are highly adaptable, though appearance matters. Frame-cut vents may affect painted or stained finishes, so glazed-in options often provide the cleanest result where joinery aesthetics are a priority.
Trickle window vents are simple devices, but they still need occasional attention. Dust, pollen, insect debris, and even paint overspray can accumulate in the narrow openings, reducing airflow and defeating the purpose of having ventilation in the first place.
How often should you check them? A quick inspection twice a year — once in spring and once in autumn — catches most problems before they become serious. If you live in an area with high pollen counts, near a busy road, or in a property with ongoing building work, more frequent checks make sense.
Here is a straightforward cleaning routine that takes just a few minutes per window:
One common issue: curtains and blinds blocking airflow. If your window vents house are positioned behind heavy curtains, the ventilation may only improve air quality in a localised area near the window. Check whether soft furnishings are pressing against the vent and adjust them if needed.
Paint is another culprit. During decorating, it is easy to accidentally seal vents shut with a careless brush stroke. If your vents have not been opened since the last redecoration, check whether paint has bridged the gap between the slider and housing.
Trickle vents are built to last, but they do not last forever. Over time, plastic components can become brittle, sliders can seize, and seals can perish. Knowing when to replace rather than repair saves frustration and ensures your window ducting continues to perform.
Signs that a vent needs replacing include:
Replacing a trickle vent is a manageable DIY task if you have the correct replacement part. The challenge is identifying the right size.
Start by removing the old vent. Most are either clip-on or screw-fixed. For screw-fixed models, the screws are usually hidden beneath a decorative cap that prises away with a flat-blade screwdriver. Once removed, measure the slot or slots cut into the frame. You may have one, two, or three slots depending on the original vent size.
The critical measurement is the fixing centres — the distance between the centre points of the screw holes. If you can find a replacement with identical fixing centres, installation is straightforward. If not, choose a slightly wider vent that bridges the existing slots and allows you to drill new screw positions into fresh frame material.
Also check:
Replacement vents are available in plastic (uPVC) and aluminium. Aluminium trickle vents are more rigid and often include a foam pad that creates a better seal when closed — useful if draughts have been a problem with your existing plastic vents.
Colour matching matters too. White, brown, tan, grey, and black options cover most frame finishes. If you cannot find an exact match, a slightly different shade is usually less noticeable than a damaged or discoloured original.
Once you have the replacement, fitting is simple: position the new vent over the slots, mark the screw positions, drill pilot holes if needed, and secure with the screws provided. Clip-on models are even easier — they simply press into place over the slot.
With your vents installed, cleaned, or replaced, the final step is choosing the right product for your next project. The following section covers the key criteria for selecting a window frame vent that matches your frame, your room, and your regulatory requirements.
Ready to buy but not sure what to look for? Selecting the right vent involves more than picking something that fits your frame. You need to consider airflow capacity, material compatibility, noise performance, and whether the product meets regulatory standards. Get these factors right, and your windows with vents will deliver reliable ventilation for years. Get them wrong, and you may end up with draughts, condensation problems, or a failed Building Control inspection.
Let's break down the key criteria so you can make an informed decision — whether you are specifying for a new build, retrofitting double glazed windows with ventilation, or sourcing replacements for worn-out units.
When evaluating air vents for double glazed windows, several factors determine whether a product suits your situation. Here is what to check before ordering:
One question that often comes up: is there an alternative to trickle vents? For most residential applications, the answer is limited. Mechanical ventilation systems like MVHR can eliminate the need for background ventilators, but they require significant investment and ductwork. A dryer exhaust window kit or window venting kit serves a different purpose — temporary venting for appliances rather than continuous background ventilation. For Part F compliance in naturally ventilated homes, trickle vents remain the standard solution.
If you need to block an existing vent temporarily — perhaps during renovation or to test whether it is causing draughts — a trickle vent blanking plate can seal the opening. However, permanently blocking vents is not recommended and may breach Building Regulations if the vent was required for compliance.
Where you buy matters almost as much as what you buy. For small retrofit jobs, local hardware stores or online retailers stock standard replacement vents. But for larger projects — new builds, multi-unit developments, or commercial specifications — sourcing directly from a manufacturer offers distinct advantages.
Manufacturer-direct purchasing typically provides:
For contractors and developers working on projects that require reliable, tested ventilation components, this approach reduces risk and simplifies procurement.
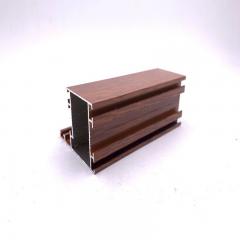
One manufacturer worth considering is Shengxin Aluminium, which produces window trickle vents designed for seamless integration into uPVC and aluminium frames. Their passive ventilation systems deliver continuous, draft-free airflow — addressing the comfort concerns that lead many homeowners to close their vents in winter. The products undergo rigorous quality testing, which matters when you need documentation for Building Control or client handover.
What makes manufacturer-direct sourcing particularly useful for window exhaust vent and trickle vent applications is the OEM capability. If you are a fabricator or installer specifying vents across multiple projects, working directly with a manufacturer allows you to standardise on a tested product, negotiate volume pricing, and access technical guidance when unusual frame profiles or acoustic requirements arise.
For retrofit projects, Shengxin's vents suit both uPVC and aluminium frames — the two most common materials in UK replacement windows. The discreet design integrates cleanly without compromising the window's appearance, and the passive airflow mechanism avoids the cold draughts that make occupants reach for the close slider on winter mornings.
Whether you are a homeowner replacing a single damaged vent or a contractor specifying ventilation for a 50-unit development, the selection criteria remain the same: match the EA rating to the room, confirm material compatibility, check acoustic performance if noise is a concern, and verify compliance documentation. Get those fundamentals right, and your vents will do their job quietly and reliably.
With the buying decision covered, the final section brings everything together — summarising the key points and outlining next steps for homeowners and contractors alike.
You have made it through the details. Now let's distil everything into the decisions that actually matter. Whether you are improving ventilation in your home or fitting vents for windows in a garden structure, success comes down to matching the right product to your specific situation.
Four key questions determine which window trickle vent or structural vent you need:
Get these four factors aligned, and the rest — sizing, colour matching, acoustic performance — falls into place.
Ready to act? Here is where to start:
The right window frame vent is the one that matches your frame, your room, and your regulatory context — get those three right and the rest follows.
A window frame vent is a ventilation component integrated into or fitted onto a window frame that allows controlled airflow without opening the window. In residential settings, these are typically trickle vents that provide background ventilation to maintain indoor air quality, control condensation, and meet building regulations. For DIY structures like sheds and greenhouses, window frame vents include louvre vents and mesh panels designed to regulate temperature and humidity in unheated spaces.
Yes, under UK Building Regulations Part F, trickle vents are required in most circumstances. New builds must include background ventilation meeting specific equivalent area thresholds per room type. When replacing windows, if the originals had trickle vents, the replacements must include them with at least equal ventilation capacity. Even homes without existing vents may need them added when upgrading to airtight double glazing to ensure ventilation is no worse than before.
Yes, retrofitting trickle vents to existing windows is possible in most cases. Slimline frame-fitted vents require as little as 18mm of frame height and involve cutting a narrow slot into the frame head. Alternatively, glazed-in trickle vents work by replacing the sealed glass unit with a slightly shorter one, allowing the vent to clip into the gap above the glass without any frame cutting. This makes them ideal for heritage properties or frames where drilling would compromise appearance.
Trickle vent sizing depends on the equivalent area (EA) rating measured in mm². Part F requires habitable rooms, kitchens, and utility rooms to have background ventilators with a minimum 8000mm² equivalent area, while bathrooms need 4000mm². Check the EA rating marked on any vent before purchasing and match it to your room-by-room requirements. For acoustic performance in urban areas, also consider the Dn,e,w rating which indicates noise reduction capability.
Condensation despite having trickle vents usually indicates blocked or closed vents. Common causes include dust and debris accumulation, paint overspray sealing the openings, or curtains and blinds pressing against the vent and restricting airflow. Inspect your vents twice yearly, clean them with a soft brush or vacuum, and ensure the slider mechanism moves freely. If vents are open and clean but condensation persists, the equivalent area may be insufficient for your room size or moisture load.


 Onlineservice
 0086 136 3563 2360
 sales@sxalu.com
 +86 136 3563 2360
 Deutsch
 English
 français
 русский
 español
 português
 العربية
 ไทย
ไทย Việt
Việt Українська