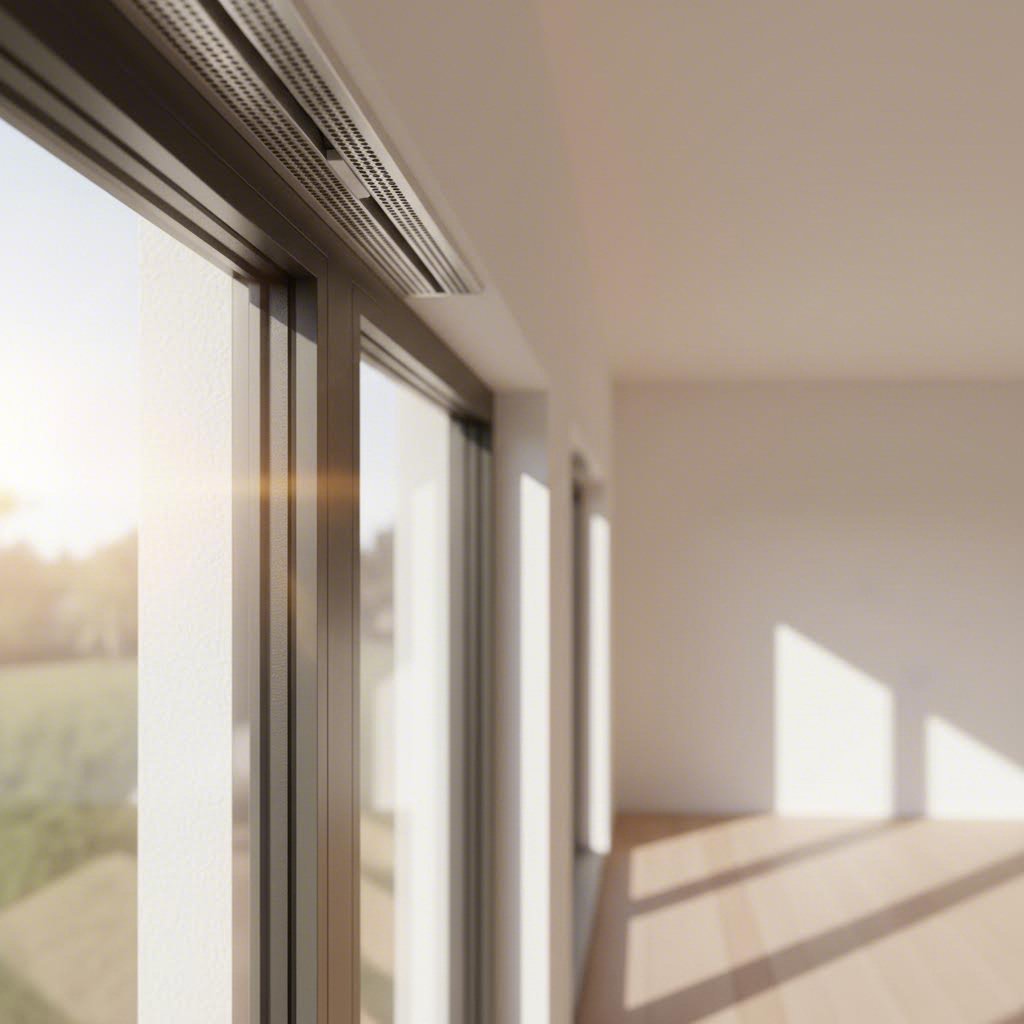
Ever noticed those small slots at the top of your window frames? Those are trickle vents, and they play a bigger role in your home's health than you might think. If you've wondered what is a trickle vent or what does a vent do for your living space, you're in the right place.
A trickle vent is a small opening installed in windows or walls that allows controlled, continuous passive ventilation, enabling fresh air to enter a building without mechanical systems.
Unlike opening a window wide or running an extractor fan, trickle vents provide subtle, constant airflow. They're designed to let your home breathe naturally, all day, every day, without you lifting a finger.
Trickle ventilation refers to the controlled introduction of small amounts of outdoor air into a building through purpose-made openings. These window ventilators are typically integrated into window frames or fitted above door frames. The key distinction here is control. While flinging open a window floods your room with air (and potentially noise, dust, and insects), trickle vents deliver a measured, gentle flow.
This approach differs fundamentally from mechanical ventilation systems that rely on fans and motors. Trickle vents require no electricity, no maintenance schedules, and no running costs. They simply work, quietly and continuously.
So how do these small openings actually move air? The answer lies in basic physics. Passive airflow relies on pressure differentials and temperature differences between indoor and outdoor environments. When it's warmer inside than outside, warm air naturally rises and escapes through any available opening, drawing cooler fresh air in through vents for windows at lower positions.
Research from the U.S. Department of Energy's Building America program confirms that passive vents work best when buildings maintain appropriate airtightness levels. The tighter your home's envelope, the greater the pressure differential created, and the more effectively air flows through designated openings rather than random gaps and cracks.
Modern homes are built tight. That's great for energy efficiency but creates a problem: moisture and pollutants have nowhere to go. Without adequate background ventilation, you'll notice condensation forming on windows, damp patches appearing on walls, and eventually, mould taking hold.
Trickle vents address this by providing a continuous, low-level supply of fresh air. As Comfort Solutions explains, this steady airflow helps reduce condensation, control humidity, and improve indoor air quality without adding to your energy bills. The result? A healthier home that feels fresher and stays drier, with no mechanical systems to maintain or power.

Understanding how your home breathes is one thing. Knowing what the law requires is another. If you're planning to replace windows or undertake any building work in England or Wales, Part F of the Building Regulations directly affects you. This section breaks down what the rules actually say, who they apply to, and why simply swapping old windows for new ones doesn't automatically let you off the hook.
Part F of the Building Regulations exists for a simple reason: to protect your health. The regulation states that buildings must have adequate means of ventilation for occupants. Without it, mould growth and poor indoor air quality become genuine health hazards.
The updated Approved Document F came into effect in June 2022 for England and November 2022 for Wales. These changes significantly tightened requirements around window ventilation, particularly for replacement projects. The core principle is straightforward: any work you carry out must not make your home's ventilation worse than it was before.
For trickle ventilation windows, the regulations use a measurement called equivalent area to determine compliance. This isn't about physical size. Equivalent area measures the aerodynamic performance of a ventilator, specifically how much air can actually pass through it. Think of it as the effective breathing capacity of your vent.
The minimum equivalent area requirements vary by room type and building configuration:
| Room Type | Multi-Storey Minimum EA | Single-Storey Minimum EA |
|---|---|---|
| Living spaces | 8,000mm² | 10,000mm² |
| Kitchen | 8,000mm² | 10,000mm² |
| Bathroom | 4,000mm² | 4,000mm² |
| Utility room and toilet | No minimum | No minimum |
For habitable rooms in living spaces and kitchens, you'll need at least five window trickle vents in most houses, or four in one-bedroom properties. Internal door vents also play a role here, as regulations require adequate undercut space beneath internal doors to allow air to circulate throughout the dwelling.
Here's where many homeowners get caught out. Replacing your windows triggers Part F compliance obligations in most cases. You can't simply swap like-for-like and assume you're exempt.
The logic is practical. Modern trickle air vents for windows are typically more airtight than older units. If your existing windows had natural gaps and draughts that provided some background ventilation, fitting tighter replacements without adding proper vents actually makes your home's ventilation worse. That's a direct breach of the regulations.
Key compliance triggers include:
For replacement window projects, FENSA-registered installers carry the compliance responsibility. They self-certify that the work meets Building Regulations, including Part F requirements. If your installer is FENSA-registered, they must ensure your new windows include adequate window ventilation provision, whether through trickle vents or an alternative compliant solution.
One common misconception: signing a disclaimer stating you don't want vents fitted, or that you'll install them later, does not satisfy the regulations. The UK Government's official guidance explicitly states that disclaimers and indemnity policies are not valid alternatives to full compliance.
This distinction matters more than most people realise. Mandatory trickle vents are those required by Building Regulations to achieve compliance. Voluntary vents are those fitted by choice, perhaps to improve comfort or address a specific condensation problem, without any regulatory trigger.
When are vents mandatory? If your project falls under any of the compliance triggers listed above, you're legally required to provide adequate background ventilation. The regulations don't give you a choice. Your installer must fit vents that meet the minimum equivalent area requirements, or demonstrate that existing ventilation (such as a wall ventilator already present in the room) already satisfies Part F.
When are vents voluntary? If you're not undertaking any building work that triggers Part F, you can choose to add trickle vents to improve your home's air quality. Many homeowners in older properties with condensation issues opt for this approach. There's no regulatory requirement, but the benefits to indoor air quality and moisture control remain the same.
The practical difference comes down to certification and enforcement. Mandatory installations must be signed off by a competent person scheme like FENSA, or approved by local authority building control. Voluntary installations don't require formal sign-off, though you'll still want to ensure proper fitting for effective performance.
Understanding where your project sits on this spectrum helps you ask the right questions when speaking to installers. It also protects you from non-compliant work that could cause problems when you come to sell your property or face a building control inspection.
With the regulatory framework clear, the next question many homeowners ask is whether all this background ventilation comes at a cost to their heating bills.
You've just invested in new double-glazed windows with vents, and now you're wondering: am I paying to heat the outside? It's a fair question. Any ventilation opening in your building envelope allows some heat exchange. But here's where the reality differs significantly from the fear.
Let's be honest. Window vents do allow cold air in and warm air out. That's literally their job. The concern isn't unfounded, but it needs context.
The aperture size of a typical trickle vent is small by design. A standard unit allows around 20-50 cubic metres of air per hour at normal pressure differences. Compare that to opening a window, which can exchange hundreds of cubic metres per hour, and the difference becomes clear. Vented windows introduce air in a controlled, measured way rather than flooding your room with cold air.
The thermal penalty exists, but it's modest. More importantly, it needs weighing against what happens without adequate ventilation: condensation damage to window frames and walls, mould remediation costs that can run into thousands, and the health impacts of poor indoor air quality. When you factor in these real costs, the small energy trade-off looks very different.
Part F of the Building Regulations takes exactly this position. The regulatory stance reflects a deliberate balance between energy efficiency and occupant health. Regulators concluded that the health and building damage risks from inadequate ventilation outweigh the modest thermal penalty from properly sized background ventilators.
Some homeowners close their vents in winter and never open them again. This creates problems that far exceed any heating savings.
When you seal off your home's ventilation opening, moisture from cooking, showering, breathing, and drying clothes has nowhere to go. Humidity builds up. Water vapour condenses on cold surfaces, particularly windows and external walls. Over time, this creates the perfect environment for mould growth.
The consequences extend beyond aesthetics. Untreated mould can trigger respiratory problems, particularly in children, the elderly, and anyone with existing health conditions. Persistent damp damages plaster, timber frames, and even structural elements. The repair costs dwarf any savings on your heating bill.
Should air vents point towards window frames or away? The direction matters less than keeping them functional. Most vents are designed to direct airflow upward or across the room to minimise the sensation of cold draughts while still providing adequate air exchange.
This misconception persists despite clear evidence to the contrary. Trickle vents aren't just for new construction. They're equally relevant, sometimes more so, for older properties.
Older homes often had natural ventilation through gaps in windows, doors, and building fabric. When you upgrade to modern, airtight windows without adding proper ventilation, you're sealing up a building that was never designed to be airtight. The result? Condensation problems that didn't exist before.
Homes with no vents that undergo window replacement are prime candidates for retrofitting. The regulations recognise this, which is why Part F applies to replacement windows, not just new builds.
The evidence points clearly in one direction: properly specified and installed trickle vents deliver meaningful benefits with minimal thermal penalty. But how do they compare to other ventilation options available to homeowners?
Wondering whether a simple window vent is enough, or if you need something more sophisticated? You're not alone. Choosing the right ventilation strategy depends on your property type, budget, and what you're actually trying to achieve. This section puts all the main options side by side so you can make an informed decision.
When searching for an alternative to trickle vents, you'll encounter several mechanical options. Each works differently and suits different situations. Let's break them down.
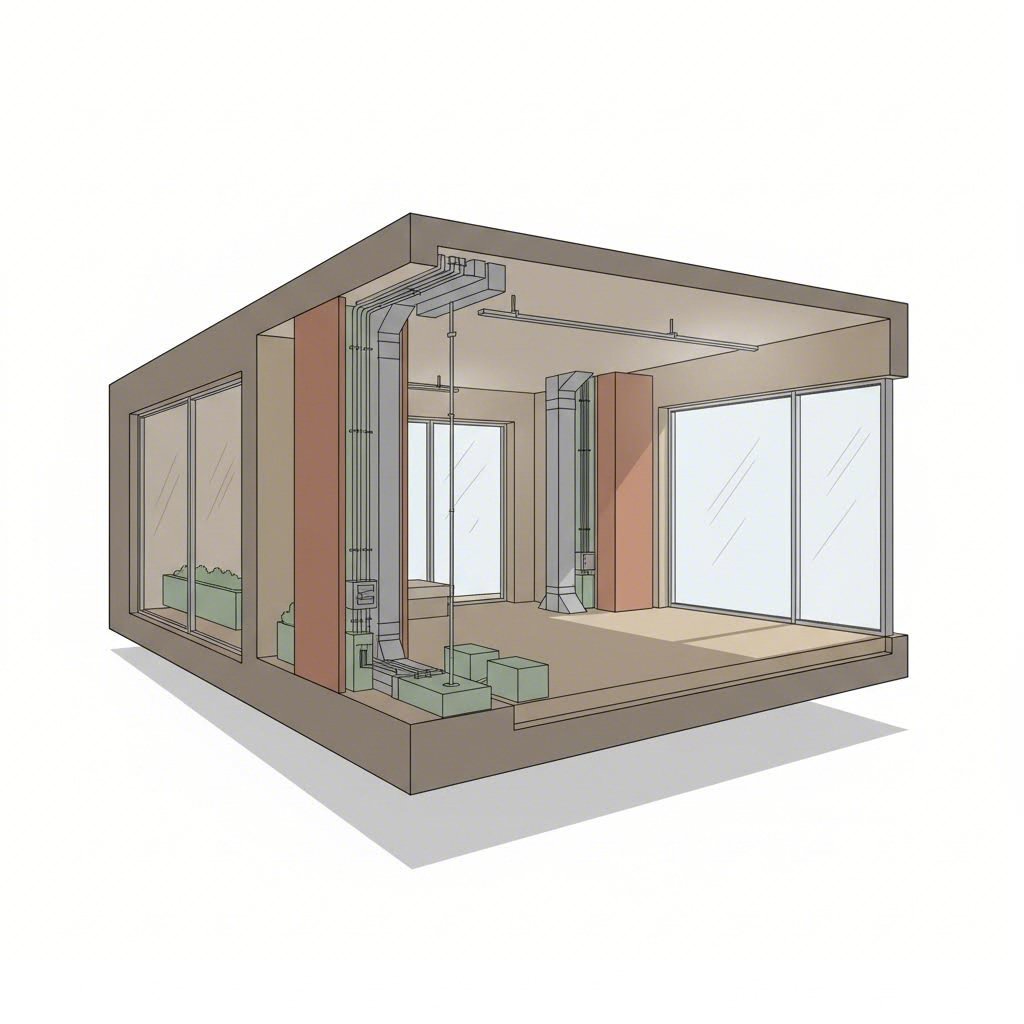
MVHR (Mechanical Ventilation with Heat Recovery) represents the premium end of the spectrum. These systems extract stale air from wet rooms while simultaneously supplying filtered, pre-warmed fresh air to living spaces. The heat exchanger recovers up to 90-95% of the heat that would otherwise escape. For airtight new builds or deep retrofits, MVHR makes strong economic sense over time.
MEV (Mechanical Extract Ventilation) offers a middle ground. A central fan continuously extracts air from bathrooms and kitchens through ducting, while replacement air enters through trickle vents in windows. It's simpler than MVHR but provides no heat recovery.
PIV (Positive Input Ventilation) takes the opposite approach. A loft-mounted unit pushes filtered air down into the home, creating positive pressure that displaces stale air outward through natural gaps. PIV works brilliantly in older, naturally leaky properties but struggles in modern airtight homes where there aren't enough escape routes for the pressurised air.
The following table compares these options alongside passive alternatives:
| Ventilation Method | Upfront Cost | Installation Complexity | Running Cost | Regulatory Compliance | Best Suited For |
|---|---|---|---|---|---|
| Trickle Vents | Low (£50-£200 per window) | Low | None | Meets Part F for background ventilation | Most homes, replacement windows, budget-conscious projects |
| MVHR | High (£4,000-£8,000 installed) | High | Low (£40-£60/year) | Meets Part F and supports Part L | Airtight new builds, deep retrofits, allergy sufferers |
| PIV | Low (£500-£1,500 installed) | Low | Low (£20-£40/year) | Supplementary only, not standalone for new builds | Older leaky properties, quick condensation fixes |
| MEV | Medium (£1,000-£2,500 installed) | Medium | Low (£20-£40/year) | Meets Part F with trickle vents | Flats, family homes, moderate budgets |
| Passive Stack Ventilation | Medium | Medium | None | Listed in Part F but rarely specified | Properties with suitable vertical duct routes |
| Intermittent Extract Fans | Low | Low | Low | Basic compliance with background ventilators | Bathrooms, kitchens, targeted moisture control |
Not every home needs a mechanical system. For many properties, a well-specified ventilator window combined with intermittent extract fans in wet rooms provides perfectly adequate ventilation.
Passive ventilation works best when your home has moderate airtightness, typically older properties or those built before stringent energy standards. In these buildings, natural air leakage through the fabric supplements the controlled airflow through trickle vents. Open window ventilation during mild weather adds another layer of flexibility.
Consider passive solutions if you're replacing windows in a pre-2006 property, working within a tight budget, or simply want a maintenance-free approach. Night time ventilation through trickle vents can also help regulate temperatures during warmer months without security concerns.
Trickle vents are the most practical choice for replacement window projects, older properties with natural air leakage, and homeowners seeking zero running costs. Mechanical systems become worthwhile when building to modern airtightness standards, when occupants have respiratory conditions requiring filtered air, or when heat recovery savings justify the higher upfront investment.
Your decision should start with your building's characteristics, not the technology itself.
For a Victorian terrace or 1930s semi with reasonable natural leakage, trickle vents combined with extract fans typically provide everything you need. These properties breathe through their fabric, and adding a venting window to each room ensures adequate fresh air without complex installations.
Modern new builds tell a different story. With airtightness levels of 3-5 m³/hr/m² at 50Pa, these homes cannot rely on accidental air leakage. MVHR becomes the sensible choice because the house is tight enough for heat recovery to deliver meaningful savings, and the construction phase allows easy duct installation.
Properties in the middle ground, perhaps a 1970s house with some insulation upgrades, might benefit from PIV or MEV. These systems address condensation effectively without the complexity of full MVHR.
Budget matters too. If you're spending £4,000-£8,000 on MVHR, you need confidence that your building envelope supports those savings. Installing MVHR in a draughty older home wastes money because heat escapes through the fabric faster than the system can recover it.
The practical takeaway? Match your ventilation strategy to your building's actual performance, not to marketing claims. For most homeowners replacing windows, properly specified trickle vents remain the most cost-effective solution. Mechanical systems earn their place in specific scenarios where the building physics and budget align.
Once you've decided on trickle vents, the next step is understanding how to install them correctly.
Ready to fit your own window trickle vent? Whether you're a confident DIYer or a trade professional looking for a refresher, this walkthrough covers everything you need to know. The good news: installing trickle vents in windows is straightforward with the right preparation. You can complete most installations in under an hour using basic tools.
Before you start, gather your tools. You'll need a tape measure, pencil, electric drill, 8-10mm drill bit (or a TCT bit for steel-reinforced uPVC frames), screwdriver, safety glasses, and a dust sheet. Most vent kits include internal and external components, screws, and cover caps.
For those working on doors rather than windows, the process to install vent in door frames follows similar principles. A window vent insert designed for door applications fits into the frame head using the same drilling and fixing method.
Here's where things get important. Not every installation is a DIY job.
If you're adding fitted vents to existing windows purely to improve ventilation, with no other building work involved, you can handle this yourself. There's no regulatory requirement for sign-off on voluntary improvements.
However, if your project involves replacement windows, the situation changes. Replacement window projects trigger Part F compliance obligations. In these cases, a FENSA-registered installer must carry out the work and self-certify compliance with Building Regulations. This isn't optional. The installer takes legal responsibility for ensuring adequate background ventilation is provided.
What does this mean practically? If you're having new windows fitted, your installer should include trickle vents as standard and handle the entire installation. If they suggest you fit vents yourself later, or ask you to sign a disclaimer waiving the requirement, that's a red flag. Such disclaimers don't satisfy the regulations.
For basement applications or specialist situations, products like a basement window vent kit may require professional assessment to ensure adequate equivalent area is achieved in below-ground rooms where ventilation requirements can differ.
This scenario catches many homeowners off guard. Your Victorian terrace or 1960s semi never had trickle vents. The old windows were draughty enough to provide natural ventilation through gaps and imperfect seals. Now you're upgrading to modern, airtight double glazing. What happens?
Part F is clear: your new windows must not make ventilation worse than before. Since your old windows provided some background ventilation through their imperfections, your new windows must compensate. This typically means fitting trickle vents even though the originals had none.
The practical implication? When replacing windows in older properties, budget for vents from the start. Your installer should factor this into their quote. If they don't mention ventilation at all, ask specifically how they plan to meet Part F requirements.
Retrofitting vents to existing windows that you're keeping is also possible. Slimline frame-fitted vents work in most uPVC, aluminium, and timber windows. Where frame space is genuinely limited, glazed-in vents offer an alternative that avoids cutting the frame altogether.
Even straightforward jobs go wrong when basic steps get skipped. Watch out for these pitfalls:
With your vents properly installed, the next consideration is keeping them working effectively over time.

Installed your trickle vents windows and assumed the job was done? You're not alone. Most homeowners forget these small components exist until something goes wrong. The reality is that window air vents need occasional attention to keep performing properly. Neglect them, and you'll find yourself dealing with blocked airflow, persistent draughts, or condensation creeping back despite having vents fitted.
The good news? Maintenance takes minutes, not hours. A little routine care prevents the vast majority of problems.
Dust is the main culprit. Every time air passes through your vents, it carries tiny particles that gradually accumulate in the slot and on the cover. In urban areas with higher pollution levels, this buildup happens faster. Left unchecked, debris can reduce ventilation capacity by up to 70%, essentially turning your vents into decorative strips.
How often should you clean them? For most homes, a quick clean every three to six months keeps things running smoothly. If you live near a busy road, construction site, or industrial area, check them more frequently. The same applies if anyone in your household has allergies or respiratory conditions.
The cleaning process is straightforward:
That's it. Five minutes of attention prevents weeks of poor air quality.
Clean your trickle vents when you clean your windows. Making it part of your regular routine ensures they never get forgotten and always perform at their best.
Feeling a cold breeze near your windows even with the vent closed? Something's not right. Drip vents in windows shouldn't create noticeable draughts when properly installed and functioning correctly.
Several issues cause this problem. A damaged closing mechanism tops the list. Repeated operation wears down sliders and hinges over time. If the vent won't close fully, cold air streams through the gap. Similarly, poor installation creates problems from day one. Misaligned vents leave gaps around the housing that let air bypass the controlled opening entirely.
Incorrect sizing also causes draughts. A vent too large for your frame delivers more airflow than intended, making the room feel cold. This sometimes happens when installers fit standard-sized vents without checking the specific requirements for each window.
Use this checklist to diagnose draught problems:
For interior door ventilation, similar principles apply. If you've fitted vents to internal doors and notice unwanted airflow, check that the vent size matches the door's requirements and that the closing mechanism functions properly.
Sometimes cleaning and adjustment aren't enough. Tickle vents (as they're sometimes called) do wear out, typically after five to ten years of regular use. Knowing when replacement beats repair saves you time and frustration.
Watch for these warning signs:
Replacement vents are widely available and relatively inexpensive. For most homeowners, fitting a new vent takes less time than repeatedly troubleshooting a failing one. If you're replacing like-for-like on existing windows without other building work, this remains a DIY job. Just ensure the new vent matches the original's equivalent area to maintain compliance.
Live near a busy road, flight path, or entertainment district? Standard vents might let in more noise than you'd like. Acoustic trickle vents offer a solution, providing the same background ventilation while significantly reducing sound transmission.
These specialised vents work through clever internal design. Sound-absorbing materials and complex chamber structures force sound waves to travel through multiple turns, dissipating their energy before reaching your interior. The result is noticeably quieter rooms without sacrificing air quality.
Acoustic performance is measured in decibels using the Dn,e,w rating. Higher numbers mean better sound reduction. A vent rated at 44 dB provides substantially more noise attenuation than one rated at 35 dB. For context, BS 8233:2014 recommends that noise levels in habitable rooms shouldn't exceed 35 dB, and restful sleep requires levels below 30 dB.
When should you specify acoustic vents? Consider them if your property faces a main road, sits under a flight path, or neighbours commercial premises with late-night activity. Local planning conditions sometimes mandate acoustic ventilation for developments in high-noise areas. Even without regulatory requirements, the comfort improvement in noisy locations often justifies the modest additional cost.
Acoustic vents function identically to standard models for maintenance purposes. The same cleaning routine applies, and the same wear patterns develop over time. The internal sound-absorbing materials don't require special attention beyond keeping the airflow path clear.
For properties requiring both ventilation and noise control, a screen vent or acoustic canopy combination may be specified. These dual systems pair an internal ventilator with an external acoustic canopy to maximise sound reduction while maintaining required equivalent area values.
With maintenance covered, the final consideration is selecting the right vent type for your specific windows and project requirements.
Standing in front of a catalogue full of window air vent options can feel overwhelming. Standard vents, acoustic vents, retrofit solutions, aluminium or plastic finishes, compatibility with different frame types. How do you know which one actually fits your situation? This buyer's guide cuts through the confusion and helps you match the right product to your specific windows and project requirements.
The first decision most buyers face is whether to go standard or acoustic. Understanding what separates these two categories helps you avoid overspending on features you don't need, or underspending and regretting it later.
Standard slot vents handle the basics well. They provide the required equivalent area for Part F compliance, allow controlled background airflow, and cost less than specialised alternatives. For most residential properties in quiet suburban or rural locations, standard vents do everything you need. They're the workhorse of the air ventilation window market.
Acoustic trickle vents step up when noise becomes a concern. These units incorporate sound-absorbing materials and baffled internal chambers that force sound waves through multiple turns before reaching your interior. The result? Noticeably reduced noise transmission without sacrificing airflow capacity.
How much quieter? Acoustic performance is measured using the Dn,e,w rating in decibels. A standard vent might offer around 30-34 dB of sound reduction, while a quality acoustic vent can achieve 42-46 dB or higher. That difference matters. If you live near a busy road, under a flight path, or next to commercial premises, acoustic vents make a genuine difference to comfort and sleep quality.
The trade-off is cost. Acoustic vents typically run 30-50% more expensive than standard equivalents. They're also slightly bulkier due to the internal baffling, which occasionally affects aesthetics on slim frame profiles. For properties in quiet areas, that premium buys you nothing useful. For homes in high-noise locations, it's money well spent.
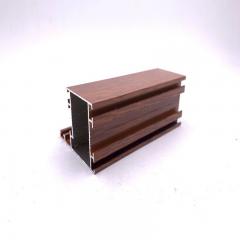
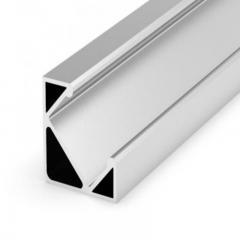
Material choice affects durability, appearance, and compatibility with your existing windows. Both aluminium and plastic vents perform the same ventilation function, but they suit different situations.
Aluminium vents offer superior longevity. The material resists UV degradation, doesn't warp in temperature extremes, and maintains its appearance over decades. For south-facing windows that take heavy sun exposure, aluminium holds up better than plastic alternatives. The finish options are broader too, with anodised, powder-coated, and brushed finishes available to match contemporary window systems.
Plastic vents cost less and work perfectly well in most applications. Modern uPVC vent housings are engineered for outdoor exposure and typically last 10-15 years before showing significant wear. They're lighter, easier to cut during installation, and available in colours that match standard uPVC window profiles. For budget-conscious projects or properties where the vents won't face extreme conditions, plastic delivers good value.
Frame compatibility matters here too. If you're fitting vents to aluminium windows, aluminium vents create a seamless visual match. The same logic applies to uPVC frames and plastic vents. Mixing materials works functionally but can look mismatched, particularly on visible elevations.
For specifiers and contractors sourcing compliant products across multiple frame types, ranges like Shengxin Aluminium's durable window trickle vents offer flexibility. Their product line covers both aluminium and plastic finishes, works with uPVC and timber systems, and meets international standards including UK Part F. Having a single supplier that handles multiple material requirements simplifies procurement on larger projects.
What if you're not replacing windows but need to add ventilation to existing frames? Retrofit vents solve this problem, though the approach varies depending on your window type and available frame space.
Slimline frame-fitted vents represent the most common retrofit solution. Modern designs require as little as 18mm of frame height, making them suitable for situations where older, bulkier vents would never have fitted. The installation involves cutting a narrow slot in the frame head, fitting a slim internal vent, and adding a low-profile external canopy.
When frame space genuinely isn't available, glazed-in vents offer an alternative. This method avoids cutting the frame entirely. Instead, the existing sealed unit is removed, a new unit manufactured approximately 45mm shorter is installed, and a glazed-in vent clips into the opening above it. This approach works particularly well for aluminium profiles that are too slim for frame-mounted options, or heritage windows where cutting the frame would compromise appearance.
Retrofit compatibility by window type:
The key takeaway? Very few windows are genuinely impossible to retrofit. The question isn't whether it can be done, but which method suits your specific situation.
Selecting the right vent means considering multiple factors simultaneously. The following table compares the main vent types across the criteria that matter most:
| Vent Type | Material Options | Frame Compatibility | Acoustic Rating | Typical Application | Relative Cost |
|---|---|---|---|---|---|
| Standard Slot Vent | Aluminium / Plastic | uPVC, Aluminium, Timber | 30-34 dB | General residential, quiet locations | Low |
| Acoustic Trickle Vent | Aluminium / Plastic | uPVC, Aluminium, Timber | 42-46 dB+ | High-noise areas, roadside properties | Medium |
| Slimline Retrofit Vent | Aluminium / Plastic | uPVC, Aluminium, Timber (18mm+ frame depth) | 30-34 dB (standard) / 42+ dB (acoustic) | Adding vents to existing windows | Low to Medium |
| Glazed-In Vent | Aluminium / Plastic | Any frame type with removable sealed units | 30-34 dB (standard) / 42+ dB (acoustic) | Slim frames, heritage windows, aesthetic priority | Medium to High |
| Fittes Vent / Fittes Air Vents | Typically Plastic | Specific frame systems | Varies by model | System-matched installations | Medium |
| Velfac Trickle Vent | Aluminium | Velfac window systems | Varies by specification | Velfac system projects | Medium to High |
Some window systems require brand-specific vents. Velfac trickle vent options, for example, are designed specifically for Velfac window profiles and may not interchange with generic alternatives. Similarly, fittes air vents are engineered for particular frame systems. Always check manufacturer compatibility before ordering.
Before placing your order, run through these criteria to confirm you're choosing the right product:
Double glazed windows with ventilation don't have to mean compromised aesthetics or excessive noise. The right vent selection balances airflow requirements, acoustic performance, visual appearance, and budget. For venting windows across residential and commercial projects, the market offers solutions for virtually every scenario.
With your vent type selected, the final step is pulling together everything you've learned into a clear decision framework for your specific situation.
You've covered the regulations, weighed the energy trade-offs, compared ventilation methods, and explored installation and maintenance. Now it's time to translate all that knowledge into action. Whether you're a homeowner planning a window upgrade, a self-builder navigating Part F, or a trade professional ensuring compliant installations, the decisions you make now determine whether your trickle window vents deliver lasting value or become a source of problems.
Your next steps depend on your role in the project. Here's what matters most for each situation:
The core message is simple: house window vents represent a low-cost, low-maintenance solution that delivers genuine benefits when correctly specified and installed. Fresh air enters, stale air escapes, moisture stays under control, and your window vents house remains healthier for it.
Yes, there's a modest energy trade-off. Any opening in your building envelope allows some heat exchange. But the Glass and Glazing Federation confirms that the benefits of adequate ventilation, including reduced condensation, lower mould risk, and improved indoor air quality, far outweigh the small thermal penalty. The regulations reflect this balance deliberately.
For those wondering when to open foundation vents or how different ventilation strategies interact, the principle remains consistent: buildings need to breathe. Whether through trickle vents in windows, an interior door vent allowing air circulation between rooms, or mechanical systems in airtight new builds, the goal is always the same: controlled, continuous fresh air supply.
Ready to source compliant products? Shengxin Aluminium's trickle vent range offers both aluminium and plastic finishes compatible with uPVC and timber systems, all meeting UK Part F requirements. It's a practical starting point for homeowners, specifiers, and contractors looking for easy-to-install ventilation solutions.
Background ventilation isn't optional. It's the difference between a building that protects its occupants and one that slowly damages both their health and its own fabric.
A trickle vent is a small opening fitted into window frames or above doors that provides controlled, continuous passive ventilation. It works through natural pressure differentials and temperature differences between indoor and outdoor environments, allowing fresh air to enter without mechanical systems or energy input. Unlike opening windows, trickle vents deliver measured, gentle airflow that helps control moisture, reduce condensation, and improve indoor air quality year-round.
Yes, in most cases. Under UK Building Regulations Part F, replacement windows trigger compliance obligations. Your new windows must not make ventilation worse than before, which typically means fitting trickle vents even if your original windows had none. FENSA-registered installers carry responsibility for ensuring adequate background ventilation is provided. Signing disclaimers to waive this requirement does not satisfy the regulations.
The heat loss from properly sized trickle vents is modest compared to the costs of inadequate ventilation. A standard unit allows around 20-50 cubic metres of air per hour, far less than an open window. The thermal penalty is minimal when weighed against condensation damage, mould remediation costs, and health impacts from poor air quality. Part F regulations reflect this balance, prioritising occupant health alongside energy efficiency.
It depends on your project. If you are adding vents to existing windows purely to improve ventilation without other building work, DIY installation is possible using basic tools. However, if your project involves replacement windows, a FENSA-registered installer must carry out the work and self-certify Part F compliance. Products like Shengxin Aluminium's durable window trickle vents are designed for easy installation across uPVC and timber systems.
Standard trickle vents provide basic background ventilation and typically offer 30-34 dB of sound reduction. Acoustic trickle vents incorporate sound-absorbing materials and baffled chambers, achieving 42-46 dB or higher noise attenuation. Acoustic vents cost 30-50% more but are worthwhile for properties near busy roads, flight paths, or commercial premises. Both types require the same maintenance routine and meet Part F equivalent area requirements.


 Onlineservice
 0086 136 3563 2360
 sales@sxalu.com
 +86 136 3563 2360
 Deutsch
 English
 français
 русский
 español
 português
 العربية
 ไทย
ไทย Việt
Việt Українська