
When you install LED strip lights directly onto a surface, you might notice something frustrating after a few months - the LEDs start dimming, colors shift, or worse, sections fail completely. What went wrong? The answer often lies in what's missing: proper LED housing that manages heat and protects your investment.
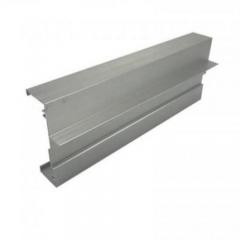
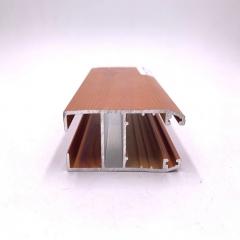
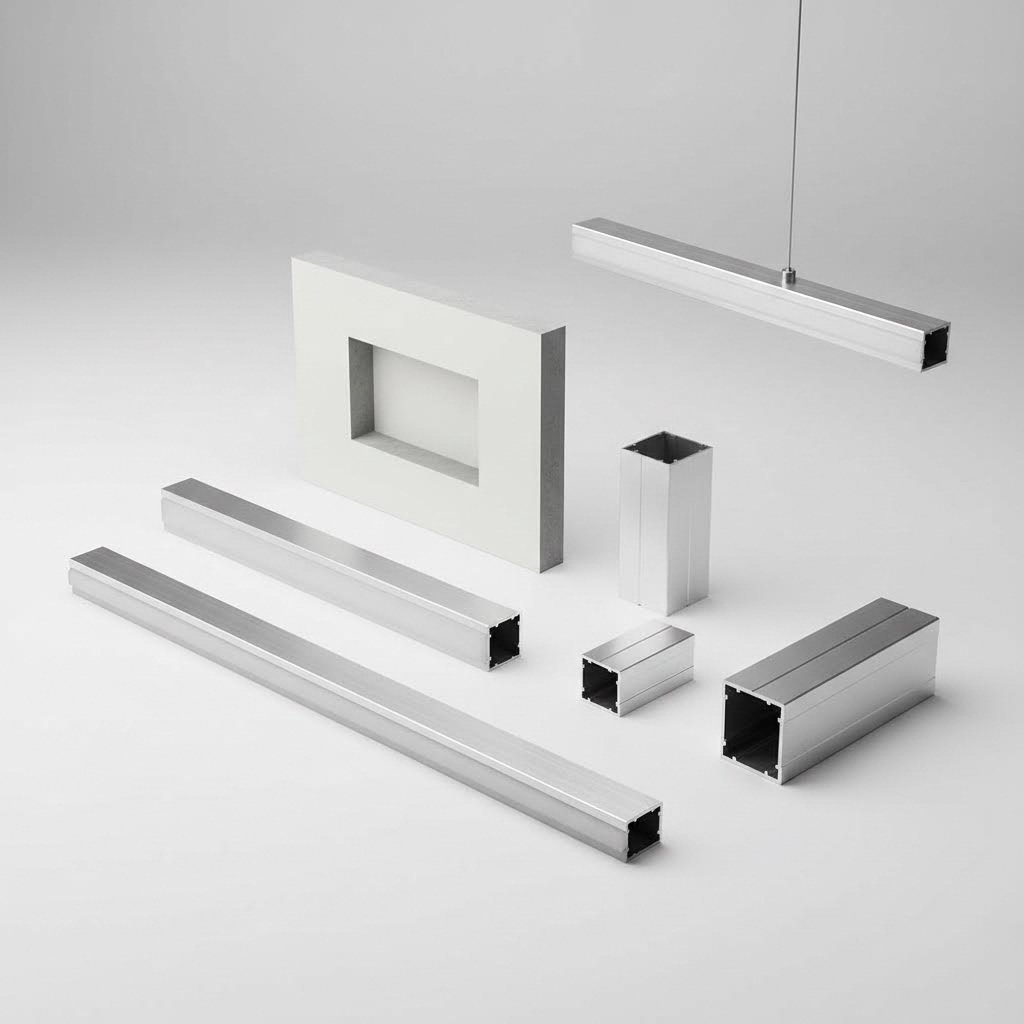
Aluminum extrusions for LED lights are specially engineered aluminum structures designed to house LED strip lights while solving critical performance challenges. Think of them as the unsung heroes of professional lighting installations. These profiles - also called LED aluminum channels or led light channels - are created by pushing heated aluminum alloy through a shaped die, producing consistent cross-sectional shapes that accommodate LED strips perfectly.
At their core, an aluminum channel for led tape light serves as far more than a simple mounting bracket. These extruded profiles act as complete LED housing systems that address every challenge your LED strips face during operation. The aluminum framework provides a secure, stable mounting solution while simultaneously functioning as a heat sink that draws thermal energy away from sensitive LED components.
Why does this matter to you? LEDs generate heat during operation - and excessive heat is their biggest enemy. Without proper thermal management, your LED strips can lose up to 70% of their lifespan. The aluminum material's excellent thermal conductivity pulls heat away efficiently, preventing the overheating that causes premature failure and color inconsistency.
Every led strip light channel system includes several key components working together:
Professional lighting designers and DIY enthusiasts alike rely on profile lighting solutions because they address multiple needs simultaneously. Understanding these primary functions helps you appreciate why quality extrusions transform ordinary LED installations into professional-grade lighting systems:
The light channel led systems available today come in remarkable variety - from simple surface-mount options to recessed profiles that disappear into architectural features. Each type serves specific applications, and choosing correctly means the difference between lighting that merely works and lighting that truly performs.
Without proper aluminum housing, even premium LED strips can fail prematurely due to heat buildup - making extrusion selection one of the most important decisions in any LED lighting project.
Whether you're illuminating kitchen cabinets, creating dramatic architectural accents, or designing commercial displays, understanding these fundamentals ensures you'll select the right profile for your specific needs. The following sections dive deeper into thermal science, profile types, and practical selection guidance to help you match the perfect extrusion to your project.
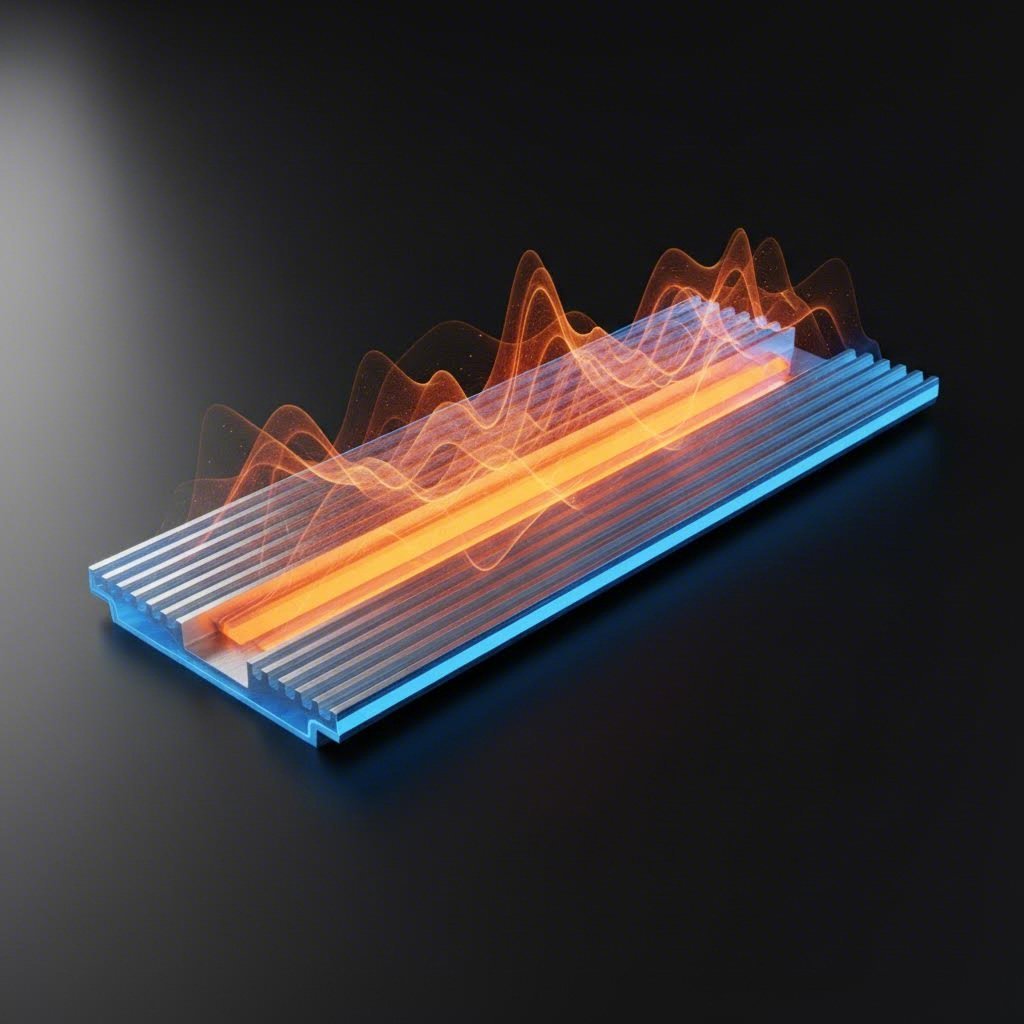
You might wonder why aluminum dominates the LED lighting industry when other metals exist. The answer comes down to a fascinating balance of physics, practicality, and economics that makes aluminum the ideal thermal management solution for your LED installations.
Here's a surprising fact: only about 30-40% of the electrical power your LED strips consume actually becomes light. The remaining 60-70% transforms into heat. For a typical 15 W/m LED strip, that means roughly 10 watts per meter of thermal energy needs somewhere to go. Without an effective led aluminum channel to manage this heat, temperatures can climb above 80°C - a danger zone where LEDs begin suffering permanent damage.
Thermal conductivity measures how efficiently a material transfers heat from one point to another. Imagine touching a metal spoon versus a wooden spoon that have both been sitting in hot soup - the metal feels much hotter because it conducts heat rapidly to your hand. This same principle makes aluminum led channel systems so effective at protecting your LEDs.
Pure aluminum boasts a thermal conductivity of 237 W/mK, ranking seventh among all metals. While gold and silver conduct heat slightly better, aluminum costs roughly 400 times less than silver - making it the practical choice for led extrusion applications. When your LED strip generates heat, the aluminum profile acts like a highway, rapidly moving thermal energy away from sensitive components and dispersing it into the surrounding air.
The led aluminium profile creates what engineers call a passive heat sink. Unlike active cooling systems that use fans, your aluminum channel works silently through three natural mechanisms:
Understanding why temperature control matters so much requires looking at what happens inside your LEDs when things get too hot. The relationship between heat and LED performance isn't just linear - it's exponential and unforgiving.
A 10°C increase in LED operating temperature can reduce lifespan by up to 50% - making proper thermal management through quality aluminum profiles one of the most cost-effective investments in any lighting project.
When selecting an aluminum profile for led strip lighting, the alloy grade significantly impacts thermal performance. Not all aluminum performs equally. The industry standard 6063-T5 alloy used in quality LED profiles delivers approximately 201 W/mK thermal conductivity - more than 1,000 times higher than plastic alternatives. This explains why plastic LED channels, while cheaper, simply cannot protect high-power LED strips effectively.
Temperature affects your LED installation in several critical ways:
| Temperature Impact | What Happens | Visible Effect |
|---|---|---|
| Lumen Depreciation | LED chip efficiency decreases as temperature rises | Gradual dimming over time |
| Color Shift | Correlated Color Temperature (CCT) drifts with heat | Light appears warmer or cooler than specified |
| Reduced CRI | Color rendering accuracy degrades | Colors appear washed out or inaccurate |
| Component Failure | Solder joints and driver circuits stress under heat | Sections stop working entirely |
For aluminum lighting applications, profile specifications matter tremendously. Wall thickness directly affects thermal mass - the profile's ability to absorb and distribute heat. Industry testing shows that upgrading from a 1mm thin-wall profile to a 2mm thick-wall 6063-T5 aluminum extrusion can reduce LED PCB temperature by 6-8°C at 15 W/m loads. This seemingly small improvement can extend your LED's L70 lifespan by 30-40%.
Light aluminum profiles work best when you match their thermal capacity to your LED strip's wattage. Standard profiles handle strips up to 10 W/m comfortably, while high-power applications above 15 W/m benefit from deep-channel or finned extrusion designs that maximize surface area for heat dissipation. The investment in proper thermal management pays dividends through years of consistent, reliable illumination rather than premature replacement costs.
Now that you understand why aluminum excels at thermal management, you're probably wondering: which profile type actually fits my project? With dozens of shapes and configurations available, selecting the right led profile can feel overwhelming. Here's the good news - most applications fall into five main categories, each designed for specific installation scenarios and visual outcomes.
Think of choosing a led aluminum profile like selecting the right tool for a job. A hammer works great for nails, but you wouldn't use it to drive screws. Similarly, surface mount profiles excel in retrofit projects, while recessed channels create seamless architectural features. Understanding these distinctions helps you match your led strip profile to your exact requirements.
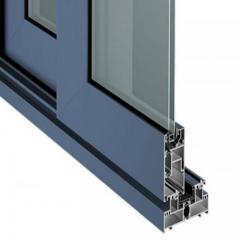
Surface mount led profiles are the workhorses of LED lighting installations. These aluminum extrusion channel systems attach directly to existing surfaces - cabinets, walls, shelves, or ceilings - without requiring any cutting or modification to the mounting surface. If you're tackling a retrofit project or want the simplest installation possible, this is your starting point.
The typical surface mount led profile channel features a U-shaped cross-section with either flat or slightly curved sides. Installation couldn't be simpler: secure mounting clips to your surface using screws or adhesive, snap the profile into place, insert your LED strip, and attach the diffuser cover. Most homeowners complete their first installation in under an hour.
Surface mount profiles work exceptionally well for:
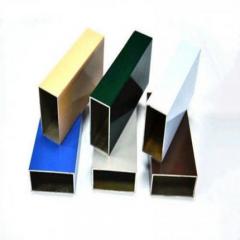
The visual outcome depends on profile depth and diffuser choice. Shallow profiles (8-12mm height) sit close to surfaces and provide subtle accent lighting. Deeper profiles (15-20mm) accommodate higher-power strips and create more pronounced light effects. Keep in mind that surface mount installations remain visible as design elements, so select finishes - silver, black, white, or bronze anodized - that complement your decor.
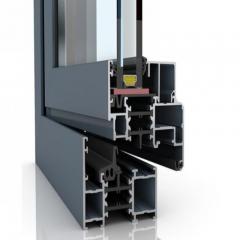
When you want LED lighting that appears built into the architecture itself, recessed led profiles deliver that seamless, professional result. These profile channel systems install flush with surrounding surfaces, leaving only the diffuser visible. The effect? Lighting that seems to emerge from the ceiling, wall, or furniture itself.
Recessed installation requires more planning and construction work. You'll need to create channels in drywall, plaster, wood, or aluminum substrates sized precisely for your chosen profile. Many recessed profiles include flanged edges that cover any gaps between the profile and surrounding material - a detail that simplifies installation and forgives minor measurement errors.
Ideal applications for recessed profiles include:
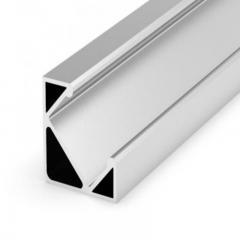
Corner profiles - also called V-channels or 45-degree profiles - solve a specific challenge: illuminating 90-degree angles where walls meet ceilings, inside cabinets, or along display case edges. These specialized led profiles position your LED strip at an angle, directing light precisely where needed while fitting snugly into corner spaces that standard U-channels cannot accommodate.
Corner profiles for led installations excel in:
Suspended led profiles transform LED strips into pendant-style fixtures that hang from ceilings via cables, rods, or chains. These systems work brilliantly in spaces with high ceilings - warehouses, lobbies, restaurants, and modern offices - where surface-mounted or recessed options simply won't reach work surfaces effectively.
The installation complexity increases with suspended systems. You'll need secure ceiling anchors capable of supporting the profile weight, adjustable suspension hardware for leveling, and careful planning for electrical connections that travel down suspension cables. However, the dramatic visual impact often justifies the additional effort.
Beyond these main categories, specialty profiles address unique requirements:
Matching the right profile to your project requires weighing multiple factors simultaneously. This comparison table summarizes the key considerations across all major profile categories:
| Profile Type | Best Applications | Installation Difficulty | Visual Effect | Ideal LED Strip Width |
|---|---|---|---|---|
| Surface Mount | Under-cabinet, shelving, retrofits, DIY projects | Easy - clips or adhesive mounting | Visible profile becomes design element | 8mm - 12mm standard strips |
| Recessed | New construction, cove lighting, custom millwork | Moderate to difficult - requires routing or framing | Seamless integration, architectural appearance | 10mm - 12mm strips common |
| Corner/V-Channel | Cabinet interiors, wall-ceiling transitions, display cases | Easy to moderate - fits 90-degree angles | Directional light at 45-degree angle | 8mm - 10mm strips typical |
| Suspended | High ceilings, commercial spaces, pendant fixtures | Moderate - requires ceiling anchors and leveling | Dramatic pendant or linear fixture appearance | 10mm - 20mm depending on profile size |
| Flexible | Curved surfaces, columns, organic architectural shapes | Moderate - requires careful bending technique | Continuous curved light lines | 8mm flexible strips recommended |
| Floor/Stair | Walkways, stair treads, floor-level accent lighting | Difficult - requires floor preparation and reinforcement | Low-level wayfinding, safety marking | 10mm - 12mm durable strips |
When selecting profiles for led applications, consider your installation constraints first, then narrow options based on aesthetic goals. A beginner tackling kitchen under-cabinet lighting benefits from forgiving surface mount profiles, while an experienced contractor building a custom home entertainment center might choose recessed channels for that seamless, high-end finish.
Remember that profile depth affects more than just appearance - it determines how well your diffuser eliminates visible LED dots. Deeper profiles position the diffuser farther from LED chips, improving light mixing and creating smoother, more uniform output. This consideration becomes especially important when selecting diffuser types, which we'll explore in the following section on lens options and light distribution effects.
You've selected the perfect profile type for your project - but here's a question that trips up even experienced installers: will your LED strip actually fit inside that aluminum channel? Getting this wrong means frustrating installation problems, compromised thermal performance, or wasted money on incompatible components.
The relationship between led strip channel dimensions and LED strip widths follows specific rules that manufacturers rarely explain clearly. Understanding these compatibility principles before purchasing saves you from the common mistake of ordering beautiful profiles that simply won't work with your existing LED strips.
LED strips come in standardized widths, but "standard" varies more than you might expect. Most flexible LED strips fall into three primary width categories: 8mm, 10mm, and 12mm. However, specialty strips - including high-density, RGBW, and addressable varieties - can measure anywhere from 5mm to 20mm or wider.
The critical measurement on any aluminium led strip channel is the internal width - not the external dimensions you see on product photos. This inside measurement determines exactly which strips fit properly. According to industry compatibility guidelines, the ideal fit occurs when the channel's internal width measures between 100% and 150% of your strip width.
Here's what those percentages mean in practice:
For your led strip light profile selection, use this compatibility chart matching common strip widths to appropriate channel internal dimensions:
| LED Strip Width | Minimum Channel Width | Ideal Channel Width | Maximum Recommended | Common Applications |
|---|---|---|---|---|
| 8mm | 8.0mm | 10.0 - 11.0mm | 12.0mm | Accent lighting, slim profiles, tight spaces |
| 10mm | 10.0mm | 11.0 - 13.0mm | 15.0mm | Standard residential, under-cabinet, most DIY projects |
| 12mm | 12.0mm | 13.0 - 16.0mm | 18.0mm | RGB strips, higher-output applications, commercial use |
| 15mm | 15.0mm | 16.0 - 20.0mm | 22.0mm | RGBW, high-density, professional installations |
| 20mm | 20.0mm | 21.0 - 24.0mm | 28.0mm | Wide COB strips, multi-row configurations |
When measuring your existing LED strips, use digital calipers for accuracy. The PCB (printed circuit board) width is your target measurement - not the silicone coating on waterproof strips, which adds 1-3mm to the overall dimension. For waterproof flexible strips, always reference the channel's internal width against the strip's total width including its protective coating.
Sounds simple enough - so why do so many installations go wrong? The most frequent compatibility errors stem from overlooking critical details that aren't immediately obvious.
Mistake #1: Ignoring thermal paste or tape thickness. When you use thermal adhesive to bond your LED strip to the led strip housing, that layer adds approximately 0.1-0.3mm to the total height. In shallow led strip channels with tight tolerances, this extra thickness can prevent the diffuser from seating properly.
Mistake #2: Forgetting about wire and connector clearance. Your LED strip may fit perfectly - until you reach a solder joint or inline connector. These points often protrude 1-2mm beyond the PCB edge. For aluminum profiles for led strips with narrow internal widths, these protrusions create installation headaches at connection points.
Mistake #3: Confusing external and internal dimensions. Product listings frequently emphasize external profile dimensions for aesthetic planning. A channel marketed as "17mm wide" might have only 12mm of internal space after accounting for wall thickness. Always verify the inside width specification before ordering.
What happens when sizing goes wrong?
For optimal thermal performance, your LED strip should contact the channel bottom surface completely. This full-surface contact maximizes heat transfer from the LED PCB to the aluminum led strip housing. A strip that's slightly loose can be secured with thermal adhesive tape, but a strip that's too tight cannot be forced without consequences.
When ordering new components, buy from suppliers who provide both strip width and channel internal width specifications - not just external dimensions. If you're working with existing LED strips, measure them yourself rather than relying on original packaging, as manufacturing tolerances vary between batches and brands.
With proper strip-to-channel matching established, your next consideration becomes how light emerges from your installation. The diffuser cover you select dramatically affects both brightness and visual quality - a topic that deserves careful attention as you finalize your profile system components.
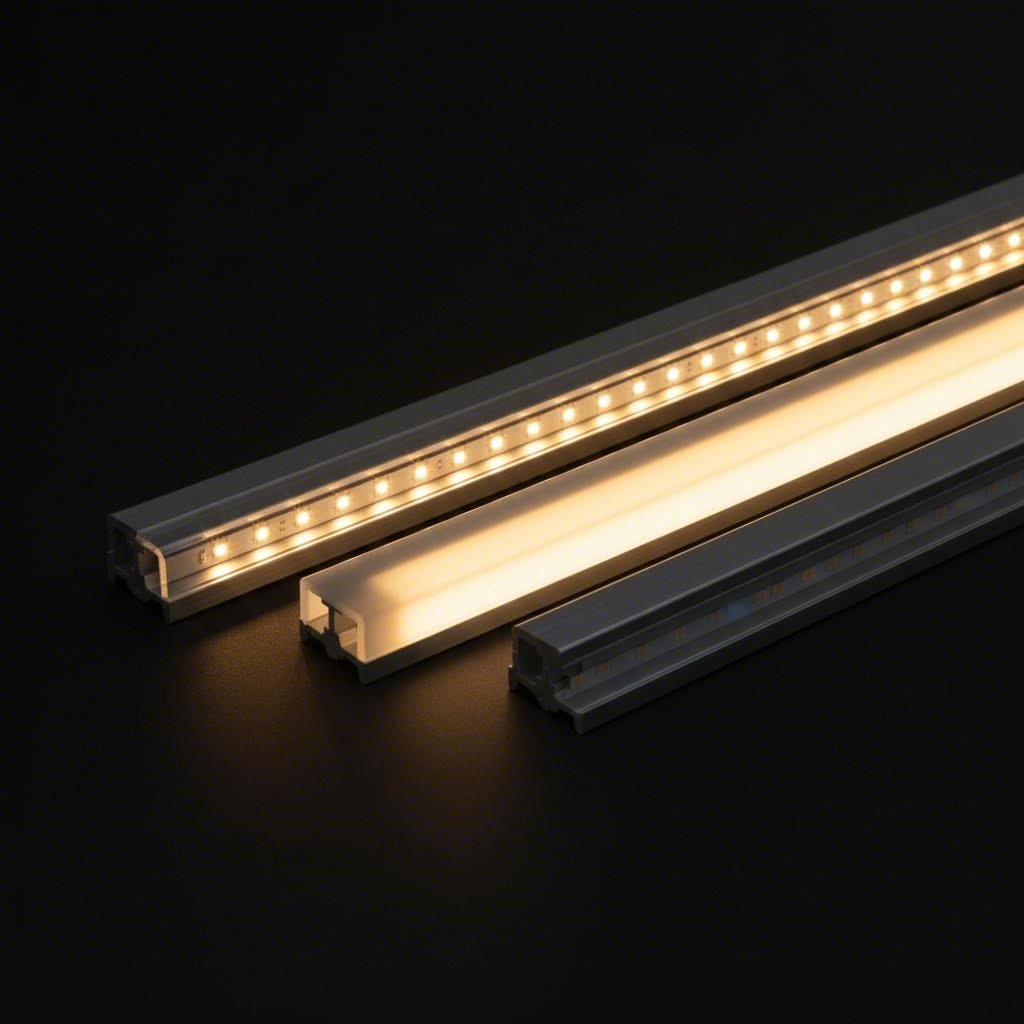
You've selected the perfect aluminum profile and confirmed your LED strip fits properly - but here's where many installations fall short of expectations. The diffuser cover you snap onto your led light extrusion determines whether your finished project looks professionally designed or disappointingly amateur. This single component controls how light emerges, how visible individual LEDs appear, and how much brightness reaches your space.
Think of diffusers like sunglasses for your LED strips. Just as different lens tints serve different purposes - clear for low light, dark for bright sun - led lighting diffusers come in distinct types that dramatically affect both appearance and performance. Understanding these differences prevents the frustration of installing beautiful profiles only to discover the light output doesn't match your vision.
Every led light profile system offers three primary diffuser options, each representing a deliberate trade-off between maximum brightness and smooth light distribution. According to technical testing by LED industry specialists, these covers reduce light output by measurably different amounts while providing vastly different visual results.
Clear Diffusers are completely transparent, transmitting approximately 85-95% of your LED strip's light output. When you need maximum brightness and don't mind seeing individual LED points, clear covers deliver. However, they provide essentially no diffusion - every LED chip remains distinctly visible as a bright dot.
Frosted Diffusers offer the middle ground that makes them the most popular choice for led strip lighting channel installations. These semi-transparent covers transmit roughly 75-85% of light while softening the appearance of individual LEDs. You'll still notice some dot visibility at close range, but the effect becomes significantly less pronounced than with clear options.
Opal (Milky) Diffusers provide the smoothest, most uniform light output - creating that coveted continuous "light line" effect where individual LEDs become completely invisible. This premium diffusion comes at a cost: opal covers transmit only 40-50% of your LED strip's output, effectively cutting brightness nearly in half.
Your application determines which aluminum diffuser type delivers the best results. Rather than defaulting to the most popular option, consider where your led channel light will be installed and who will see it.
Where dot visibility is acceptable: Inside cabinets, behind furniture, indirect cove lighting where the led lighting channel faces away from viewers, utility areas, and any installation where the profile remains hidden from direct sight lines. In these scenarios, clear or frosted diffusers maximize your investment in LED brightness without aesthetic compromise.
Where seamless light lines are essential: Visible architectural features, floating shelves with exposed undersides, handrail lighting at eye level, commercial displays, hospitality environments, and any high-end residential application where the fixture becomes a design element. Here, opal diffusers justify their brightness reduction through superior visual quality.
Profile depth plays a crucial role in diffusion effectiveness. Industry guidelines recommend specific minimum channel heights based on LED density when using frosted covers:
This relationship explains why shallow profiles paired with low-density strips often disappoint - the diffuser simply can't blend the light before it exits. When budget constraints limit you to lower LED densities, compensate by selecting deeper profiles that give light more distance to mix before reaching the diffuser surface.
For RGB and RGBW installations, prioritize higher VLT diffusers. Colored light already appears dimmer than white light to human eyes, and cutting output by 50% with opal covers can leave your colored effects looking washed out. Frosted or clear covers preserve the vibrancy that makes dynamic color-changing installations impressive.
Material quality matters beyond just opacity levels. Premium PMMA (acrylic) diffusers resist yellowing from UV exposure and heat far better than cheaper polycarbonate alternatives. This durability consideration becomes especially important for installations near windows or in high-temperature environments where inferior materials degrade within months.
With your diffuser selection finalized, you'll have all the components needed for a complete led light profile system. The next step involves actually getting these pieces installed correctly - a process that requires specific techniques for cutting, joining, and mounting that we'll cover in detail.
You've selected the perfect aluminum profile, confirmed your LED strip compatibility, and chosen the ideal diffuser - now comes the moment of truth. How do you actually install these components to achieve that professional, seamless result? Unlike product listings that assume you'll figure it out, this section walks you through every step of cutting, joining, and mounting your led tape light channel system.
The good news? Installing aluminum extrusions doesn't require professional contractor skills. With the right tools, proper technique, and attention to detail, you can achieve results that rival custom installations costing thousands more. The key lies in understanding each phase of the process before you make your first cut.
Before touching your aluminum light channel, gather the tools and materials you'll need. Stopping mid-installation to hunt for supplies leads to frustration and often compromises results.
Essential tools for led mounting projects:
Your mounting method depends on the surface material and whether you prioritize easy removal or permanent installation. Most led tape light mounting channel installations use one of two approaches: mounting clips or direct screw mounting.
Mounting Clip Method - ideal for surface mount led strip applications where you want easy profile removal for maintenance:
Direct Screw Method - provides the most secure attachment for led tape mounting channel installations in commercial or high-traffic areas:
Standard led mounting channel lengths rarely match your exact project dimensions. Cutting aluminum profiles to size requires the right approach to avoid rough edges, burrs, or damage that compromises your finished installation.
Preparation before cutting:
Cutting technique matters:
A miter saw with a fine-toothed blade delivers the cleanest cuts with minimal effort. Position the channel securely against the saw fence, align your mark with the blade, and make a steady, controlled cut. Let the saw do the work - forcing the cut creates rough edges and potential blade binding.
If using a hacksaw, employ slow, even strokes with light pressure. Rushing creates angled cuts and excessive burring. For angle grinder users, use a thin metal cutting disc and work in a well-ventilated area while wearing appropriate safety equipment.
Finishing cut edges:
Joining multiple channel sections:
Long runs often require connecting multiple channel pieces. Specialty connectors - available as straight joiners, 90-degree corners, and T-connectors - create seamless transitions between sections. When using joining hardware:
Completing your installation:
Adhesive versus mechanical mounting considerations:
Many aluminum extrusions include adhesive backing as an alternative to clips or screws. While convenient, adhesive mounting works best on smooth, non-porous surfaces like metal, glass, or sealed laminate. For textured surfaces, painted drywall, or outdoor applications, mechanical mounting provides superior long-term reliability. In high-temperature environments or vertical installations, always supplement adhesive with mechanical fasteners to prevent gradual separation.
With your profiles properly cut, joined, and mounted, you've completed the physical installation. However, choosing the right profile for specific applications - whether residential, commercial, or architectural - requires understanding how different environments demand different solutions. Let's explore how to match profiles to your specific project type.
You've mastered the installation techniques - but here's what really separates amateur LED projects from professional results: matching your channel for led lights to the specific demands of your environment. Rather than browsing endless product catalogs wondering what might work, let's flip the approach. Start with where you're installing, then work backward to the ideal profile solution.
Every application presents unique challenges. Kitchen cabinets face heat and occasional moisture. Outdoor facades battle rain, UV exposure, and temperature swings. Commercial displays demand maximum brightness with minimal visible hardware. When you understand these environmental requirements first, selecting the right aluminum channel for led lights becomes remarkably straightforward.
Kitchen installations remain the most popular residential LED project - and for good reason. Properly illuminated countertops transform both cooking functionality and overall kitchen ambiance. However, kitchens present specific challenges that influence your under cabinet lighting channel selection.
Heat rises from cooktops and accumulates under upper cabinets. Steam from boiling water creates localized humidity spikes. Grease particles gradually coat surfaces near cooking areas. Your aluminum light profiles need to handle all three while delivering consistent, attractive illumination.
Recommended profiles for kitchen applications:
For task lighting directly above food preparation areas, frosted diffusers provide adequate brightness while softening harsh shadows from overhead illumination. Position your led tape track 1-2 inches behind the cabinet front edge to prevent direct visibility when standing at the counter.
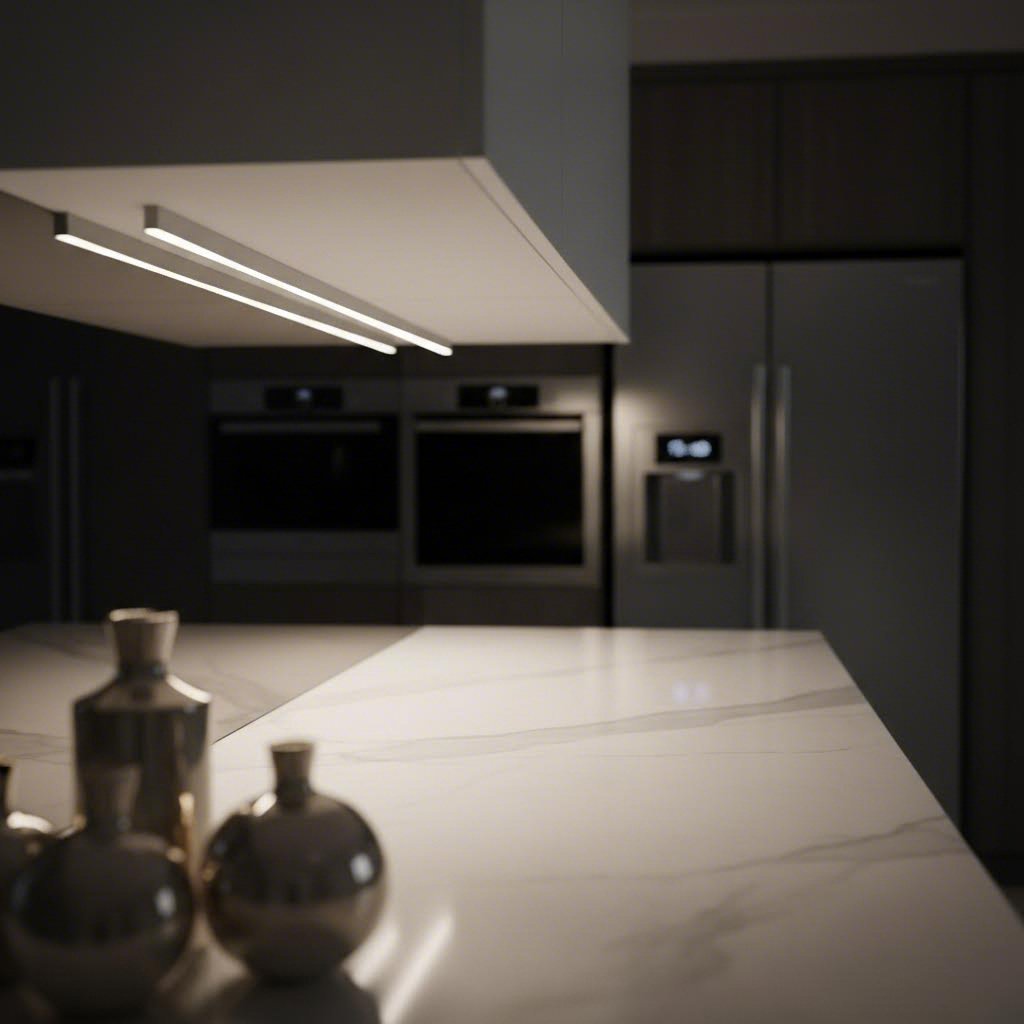
Cove lighting and living spaces demand different priorities. Here, aesthetics dominate over pure functionality. The goal shifts from illuminating tasks to creating atmosphere and highlighting architectural features.
Recessed profiles excel in cove applications where the channel hides behind a ledge or crown molding. Only the diffuser - and the soft glow it produces - remains visible. For led rope light channel installations along ceiling perimeters, deeper profiles (15-20mm) paired with opal diffusers create that seamless light line effect interior designers specify for high-end projects.
Stairway lighting serves dual purposes: safety illumination and decorative enhancement. Stair nosing profiles - those L-shaped extrusions that wrap stair treads - provide low-level visibility without disrupting night vision or creating glare during evening hours.
For stair applications, durability trumps all other considerations. Profiles must withstand foot traffic, vacuum cleaner bumps, and occasional direct contact. Look for reinforced diffuser covers and heavy-gauge aluminum construction rated for floor-level installation.
Commercial environments demand more from your aluminum extrusions than residential projects. Retail displays, hospitality venues, and architectural features face extended operating hours, higher ambient temperatures, and viewers who scrutinize lighting quality.
Retail and display lighting prioritizes color accuracy and brightness above all else. Products need to look their best under LED illumination - meaning high-CRI strips paired with clear or lightly frosted diffusers that preserve maximum light output.
Hospitality and signage applications often push profiles to their environmental limits. Restaurant exteriors, bar underbar lighting, and illuminated signage face moisture, temperature fluctuations, and cleaning chemical exposure.
For these demanding environments, IP (Ingress Protection) ratings become critical selection criteria. According to industry protection standards, different ratings suit different exposure levels:
| IP Rating | Protection Level | Suitable Applications |
|---|---|---|
| IP20 | Indoor only, no moisture protection | Interior residential, climate-controlled commercial |
| IP65 | Dust-tight, protected against water jets | Covered outdoor areas, bathroom lighting, exterior led channel under awnings |
| IP67 | Dust-tight, survives temporary submersion | Exposed exterior installations, areas prone to flooding |
| IP68 | Dust-tight, continuous submersion rated | Pool lighting, fountains, fully submerged outdoor led channel applications |
Facade and architectural lighting represents the most demanding exterior led channel applications. Building-mounted LED systems face direct sun exposure, driving rain, freezing temperatures, and thermal cycling that stresses materials over years of operation.
For true outdoor installations, standard anodized aluminum profiles may not suffice. Marine-grade anodizing, powder coating, or PVDF finishes provide superior weather resistance. Profile construction should include sealed end caps and gaskets that prevent moisture infiltration while allowing trapped condensation to escape.
Environmental selection summary:
Indoor residential projects offer the most flexibility - nearly any quality profile performs well in climate-controlled spaces. Commercial interiors demand higher thermal capacity and durability. Covered outdoor areas need IP65 minimum protection. Fully exposed exterior applications require IP67 or IP68 systems with weather-resistant finishes.
When in doubt about your specific environment, err toward higher protection ratings. The cost difference between IP65 and IP67 profiles is minimal compared to replacing a failed installation. As lighting applications grow more specialized, selecting the right quality extrusion from reliable suppliers becomes increasingly important - a topic we'll address next.
You've mapped your application requirements and understand which profile types work best - but here's where many projects stumble. Not all led extrusions are created equal, and the difference between a bargain-priced channel and a quality-engineered profile becomes painfully obvious after installation. How do you evaluate suppliers and specifications to ensure your investment delivers years of reliable performance?
Whether you're sourcing standard led tape channel systems or commissioning custom aluminium channel for led strip lighting, understanding what separates premium extrusions from budget alternatives protects your project from costly failures and disappointing results.
Imagine ordering led aluminum extrusions that look perfect in photos - then discovering the walls are too thin for proper heat dissipation, the dimensions don't match specifications, or the surface finish deteriorates within months. These scenarios happen more often than suppliers admit. Knowing what to evaluate prevents expensive surprises.
Material Quality and Alloy Selection
The aluminum alloy grade directly impacts thermal performance, structural integrity, and longevity. Premium led extrusions use 6063-T5 or 6063-T6 aluminum - alloys specifically engineered for extrusion with excellent thermal conductivity and corrosion resistance. According to manufacturing industry guidelines, 6063 aluminum delivers thermal conductivity around 201 W/mK while providing the smooth surface finish essential for LED applications.
Budget suppliers often substitute recycled aluminum blends or inferior alloys that compromise heat dissipation. Ask potential suppliers to specify the exact alloy grade - reputable manufacturers provide this information readily.
Dimensional Accuracy and Tolerances
Your led tape light extrusion must match specified dimensions precisely. Variations of even 0.5mm in internal width can mean the difference between proper LED strip fit and installation problems. Industry-standard tolerances for quality LED profiles include:
Request tolerance specifications before ordering. Suppliers who can't provide this data likely lack the quality control processes that ensure consistency across production runs.
Surface Finish Options and Durability
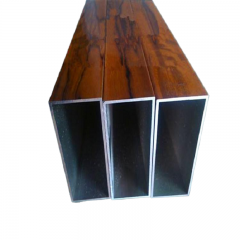
Surface treatment affects both aesthetics and long-term performance of your aluminum extrusion for led strip lights. According to industry finishing standards, different treatments suit different applications:
| Finish Type | Durability | Best Applications | Color Options |
|---|---|---|---|
| Clear Anodizing | Excellent - 10+ years | Interior, protected exterior | Natural silver, bronze tones |
| Color Anodizing | Excellent - 10+ years | Decorative, architectural | Black, champagne, rose gold, custom |
| Powder Coating | Very Good - 5-15 years | Color-matched projects | Virtually unlimited RAL colors |
| PVDF Coating | Superior - 20+ years | Exterior, harsh environments | Wide range including metallics |
For most interior led extrusion channel applications, Class I anodizing (0.7 mils thickness) provides optimal durability. Exterior installations benefit from PVDF coatings that resist UV degradation and maintain appearance for decades.
Thermal Performance Verification
The entire purpose of aluminum profiles is heat management - yet few buyers verify thermal specifications. Key indicators of adequate thermal capacity include:
Standard catalog profiles work for many projects - but what happens when your design requires specific dimensions, unique cross-sections, or integrated features that off-the-shelf options can't provide? Custom aluminium profiles for led tape open possibilities that standard products simply cannot match.
Custom extrusion projects require suppliers with comprehensive capabilities spanning the entire production chain. Evaluating potential partners involves assessing several critical factors:
For projects requiring precision aluminum solutions beyond standard offerings, manufacturers with extensive experience and integrated capabilities deliver significant advantages. Shengxin Aluminium's deep processing services exemplify this comprehensive approach - with over 30 years of industry experience, 35 extrusion presses ranging from 600T to 5500T, and advanced CNC machining centers capable of precise cutting, drilling, and bending operations.
Their surface treatment portfolio spans the full range professional LED projects demand: anodizing in custom colors including champagne and rose gold, powder coating for color-matched applications, PVDF coatings for superior weather resistance, and micro-arc oxidation for enhanced durability. This end-to-end capability from die development through mass production - combined with factory-direct pricing - makes comprehensive suppliers valuable partners for custom led extrusion channel projects.
Cost Considerations for Custom Projects
Custom extrusion pricing depends on several factors beyond raw material costs:
When evaluating quotes, compare total delivered cost including tooling, production, finishing, and logistics. The lowest per-meter price often excludes critical costs that appear later as surprises. Established suppliers with integrated capabilities frequently deliver better total value than brokers assembling components from multiple sources.
Quality led aluminum extrusions represent an investment that pays dividends over years of reliable operation. Cutting corners on material quality or supplier selection leads to premature failures, warranty claims, and replacement costs that dwarf initial savings. With your quality criteria established and supplier evaluation complete, you're ready to plan your specific LED extrusion project - bringing together all the selection factors we've covered into a cohesive implementation strategy.
You've absorbed a tremendous amount of information about aluminum extrusions for LED lights - from thermal science and profile types to compatibility charts and installation techniques. Now comes the practical question: how do you pull all these factors together into a coherent project plan? Whether you're tackling your first under-cabinet lighting upgrade or designing a complex commercial installation, a systematic approach prevents costly mistakes and delivers results that exceed expectations.
Think of project planning like assembling a puzzle. Each decision - thermal requirements, profile selection, sizing, diffuser choice, and mounting method - represents a piece that must fit with the others. Skip a piece, and gaps appear in your finished installation. Force incompatible pieces together, and the result looks wrong no matter how hard you try to make it work.
Successful led light channels installations share a common trait: they start with clear objectives before any purchasing decisions. Rushing to buy products based on attractive photos or competitive pricing leads to the compatibility issues, aesthetic compromises, and performance failures we've discussed throughout this guide.
The most important factor in any LED extrusion project isn't the profile you choose - it's matching that choice precisely to your specific application requirements, environmental conditions, and visual expectations.
Before purchasing any components for your lighting channel system, work through this comprehensive planning checklist:
With your project requirements documented, you're positioned to source components confidently. For standard profile lights applications using common dimensions and finishes, quality catalog products from reputable suppliers serve most needs effectively. Verify specifications match your requirements, order samples when possible, and confirm return policies before committing to large quantities.
Complex projects requiring custom specifications - unique cross-sections, specific dimensions, integrated features, or specialty finishes - benefit from working with manufacturers offering comprehensive capabilities. The value of end-to-end support from die development through mass production becomes apparent when standard options can't meet your requirements. Shengxin Aluminium's technical team provides exactly this level of support for projects demanding precision aluminum solutions, with engineering consultation that helps optimize designs for both performance and manufacturability.
For channel for led installations where even small variations impact visual consistency - think continuous runs across large spaces or high-visibility architectural features - factory-direct partnerships ensure the dimensional accuracy and finish quality that define professional results.
Your tape light channel project timeline should include:
This guide serves as your reference resource for track for led strip lighting projects - whether you're starting your first installation or refining techniques for your tenth. Bookmark it, return to the specific sections relevant to your current project phase, and use the comparison tables and checklists to validate your decisions.
Every professional installation began with someone learning these fundamentals. The difference between acceptable results and exceptional outcomes lies in applying this knowledge systematically rather than relying on guesswork. Your led light channels project deserves that attention to detail - and now you have the framework to deliver it.
Aluminum LED extrusions typically range from $2-15 per linear foot for standard profiles, depending on size, finish, and quality. Custom extrusions involve additional die tooling costs of $500-$5,000, which amortizes across production volume. Premium finishes like anodizing or powder coating add 15-40% to base costs. For large projects requiring custom specifications, working with manufacturers like Shengxin Aluminium offering factory-direct pricing can significantly reduce per-unit costs while ensuring quality 6063-T5 aluminum construction.
While aluminum extrusions offer excellent thermal management and durability, they have some limitations. Higher upfront costs compared to plastic alternatives, though justified by superior heat dissipation and longevity. Installation requires cutting tools and more effort than adhesive-only solutions. Custom profiles need minimum order quantities (typically 500-1,000kg) and lead time for die development. However, these disadvantages are offset by aluminum's ability to extend LED lifespan by up to 70% through proper thermal management.
Yes, LED lights can be safely mounted on metal surfaces when installed correctly. Metal actually benefits LED performance by conducting heat away from LED junctions. However, ensure proper electrical isolation between the LED strip's circuitry and the metal surface. Use aluminum extrusion channels with non-conductive mounting methods, or apply thermal adhesive tape that provides both heat transfer and electrical insulation. Always verify your LED strips are properly rated and the metal surface is grounded appropriately.
Select an aluminum channel with internal width measuring 100-150% of your LED strip width for optimal fit. For 8mm strips, choose channels with 10-12mm internal width. For 10mm strips, select 11-15mm channels. For 12mm strips, use 13-18mm channels. This sizing ensures secure mounting with proper thermal contact while allowing easy installation. Always measure your strip's actual PCB width, not the package dimensions, and account for waterproof coating thickness on sealed strips.
Choose diffusers based on your visibility and brightness priorities. Clear diffusers transmit 85-95% of light but show visible LED dots - ideal for hidden installations. Frosted diffusers offer balanced 75-85% transmission with reduced dot visibility, suitable for most residential projects. Opal (milky) diffusers create seamless light lines but reduce output to 40-50% - best for visible architectural features where aesthetics matter most. Profile depth also affects diffusion; deeper channels improve light mixing before reaching the diffuser.


 Onlineservice
 0086 136 3563 2360
 sales@sxalu.com
 +86 136 3563 2360
 Deutsch
 English
 français
 русский
 español
 português
 العربية
 ไทย
ไทย Việt
Việt Українська