
Picture this: you wake up on a chilly morning, draw back the curtains, and find your windows dripping with condensation. Water pools on the sill, and you notice dark spots creeping into the corner of the frame. Sound familiar? If you live in a modern, well-insulated home, you have likely battled stuffy rooms, foggy glass, and the lingering worry of mould taking hold. The culprit is often surprisingly simple: your home is too airtight for its own good.
This is where uPVC window vents come into play. These unassuming additions to your window frames might not look like much, but they serve a critical role in keeping your indoor environment fresh, dry, and healthy. Whether you are dealing with persistent condensation in your bathroom or a living room that feels stale by evening, understanding how vents in uPVC windows work could be the key to transforming your home comfort.
So, what exactly are these vents? A uPVC window air vent, commonly known as a trickle vent, is a small opening integrated into the frame of your window. Positioned at the top of the frame, these narrow slots allow a controlled amount of fresh air to "trickle" into your home, even when the window remains fully closed and locked.
Think of them as your home's quiet breathing mechanism. Unlike opening a window wide, which can let in noise, rain, or security concerns, trickle vents provide continuous background ventilation without any of those drawbacks. Modern versions typically feature an adjustable slider or cover on the interior side, giving you control over the airflow. When you want more fresh air, slide it open. On particularly cold or windy days, simply close it down.
These vents are constructed from durable materials designed to withstand weather exposure, and they include an external canopy with insect mesh to keep unwanted visitors out. The result? A steady exchange of stale indoor air with fresh outdoor air, all while maintaining your home's security and thermal efficiency.
Here is the irony of energy-efficient living: the better your windows insulate, the more problems you might face with air quality. Older homes with single-glazed windows and natural gaps in their construction had plenty of unintentional ventilation. Draughty, yes, but rarely stuffy.
Modern double and triple-glazed uPVC windows with vents address a real challenge. Today's high-performance glazing creates an almost airtight seal, which is excellent for keeping heating bills down but problematic for air circulation. According to guidance in Approved Document Part F, as homes become more airtight, deliberate ventilation solutions become essential to maintain healthy indoor environments.
Without adequate airflow, moisture from everyday activities like cooking, showering, and even breathing accumulates inside your home. This trapped humidity condenses on the coldest surfaces, typically your windows, leading to the familiar frustration of water streaming down the glass each morning.
Installing uPVC window air vents offers a practical solution to this modern problem. By providing continuous background ventilation, they help regulate indoor humidity levels and ensure fresh air reaches every room. The key benefits include:
Whether you are planning a renovation or simply looking to improve your current living conditions, understanding the role of proper window ventilation is the first step toward a fresher, healthier home.
If you are installing new windows or replacing existing ones, you might be wondering whether trickle vents are a choice or a requirement. The answer lies in UK Building Regulations, specifically a document called Approved Document Part F. Sounds technical? Do not worry. We will break it down into plain English so you understand exactly what the rules mean for your home.
Understanding these regulations matters because non-compliant window installations can create problems down the line, from failed inspections to difficulties when selling your property. More importantly, the rules exist to protect your health by ensuring adequate ventilation in modern, airtight homes.
Approved Document Part F is the official guidance covering ventilation requirements for buildings in England. Updated in June 2022, this document sets out how homes should be ventilated to maintain healthy indoor air quality. The core principle is straightforward: every dwelling needs adequate means of ventilation to protect occupants from mould growth and indoor air pollution.
So, do uPVC windows need trickle vents? Here is when they become mandatory:
One important point the official government FAQ makes clear: homeowners cannot simply sign a disclaimer refusing trickle vents. The work must comply with Building Regulations in full, and competent person schemes cannot certify installations that fail to meet these requirements.
What about night-latch positions, where a window locks slightly ajar? According to the regulations, this is not an acceptable substitute for background ventilation because it does not provide a sufficiently secure solution. Trickle vents for uPVC windows remain the standard approach.
When shopping for trickle vents, you will encounter a term called equivalent area, often abbreviated as EA and measured in square millimetres (mm²). This is not the physical size of the vent slot but rather a measurement of how much air can actually flow through it.
Imagine comparing two garden hoses. One might look wider, but if it has a kink inside, less water gets through. Equivalent area tells you the effective airflow capacity, accounting for the vent's internal design and any obstructions. The higher the EA number, the more air the vent can deliver.
Different rooms require different levels of background ventilation based on their purpose and floor area. The table below shows the minimum equivalent area requirements for uPVC windows with trickle vents in typical UK homes:
| Room Type | Multi-Storey Homes (Minimum EA) | Single-Storey Homes (Minimum EA) |
|---|---|---|
| Living Rooms | 8,000 mm² | 10,000 mm² |
| Bedrooms | 8,000 mm² | 10,000 mm² |
| Kitchen | 8,000 mm² | 10,000 mm² |
| Bathroom | 4,000 mm² | 4,000 mm² |
| Utility Room | No minimum specified | No minimum specified |
| Toilet (WC only) | No minimum specified | No minimum specified |
Notice how single-storey properties like bungalows require higher equivalent areas for habitable rooms. This accounts for the different airflow dynamics compared to multi-level homes where air naturally circulates between floors.
The regulations also specify minimum numbers of ventilators. For most houses, living spaces and kitchens should have no fewer than five background ventilators, reduced to four in one-bedroom properties. These can be distributed across multiple windows in the same room to achieve the required total equivalent area.
Another practical consideration: trickle vents should ideally be positioned at least 1.7 metres above floor level. This height helps prevent cold draughts from causing discomfort, directing incoming air upward where it mixes with warmer room air before descending.
If your property has existing wall ventilators that already meet the minimum equivalent area requirements, you may not need additional trickle vents when replacing windows. However, air vents for combustion appliances like gas fires do not count toward Part F compliance, as these serve a different purpose under separate regulations.
For those wanting complete details on specific scenarios, including properties with limited external walls or open-plan layouts, the full official guidance is available through the gov.uk Building Regulations documentation. Your window installer should also be able to advise on compliance requirements for your particular situation.
With the regulatory framework understood, the next step is exploring the different types of trickle vents available and finding the right option for your specific needs and property type.

Now that you understand why ventilation matters and what the regulations require, the next question is obvious: which type of trickle vent should you choose? Not all window vents for uPVC windows are created equal. Some simply let air in, while others tackle noise, respond automatically to humidity, or offer enhanced security for overnight use.
Choosing the right vent depends on your specific situation. Live on a quiet street? A basic model will serve you well. Battling traffic noise from a busy road? You will want something more sophisticated. Let us explore the main categories so you can make an informed decision.
Standard uPVC window trickle vents are the workhorses of background ventilation. These are the simple slot-style vents you will find on most modern windows, featuring a straightforward design that has proven effective for decades.
How do they work? A slot is cut into the top of your window frame, with an internal cover that you can slide open or closed manually. On the exterior, a canopy with insect mesh protects against rain and unwanted visitors. When open, air flows through naturally, driven by the slight pressure differences between inside and outside your home.
Standard trickle vents typically provide between 2,000 and 8,000 mm² of equivalent area, covering most residential ventilation requirements. Their key advantages include:
The main limitation? Standard vents offer minimal noise reduction. If you live in a quiet area, this is not a concern. However, if external noise is an issue, you will want to consider the next category.
Imagine finally solving your condensation problem, only to be kept awake by traffic noise streaming through your new vents. This is where acoustic trickle vents for uPVC windows become essential.
These specialised vents look similar to standard models from the outside, but their internal construction is far more sophisticated. According to industry experts at Titon, acoustic trickle vents incorporate sound-absorbing materials and complex internal chambers that force sound waves to travel through multiple turns. This design dissipates the energy from noise while still allowing air to flow freely.
The performance of acoustic vents is measured using a rating called Dn,e,w expressed in decibels. Higher numbers indicate better sound reduction. For context, a vent rated at 44 dB provides significantly better noise attenuation than one rated at 35 dB. When comparing products, look for these ratings rather than relying on general marketing claims.
Who needs acoustic vents? Consider them if your property is:
Titon trickle vents for uPVC windows, along with products from other reputable manufacturers, often incorporate dual attenuator systems combining an internal vent with an external canopy designed to work together. High-performing gaskets improve sealing when the vent is closed, decisively blocking external noise while still allowing you to open up for ventilation when conditions permit.
The trade-off is cost. Acoustic vents typically cost two to three times more than standard equivalents, and installation may be more involved. However, for properties in noisy locations, the investment in quality sleep and peaceful living is often worthwhile.
What if your vents could think for themselves? Humidity-controlled trickle vents do exactly that, automatically adjusting their opening based on moisture levels in the room.
These clever devices, such as Glidevale's Energy Saver Humidity Sensitive Trickle Ventilator, contain sensors that detect rising humidity. When moisture levels increase, perhaps while you are cooking or after a shower, the vent opens wider to expel damp air. As humidity drops, it closes down to reduce heat loss. No power supply required, and no user intervention needed.
This automatic operation makes humidity-controlled vents particularly suitable for:
A uPVC window night vent offers a different approach. Rather than responding to humidity, night vents are designed to allow secure ventilation while you sleep. They typically feature a locking mechanism that holds the window in a slightly open position, allowing more airflow than a trickle vent while maintaining security against intrusion.
Night vents are particularly popular in bedrooms where adequate ventilation during sleep hours improves rest quality. However, remember that building regulations do not accept night-latch positions as a substitute for proper background ventilation, so you will typically need trickle vents as well.
With several options available, this comparison table helps you identify which type of vent suits your situation:
| Vent Type | Noise Reduction | Airflow Control | Price Range | Best Use Cases |
|---|---|---|---|---|
| Standard Trickle Vent | Minimal | Manual slider | £5-£15 per unit | Quiet locations, budget projects, straightforward compliance |
| Acoustic Trickle Vent | High (35-50+ dB) | Manual slider | £20-£50 per unit | Busy roads, flight paths, urban areas, planning requirements |
| Humidity-Controlled Vent | Low to Moderate | Automatic | £25-£45 per unit | Kitchens, bathrooms, rental properties, set-and-forget |
| Night Vent | Low | Fixed secure position | £15-£30 per unit | Bedrooms, enhanced purge ventilation, warm weather |
Acoustic versions of humidity-controlled vents are also available for properties that need both automatic operation and noise reduction. These premium options combine the best features but come at a higher price point.
Concerned about how vents will look on your windows? Modern trickle vents are available in a range of finishes to match your frames seamlessly.
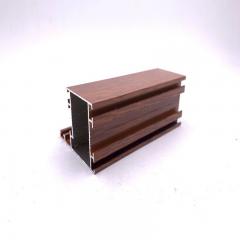
White uPVC window vents remain the most popular choice, blending invisibly with standard white frames. For properties with coloured or woodgrain-effect windows, brown uPVC window vents offer an excellent alternative, available in various shades from light oak to dark rosewood tones.
Many manufacturers also offer grey, black, anthracite, and cream finishes. Higher-end aluminium vents can be powder-coated to virtually any RAL colour, which is particularly useful for listed buildings or high-specification developments where colour matching is critical.
When selecting vents, request samples if possible to compare against your existing frames in natural light. A close match is achievable with most modern products, ensuring your ventilation solution enhances rather than detracts from your windows' appearance.
Understanding these options puts you in a strong position to choose the right vents for your needs. But what if your windows were installed without trickle vents? The next section explores whether retrofitting is possible and how to assess your existing frames for compatibility.
Perhaps you had your windows installed before current regulations took effect, or maybe you simply did not realise how important background ventilation would become. Either way, you are now facing condensation issues and wondering: can you add vents to uPVC windows that were installed without them?
The good news is that retrofitting trickle vents to uPVC windows is entirely possible in most cases. However, not every window is suitable, and understanding the difference between your options will help you make the right decision for your property.
When it comes to getting trickle vents into your home, you have two distinct paths: factory-fitted vents installed with new windows, or retrofit solutions added to your existing frames.
Factory-fitted vents are integrated during the window manufacturing process. The frame is designed from the outset to accommodate the vent, with pre-formed channels and reinforced sections where needed. This approach delivers the cleanest finish and optimal performance because everything is engineered to work together. If you are ordering new windows, always specify trickle vents at this stage since it is far simpler and more cost-effective than adding them later.
Retrofit vents are added to windows after installation. This involves carefully cutting slots into the existing frame, then fitting internal and external vent components into the newly created opening. According to Double Glazing Direct, it is possible to retrofit trickle vents to existing windows provided the top of the window frame is wide enough to accommodate them.
Can you retrofit trickle vents to uPVC windows yourself? Technically, yes. The process requires basic DIY skills, careful measurement, and the right tools. However, the question of whether you should depends on your confidence level and the specifics of your windows. Cutting into uPVC frames is not reversible, and mistakes can compromise both the appearance and structural integrity of your windows.
The cost difference between the two approaches is significant. Retrofit vents to uPVC windows typically cost between £30 and £80 per window when professionally installed, whereas factory-fitted vents add only a modest amount to new window prices. If your windows are aging anyway, replacing them with vented versions often makes more financial sense than retrofitting.
Before committing to a retrofit project, you need to determine whether your existing windows can actually accommodate trickle vents. Not all frames are suitable, and attempting to fit vents into incompatible windows can cause damage or result in poor performance.
The most critical factor is frame depth. Standard trickle vents require at least 30-40mm of frame width at the top where the vent will be installed. Modern uPVC windows typically meet this requirement, but some older or budget frames may have narrower sections.
Here is how to check your windows. Start by examining the top of the frame where it meets the wall. Using a ruler, measure the visible face of the frame from front to back. If you have access to the window manufacturer's specifications, even better, since these will confirm internal cavity dimensions.
Beyond measurements, look for these signs that your windows are suitable for retrofitting:
Can trickle vents be fitted to existing uPVC windows that do not meet all these criteria? Sometimes surface-mounted options provide an alternative. These vents attach to the frame face rather than fitting into a cut slot, making them suitable for frames with unusual dimensions. However, they are more visible and may not deliver the same equivalent area as integrated solutions.
Do you need a professional assessment? For straightforward modern uPVC windows in good condition, a competent DIYer can usually determine suitability themselves. However, professional assessment is recommended in these scenarios:
Most window installers will assess your frames for free or for a nominal fee, providing peace of mind before you commit to the project. They can also advise whether retrofitting makes sense compared to window replacement, particularly if your existing glazing is approaching the end of its lifespan.
If your windows pass the compatibility check, the next step is understanding exactly how the installation process works and whether to tackle it yourself or call in a professional.

You have confirmed your windows are compatible and chosen the right vents for your needs. Now comes the practical question: should you fit them yourself or hire a professional? Fitting trickle vents to uPVC windows is within reach of confident DIYers, but the process does involve permanently cutting into your window frames. Understanding exactly what is involved will help you decide which approach suits your skills and situation.
This section walks through the complete installation process, from gathering your tools to testing the finished vents. Even if you ultimately choose professional installation, understanding these steps helps you evaluate quotes and ensure the work is done correctly.
Before you begin fitting uPVC window vents, gather everything you need. Having the right tools makes the difference between a neat, professional finish and a frustrating experience. Here is what you will need:
Before starting, read through your vent manufacturer's instructions completely. Different products may have specific requirements, and following their guidance protects any warranty. Also check the weather forecast since calm, dry conditions make working on windows much easier, particularly for the external components.
Ready to learn how to fit trickle vents to existing uPVC windows? Follow these steps carefully, and take your time with each stage. Rushing increases the risk of mistakes that cannot be easily corrected.
The entire process typically takes 30 to 60 minutes per window for a competent DIYer. Installing trickle vents in uPVC windows becomes faster with practice, so if you have multiple windows, expect the later ones to go more smoothly than the first.
While how to install trickle vents in uPVC windows is not beyond capable homeowners, certain situations clearly call for professional help. Knowing when to step back can save you from costly mistakes and frustration.
Consider professional installation if:
The warranty question deserves special attention. Many window manufacturers specify that modifications must be carried out by certified installers to maintain warranty protection. If your windows are relatively new and still covered, the cost of professional fitting is worthwhile insurance against future claims being rejected. Even if the warranty has expired, professional installation often comes with its own guarantee on the work, giving you recourse if problems develop.
Cost comparison: DIY installation costs roughly £10-15 per window for the vent kit alone. Professional installation typically runs £50-80 per window including parts and labour. For a single window, DIY makes financial sense if you are confident. For five or more windows, professionals offer time savings and peace of mind that may justify the additional expense.
Whatever route you choose, properly installed trickle vents will serve your home for years. With ventilation sorted, you might wonder how these simple vents compare to more elaborate ventilation systems, and whether there are alternatives worth considering for your property type.
With trickle vents now firmly on your radar, you might be wondering whether they are actually the best solution for your home. After all, extractor fans have been around for decades, and you have probably heard about whole-house ventilation systems that promise to revolutionise indoor air quality. How do these options stack up against simple air vents in uPVC windows?
The truth is that different ventilation methods serve different purposes, and the best choice depends on your property type, budget, and specific air quality challenges. Understanding these alternatives helps you make an informed decision rather than simply accepting whatever your installer recommends.
The fundamental difference between trickle vents and mechanical systems comes down to one word: power. Trickle vents are entirely passive, relying on natural pressure differences between inside and outside your home to move air. Mechanical systems use fans and motors to actively push or pull air, giving you far greater control over ventilation rates.
Extractor fans are the simplest mechanical option. Found in most kitchens and bathrooms, these units actively remove moisture-laden air at the source. A decent bathroom extractor might shift 15-25 litres of air per second during operation, far exceeding what any trickle vent achieves. However, they only work when switched on, and many homeowners forget to run them long enough to be effective.
MVHR systems (Mechanical Ventilation with Heat Recovery) represent the premium end of the market. According to industry analysis, these whole-house systems continuously extract stale air from wet rooms while supplying filtered fresh air to living spaces. The clever part? They capture up to 90% of the heat from outgoing air and use it to warm incoming air, dramatically reducing the energy penalty of ventilation.
Decentralised units like single-room MVHR fans offer a middle ground. These wall-mounted devices provide heat recovery ventilation for individual rooms without the ductwork complexity of whole-house systems. Running costs can be remarkably low, with some units consuming just a few pounds of electricity annually.
So why would anyone choose passive vents for uPVC windows over these sophisticated alternatives? The answer lies in practicality:
The main limitation of air vents for upvc windows is their passive nature. On still days with minimal pressure difference between inside and outside, airflow reduces significantly. Mechanical systems maintain consistent ventilation regardless of weather conditions.
A common point of confusion arises when comparing trickle vents with window restrictors or night-latch positions. While both involve windows and airflow, they serve fundamentally different purposes.
Background ventilation is what trickle vents provide. This is continuous, low-level air exchange happening constantly in the background, even while you sleep or are away from home. The airflow is modest but persistent, gradually diluting indoor pollutants and removing excess moisture before it accumulates.
Purge ventilation is what open windows provide, whether fully open or held ajar by a restrictor. According to UK Building Regulations, purge ventilation requires an openable area equivalent to at least 1/20th of the room's floor area. This rapid ventilation is designed for short-term use to quickly clear moisture after cooking or showering, or to flush out odours and stale air.
Here is the key distinction: you cannot substitute one for the other. A window held on a night latch provides purge ventilation but not adequate background ventilation. Conversely, trickle vents cannot achieve the rapid air exchange needed to clear a steamy bathroom in minutes.
Window restrictors have their place, particularly for:
However, restrictors present practical issues for continuous ventilation. Security concerns, rain ingress, noise intrusion, and heat loss all limit when you can realistically leave windows ajar. This is precisely why Building Regulations specify that night-latch positions do not satisfy background ventilation requirements.
The ideal approach combines both: air vents in upvc windows for continuous background ventilation, plus openable windows for purge ventilation when needed.
Your property type significantly influences which ventilation approach makes most sense. What works brilliantly in a new-build house might be impractical in a Victorian terrace or a modern flat.
Flats and apartments present unique challenges. External walls may be limited, shared with neighbours, or subject to leasehold restrictions on modifications. Air vents for upvc windows often represent the most straightforward solution, though bathroom extractor fans remain essential for wet rooms. MVHR systems are less common in flats due to space constraints, though decentralised single-room units can work well.
Semi-detached and terraced houses typically have multiple external walls, making various ventilation options viable. Trickle vents combined with extractor fans satisfy most requirements cost-effectively. Properties in noisier locations benefit from acoustic vents on street-facing windows.
Detached houses offer the greatest flexibility. Larger properties with good attic access are ideal candidates for whole-house MVHR if the budget allows. However, for most homeowners, the combination of quality vented upvc windows and properly specified extractor fans delivers excellent results at a fraction of the cost.
Period properties require careful consideration. Listed buildings may face restrictions on visible alterations, making trickle vents problematic if they affect the external appearance. Specialist slimline vents or alternative approaches like wall-mounted ventilators may be necessary. Consult your local conservation officer before making changes to listed or heritage buildings.
New builds should already comply with current ventilation standards, typically through upvc windows air vents as standard. If you are purchasing new construction, verify that the installed vents meet the equivalent area requirements for each room.
This comparison table summarises how different ventilation solutions perform across key criteria:
| Criteria | Trickle Vents | Extractor Fans | MVHR Systems | Window Restrictors |
|---|---|---|---|---|
| Initial Cost | £10-50 per window | £50-200 per unit | £2,000-6,000+ installed | £15-40 per window |
| Running Costs | None | £5-15 per year each | £30-80 per year | None (increases heating) |
| Effectiveness | Good for background | Excellent for wet rooms | Excellent whole-house | Good for purge only |
| Noise Impact | Some external noise | Fan noise when running | Very quiet operation | Significant noise ingress |
| Flats | Excellent | Essential for bathrooms | Limited suitability | Security concerns |
| Houses | Excellent | Essential for wet rooms | Good if budget allows | Supplementary use |
| Period Properties | May need approval | Usually acceptable | Installation challenges | Usually acceptable |
| New Builds | Standard requirement | Standard in wet rooms | Increasingly specified | Supplementary |
How you use your trickle vents should change with the seasons to balance ventilation needs against comfort and energy efficiency.
During winter, the temptation is to close vents completely to prevent cold draughts. Resist this urge. Winter actually brings the highest risk of condensation because warm, moist indoor air meets cold window surfaces. Keep vents at least partially open, particularly in bedrooms overnight and in kitchens and bathrooms after moisture-generating activities. The modest heat loss is worthwhile insurance against damp and mould problems.
During summer, vents can work harder. Open them fully to maximise natural airflow, and supplement with open windows during cooler morning and evening hours. On the hottest days, you might actually close vents and windows to keep hot outside air from entering, then open everything once temperatures drop.
Spring and autumn offer the best natural ventilation conditions. Moderate outdoor temperatures mean you can open vents and windows liberally without significant heating or cooling penalties. Take advantage of these shoulder seasons to thoroughly air your home.
Whatever the season, remember that consistent background ventilation delivers cumulative benefits. Short periods of closure are fine, but days or weeks with vents sealed creates the conditions that lead to condensation, musty smells, and eventually mould growth.
With a clear understanding of how trickle vents compare to alternatives, you are well-equipped to choose the right approach for your home. But installation is just the beginning. Keeping your vents working effectively requires ongoing attention, which brings us to maintenance and troubleshooting.
You have invested time and money into getting your uPVC window vents installed correctly. Now comes the part that many homeowners overlook: keeping them working effectively for years to come. Unlike mechanical systems that demand regular servicing, trickle vents are remarkably low-maintenance. However, neglecting them entirely leads to reduced airflow, frustrating problems, and eventually the need for premature replacement.
The good news? A few minutes of attention every few months is all it takes to maintain optimal performance. This section covers everything you need to know about cleaning upvc window vents, diagnosing common issues, and recognising when replacement becomes necessary.
Ever noticed your vents seem less effective than when first installed? Dust, debris, and even insect residue gradually accumulate inside the narrow channels, restricting the airflow your vents were designed to provide. Regular cleaning restores full function and extends the lifespan of your ventilation system.
How often should you clean? For most homes, cleaning trickle vents upvc windows every three to four months keeps them functioning well. However, increase this frequency if you live near busy roads where particulate pollution is higher, in rural areas with seasonal pollen and seeds, or in properties with smokers or pets that generate additional airborne particles.
Here is how to clean upvc window vents safely and effectively:
What to avoid: Never use abrasive cleaners, scouring pads, or harsh chemicals like bleach or white spirit on your vents. According to Anglian's maintenance guide, products containing solvents can damage uPVC surfaces and decorative finishes. Pressure washers are also off-limits as they can force water into the frame cavity or dislodge seals.
While cleaning, take the opportunity to inspect the external canopy. Check that the weatherproof hood remains securely fixed and that rainwater can drain away freely. Blocked drainage on the external component can lead to water entering the vent channel rather than being deflected.
Even well-maintained vents occasionally develop issues. Before calling a professional or ordering replacements, work through these common problems and their solutions. Many issues have simple fixes that take just minutes to resolve.
Identifying symptoms and solutions:
If basic troubleshooting does not resolve your issue, the vent components may have reached the end of their serviceable life. Fortunately, replacement is straightforward and far less expensive than replacing entire windows.
Trickle vents are durable but not immortal. After years of exposure to weather, UV light, and regular use, they eventually wear out. Recognising the signs of terminal decline helps you plan replacement before problems become serious.
Signs that repair is no longer viable:
Sourcing replacement trickle vents for uPVC windows: The good news is that replacement vents are widely available and reasonably priced. Start by measuring your existing vent to determine the required size. Note the slot length, the distance between fixing holes, and whether you need internal, external, or both components.
Many manufacturers produce vents to standard dimensions, making direct replacement straightforward. If your original vents came from a specific manufacturer like Titon, Greenwood, or Renson, searching for their replacement parts often yields exact matches. However, compatible alternatives from other suppliers usually fit standard installations perfectly well.
When ordering replacement upvc window vents, consider whether to upgrade rather than simply replace like-for-like. If noise has become an issue, switching to acoustic vents during replacement makes sense. Similarly, if you have struggled with condensation despite having vents, higher equivalent area replacements may resolve the problem.
Fitting replacement vents: If the existing slot dimensions match your new vents, replacement involves simply unscrewing the old components and fitting the new ones. No cutting or frame modification is needed. This makes uPVC window vent replacement a genuine DIY project for most homeowners, taking just 15-20 minutes per window.
However, if you want to upgrade to larger vents or different types, the existing slot may need enlargement. This brings the same considerations as new installation: assess your comfort with cutting uPVC, and consider professional help if the modification is beyond your skills.
With proper maintenance and timely replacement when needed, your window vents will continue protecting your home from condensation and maintaining healthy indoor air quality for the long term. For landlords and property managers, these same principles apply, though additional regulatory requirements come into play, which the next section explores.
Managing a rental property comes with responsibilities that extend well beyond collecting rent and fixing leaky taps. Ventilation might not be the first thing on your mind when reviewing your landlord obligations, but inadequate airflow can quickly escalate into serious compliance issues, tenant complaints, and costly remediation work. If your tenants are reporting condensation, musty smells, or visible mould, your ventilation provision is likely part of the problem.
Whether you own a single buy-to-let flat or manage a portfolio of properties, understanding how uPVC windows vents fit into the regulatory landscape protects both your tenants' health and your legal position. This section explains what the law requires and how to demonstrate compliance.
As a landlord, you are legally obligated to provide accommodation that does not pose health risks to your tenants. Ventilation sits at the heart of this responsibility, governed primarily by the Housing Health and Safety Rating System (HHSRS).
What exactly is the HHSRS? According to the National Residential Landlords Association, the HHSRS is a risk-based assessment method used by local authority inspectors to evaluate housing conditions in England and Wales. Rather than prescribing specific standards, inspectors identify potential hazards and score their severity. If a hazard scores high enough to be classified as Category 1, the local authority must take enforcement action.
Where does ventilation fit in? Damp and mould growth is one of the 29 hazards assessed under HHSRS. Inadequate ventilation directly contributes to this hazard by allowing moisture to accumulate on cold surfaces. According to the same guidance, a well-heated and well-ventilated home is likely to be free of such hazards. The property should be adequately ventilated throughout so that ordinary use does not require opening windows or cause excess humidity buildup.
This means vents on uPVC windows are not merely a nice-to-have feature in rental properties. They form part of your defence against HHSRS enforcement. If a local authority inspector finds Category 1 damp and mould hazards resulting from poor ventilation, you face:
Beyond HHSRS, the broader fitness of your property for habitation means tenants can take direct action if ventilation is inadequate. The Homes (Fitness for Human Habitation) Act 2018 gives tenants the right to take landlords to court if their home is unfit, with ventilation specifically listed as a factor courts will consider.
The practical takeaway? Ensure every habitable room has appropriate background ventilation. For most properties, uPVC window frame vents provide the simplest solution, meeting regulatory requirements without the complexity and maintenance demands of mechanical systems.
If you operate a House in Multiple Occupation, ventilation requirements become more stringent. HMOs house multiple unrelated tenants sharing facilities, creating higher moisture loads and greater risk of condensation problems if ventilation is inadequate.
According to Milton Keynes Council's HMO Amenity Standards, which reflect typical local authority expectations, all units of accommodation must be ventilated directly to external air. Windows should have an openable area of at least 1/20th of the floor area. Additionally, where natural ventilation is inadequate, mechanical ventilation must be fitted in accordance with current Building Regulations.
For kitchens, bathrooms, and shower rooms in HMOs, the standards are particularly clear: where natural ventilation is insufficient, mechanical extraction to the outside is required. Cooker hoods only count if they vent externally rather than recirculating air. Every bathroom and shower room needs mechanical ventilation meeting Building Regulations, typically coupled to the light switch with an appropriate overrun period.
What does this mean for your window ventilation strategy? Trickle vents in bedroom windows provide essential background ventilation for sleeping areas, but they cannot substitute for proper extraction in wet rooms. A compliant HMO typically combines:
HMO licensing applications require you to demonstrate adequate ventilation provision. Inspectors will check that ventilation meets standards, and non-compliance can result in licence refusal or conditions requiring remediation before approval.
Staying compliant requires systematic attention to ventilation across your property portfolio. Use this checklist to assess your current position and identify any gaps:
Good documentation protects you in disputes and demonstrates due diligence to inspectors. For each property, maintain records including:
During tenant handovers, explain how ventilation systems work. Show tenants where trickle vents are located and demonstrate the slider controls. Provide written guidance explaining that vents should remain open, particularly in bedrooms overnight and during moisture-generating activities. This simple step reduces the likelihood of tenants sealing vents shut and then complaining about condensation.
Include ventilation guidance in your tenant welcome pack. Explain the connection between closed vents and condensation problems, and make clear that reporting ventilation issues promptly is the tenant's responsibility. This creates a documented trail showing you have educated tenants about proper use of the ventilation provided.
For HMO properties, consider posting simple instructions near vents and extractor fans in common areas. Clear signage reminding occupants to use extraction when cooking or showering reinforces good habits across a multi-occupant household.
With compliance requirements understood and documentation in place, landlords are well-positioned to maintain healthy, legally compliant properties. The final consideration is selecting quality ventilation products that will perform reliably over time, which the next section addresses.

You have navigated the regulations, explored the different types, and perhaps even assessed your existing windows for retrofit compatibility. Now comes the decision that will affect your home comfort for years to come: which trickle vent should you actually buy? With dozens of products on the market ranging from budget options to premium solutions, knowing what separates a quality uPVC window vent from a disappointing purchase saves both money and frustration.
The right trickle vent for upvc windows delivers reliable ventilation without drawing attention to itself. It opens and closes smoothly, resists weathering, and matches your window frames so seamlessly that visitors never notice it. The wrong choice results in draughts, stiff mechanisms, faded plastic, and the nagging realisation that you will need replacements far sooner than expected.
Before comparing specific products, understand the criteria that distinguish quality window vents upvc from inferior alternatives. Evaluating these factors systematically ensures you make an informed decision rather than simply choosing the cheapest option or the first result in your search.
Equivalent Area Rating: This is your starting point. As discussed in the building regulations section, equivalent area (EA) measured in mm² determines how much air can actually flow through the vent. According to industry guidance from Duffells, the equivalent area represents the size of an equivalent sharp-edged circular orifice that would allow the same airflow under identical pressure conditions. Higher EA ratings mean greater ventilation capacity. Match your vent selection to the requirements of each room, remembering that habitable rooms in multi-storey homes typically need 8,000 mm² while bathrooms require 4,000 mm².
Noise Reduction Properties: If you live near busy roads or in urban areas, the sound insulation rating matters significantly. Look for vents tested to BS EN 13141-1:2019, with airborne sound insulation measured in decibels (dB). Standard vents offer minimal noise reduction, typically around 30-35 dB, while acoustic models can achieve 42 dB or higher. For bedrooms facing traffic, investing in enhanced acoustic performance pays dividends in sleep quality.
Ease of Operation: A vent you cannot easily open becomes a vent that stays permanently closed. Quality products feature smooth-action sliders that move freely without sticking or requiring excessive force. Test the mechanism if possible before purchasing, or check product reviews mentioning operational smoothness. The control should be accessible when the window is in its normal position, not hidden behind curtains or difficult to reach.
Durability and Weather Resistance: Your upvc window trickle vent faces constant exposure to UV light, rain, temperature fluctuations, and wind. According to Shengxin Aluminium's comprehensive guide, quality vents should resist corrosion, UV degradation, and maintain their operation over years of use. Look for products with stated watertightness pressure ratings, indicating how much water pressure the vent can withstand in its closed position without leaking. Higher ratings mean better protection during driving rain.
Aesthetic Integration: A vent that clashes with your window frames draws unwanted attention. Quality manufacturers offer multiple colour options to match common uPVC finishes, including white, brown, grey, anthracite, and woodgrain effects. The profile height also matters, as bulky vents protrude visibly while slim designs blend into the frame line. For modern installations where clean aesthetics are priorities, low-profile options maintain the window's visual appeal.
Compatibility with Standard Systems: Ensure the vent dimensions match your window frames. Standard slot lengths typically range from 250mm to 400mm, and frame depth requirements vary between products. Checking compatibility before ordering prevents the frustration of receiving vents that do not fit your installation.
Design trends in uPVC windows have shifted decisively toward minimalist aesthetics. According to industry analysis of 2025 design trends, slim-frame windows that maximise glass area and natural light are increasingly popular. Homeowners want clean lines and unobstructed views, which makes bulky ventilation hardware particularly unwelcome.
Low-profile trickle vent designs address this preference directly. Rather than protruding visibly from the frame, these vents integrate within the existing profile dimensions. The result? You get essential background ventilation without compromising the sleek appearance that modern windows provide. For renovations and new builds where aesthetics matter, slim vents preserve the architectural intent while meeting regulatory requirements.
Beyond visual benefits, slim profile vents often deliver improved thermal efficiency. Compact designs reduce the surface area exposed to external temperatures, minimising the thermal bridging effect that can occur with larger vent housings. This helps maintain the insulating performance of your double or triple glazed units.
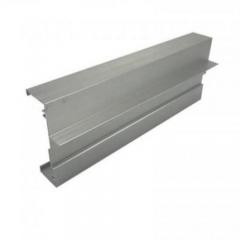
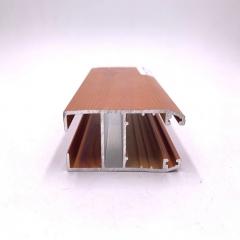
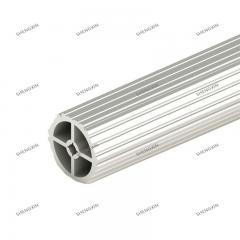
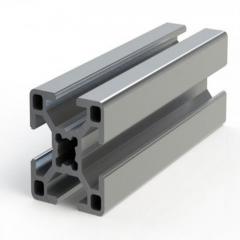
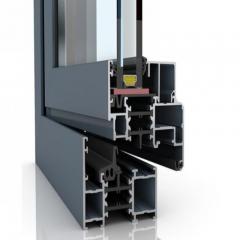
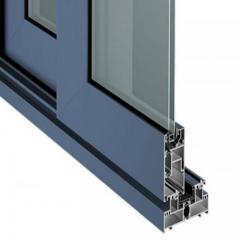
For homeowners seeking an example of well-engineered passive ventilation that addresses these selection criteria, Shengxin Aluminium's Slim uPVC Window Trickle Vents demonstrate what quality manufacturing delivers. These durable, low-profile units feature a manual slider control that allows precise regulation of airflow, helping reduce condensation while maintaining a discrete appearance that integrates seamlessly with existing uPVC window systems.
What makes a quality upvc window vent cover and internal component stand apart from budget alternatives? Look for these indicators when evaluating products:
When comparing prices, remember that the cheapest option rarely represents the best value. A quality vent costing slightly more upfront delivers years of reliable service, while a budget alternative may need replacement within a few years, requiring additional expense and installation effort. The per-year cost of a durable product typically works out lower than cycling through multiple inferior replacements.
Consider also the warranty and support offered. Reputable manufacturers stand behind their products with meaningful guarantees and responsive customer service. If something does go wrong, having a manufacturer who addresses issues promptly makes all the difference.
With these selection criteria in mind, you are equipped to choose trickle vents that will serve your home effectively for the long term. Whether you prioritise noise reduction for a bedroom, maximum airflow for a kitchen, or seamless aesthetics for a modern living space, the right product exists. Take time to evaluate options against your specific requirements, and invest in quality that delivers lasting comfort and compliance.
Yes, you can retrofit trickle vents to most modern uPVC windows provided the frame has sufficient depth, typically at least 35mm at the top rail. The process involves cutting a slot into the existing frame and fitting internal and external vent components. Before proceeding, check your frame condition, measure the available space, and consider whether professional installation might be worthwhile, especially for older windows or if you want acoustic vents. Products like Shengxin Aluminium's Slim uPVC Window Trickle Vents are designed for easy integration with existing window systems.
Standard trickle vents offer minimal noise reduction, which can be problematic near busy roads. They may also introduce small amounts of dust and outdoor pollutants into your home. On cold, windy days, open vents can create slight draughts if positioned incorrectly. However, these drawbacks are often outweighed by benefits including condensation reduction, mould prevention, and improved indoor air quality. Acoustic trickle vents address noise concerns effectively, while humidity-controlled versions automatically adjust airflow to minimise discomfort.
Trickle vents are narrow openings positioned at the top of window frames that allow continuous passive airflow even when windows are closed. They rely on natural pressure differences between indoor and outdoor air to drive ventilation. Most feature a manual slider control on the interior side, letting you adjust airflow based on conditions. The external canopy includes insect mesh and weather protection. This constant background ventilation gradually dilutes indoor pollutants and removes excess moisture before it condenses on cold surfaces.
Under UK Building Regulations Approved Document Part F, trickle vents are mandatory for new builds and often required when replacing windows in existing properties. The regulations specify that replacement windows must not make ventilation worse than before, meaning if original windows had vents, replacements must too. Even without existing vents, modern airtight uPVC windows typically require them for compliance. Homeowners cannot simply refuse vents, as installations must meet full regulatory requirements to be certified by competent person schemes.
Clean your trickle vents every three to four months to maintain optimal airflow. Use a vacuum with a brush attachment to remove loose debris, then wipe surfaces with warm soapy water and a soft cloth. Clean the slider track to ensure smooth operation and check that external canopy drainage remains clear. Increase cleaning frequency if you live near busy roads, in rural areas with seasonal pollen, or in homes with smokers or pets. Avoid abrasive cleaners, scouring pads, or solvent-based products that can damage uPVC surfaces.


 Onlineservice
 0086 136 3563 2360
 sales@sxalu.com
 +86 136 3563 2360
 Deutsch
 English
 français
 русский
 español
 português
 العربية
 ไทย
ไทย Việt
Việt Українська