Flawless Aluminum Welding: A Pro's How-To Guide
Ever wondered why so many industries—from aerospace to automotive—are making the switch to aluminum? Or maybe you’ve heard that aluminum welding is trickier than working with steel, but you’re not sure why. If you’re curious about how to weld aluminum and why it matters, you’re in the right place.
Why Aluminum Welding Is a Game-Changer?
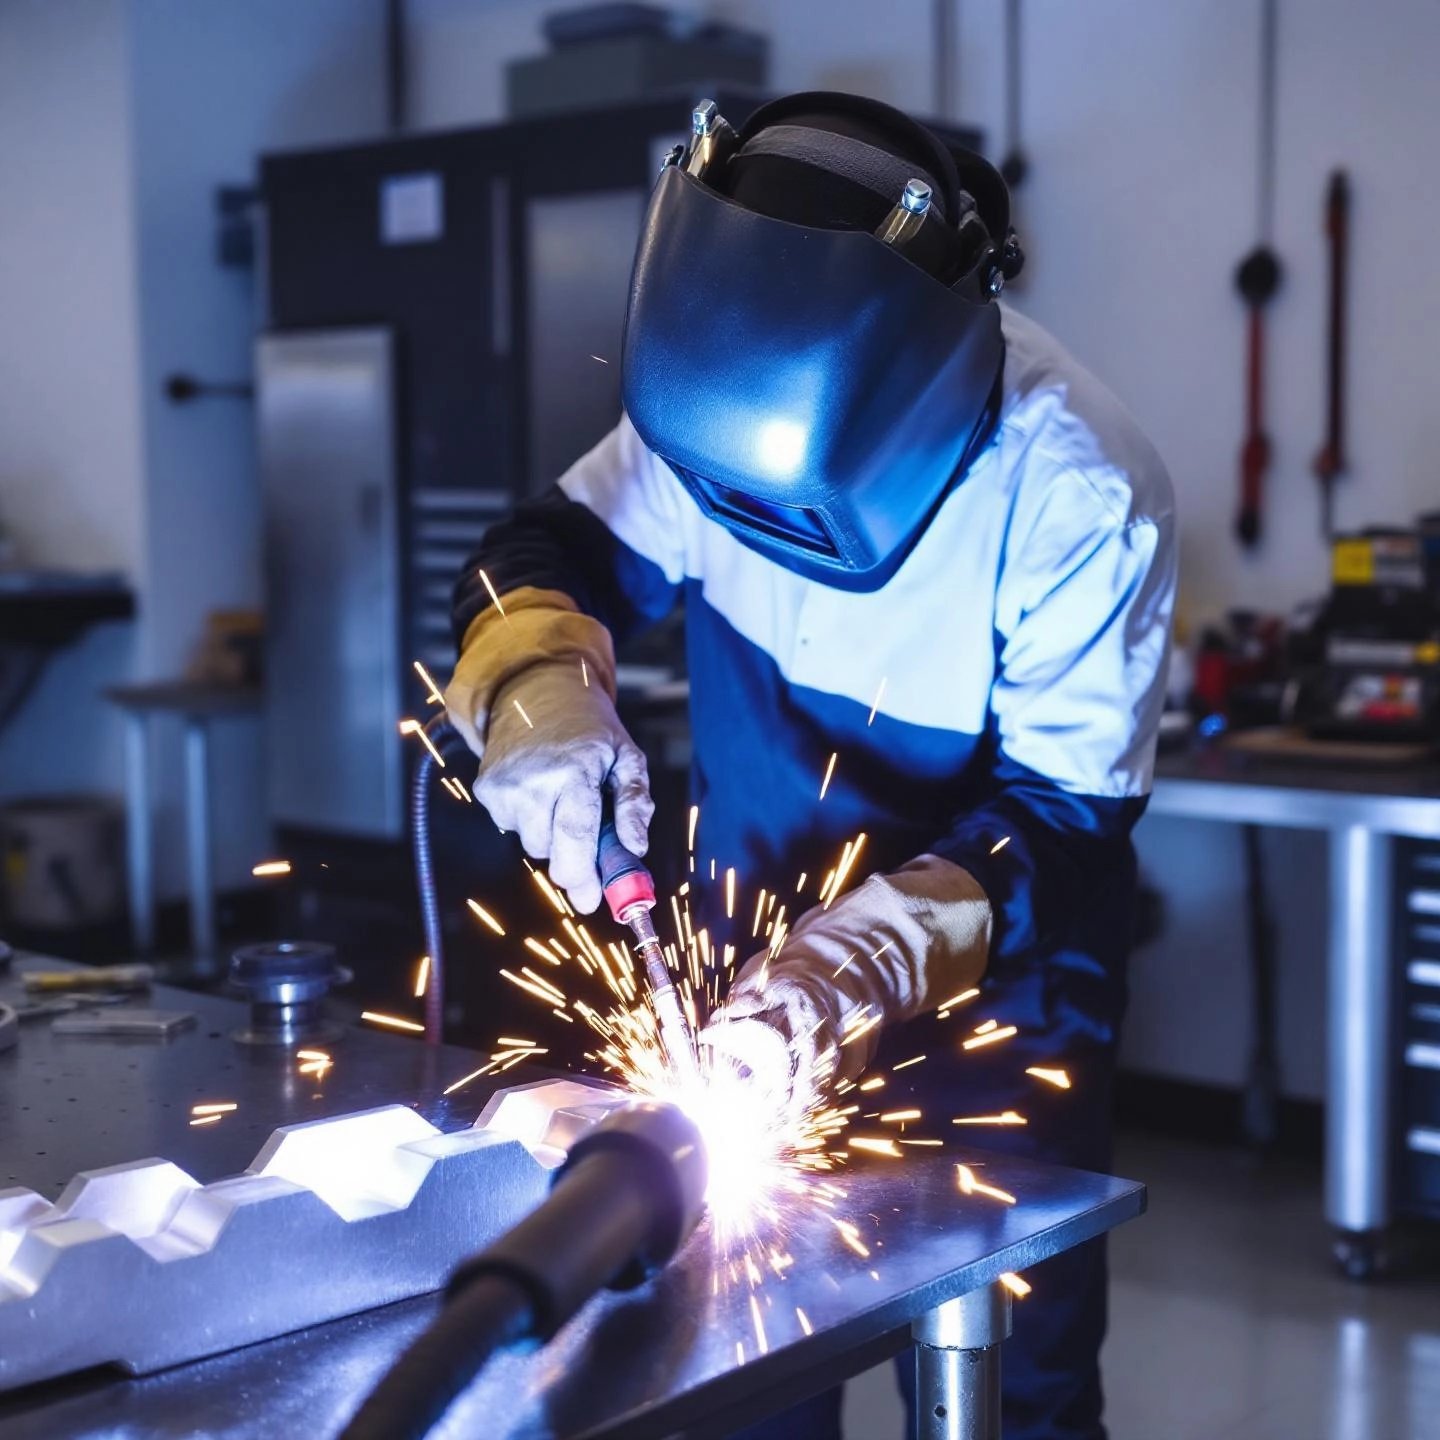
Imagine building an airplane, a ship, or even an energy-efficient car. What do they all have in common? The need for strong, lightweight materials that can stand up to harsh environments. That’s where aluminum comes in. At about one-third the weight of steel but with impressive strength and corrosion resistance, aluminum opens up design possibilities that would be impossible or too costly with heavier metals. In fact, switching to aluminum can reduce the weight of products dramatically, leading to significant savings in fuel and transportation costs—a major reason why it’s so popular in the aerospace, automotive, marine, and construction sectors.
-
Aerospace: Lightweight frames and panels for aircraft, satellites, and rockets
-
Automotive: Car bodies, frames, and engine components for improved fuel efficiency
-
Marine: Boat hulls and superstructures that resist corrosion
-
Construction: Windows, doors, and structural elements for modern buildings
But with these opportunities come unique challenges. You’ll notice that welding aluminum isn’t as straightforward as welding steel. Why is that?
Unique Challenges and Opportunities When Welding Aluminum
Sounds complex? It can be. Aluminum’s high thermal conductivity, tough oxide layer, and susceptibility to porosity and cracking all make the welding process more demanding than with steel. But with the right knowledge and techniques, these challenges can be turned into advantages—creating welds that are strong, clean, and long-lasting.
-
High thermal conductivity: Aluminum dissipates heat quickly, requiring more heat input to create a solid weld pool.
-
Oxide layer: The natural aluminum oxide coating melts at a much higher temperature than the metal underneath, complicating arc starts and causing potential defects.
-
Porosity and cracking: Aluminum absorbs hydrogen easily during welding, which can lead to trapped gas bubbles and weakened joints.
-
Malleability: Aluminum is more malleable than steel, allowing for creative designs but also demanding careful handling to avoid distortion.
So, can you weld aluminum? Absolutely—if you understand its properties and use the right approach. In fact, mastering aluminum welding is considered a valuable skill in today’s fabrication world, opening doors to advanced projects and career growth (AWS Welding Digest).
What This Guide Will Cover?
This comprehensive guide is designed to walk you through every critical aspect of aluminum welding. Here’s what you can expect:
-
A deep dive into aluminum’s unique properties and pre-welding considerations
-
Side-by-side comparisons of major welding processes: TIG, MIG, and Stick
-
How to select the best welder and consumables for your project
-
Step-by-step instructions for flawless TIG and MIG welding
-
Troubleshooting common problems and exploring alternatives
-
Tips for finding professional resources and further learning
Whether you’re a seasoned fabricator or just getting started, this guide will help you unlock the full potential of aluminum welding—so you can take on projects with confidence and precision.
Ever tried to weld aluminum and wondered why it feels so different from working with steel? Or maybe you’ve heard stories about welds gone wrong—burn-through, ugly porous beads, or mysterious cracks that appear after cooling. If so, you’re not alone. Let’s break down what makes aluminum both a rewarding and challenging material to weld, and how you can set yourself up for success from the very start.
What Makes Aluminum So Different to Weld?
When you look at the properties of aluminum, you’ll notice several features that set it apart from other metals. These same characteristics are what make aluminum both attractive for fabrication and tricky to weld. Here’s what you need to know:
-
High Thermal Conductivity: Aluminum dissipates heat much faster than steel. Imagine pouring water onto a hot pan—heat spreads out quickly, making it harder to keep the weld pool hot enough. This means you need to use higher heat inputs, but with careful control to avoid burn-through.
-
Tough Aluminum Oxide Layer: The surface of aluminum naturally forms a thin, invisible oxide coating (aluminum oxide). Here’s the catch: this layer melts at over 3,700°F (2,037°C), while the aluminum underneath melts at just around 1,200°F (650°C). If not removed, the oxide can prevent proper fusion, cause arc instability, and trap impurities in the weld (UTI).
-
Susceptibility to Porosity: In its molten state, aluminum absorbs hydrogen from moisture and contaminants. As the weld cools, this hydrogen forms bubbles, leaving behind tiny holes (porosity) that weaken the joint.
-
Low Melting Point: Aluminum’s relatively low melting point means there’s a fine line between a perfect weld and a burned-through hole—especially on thin materials.
-
Cracking and Distortion: The combination of rapid heating and cooling, along with specific alloy compositions, can make aluminum prone to hot cracking and warping if not managed carefully.
Essential Pre-Welding Considerations
So, can you weld aluminum? Absolutely—but preparation is key. Before you even strike an arc, address these critical steps to avoid common pitfalls:
-
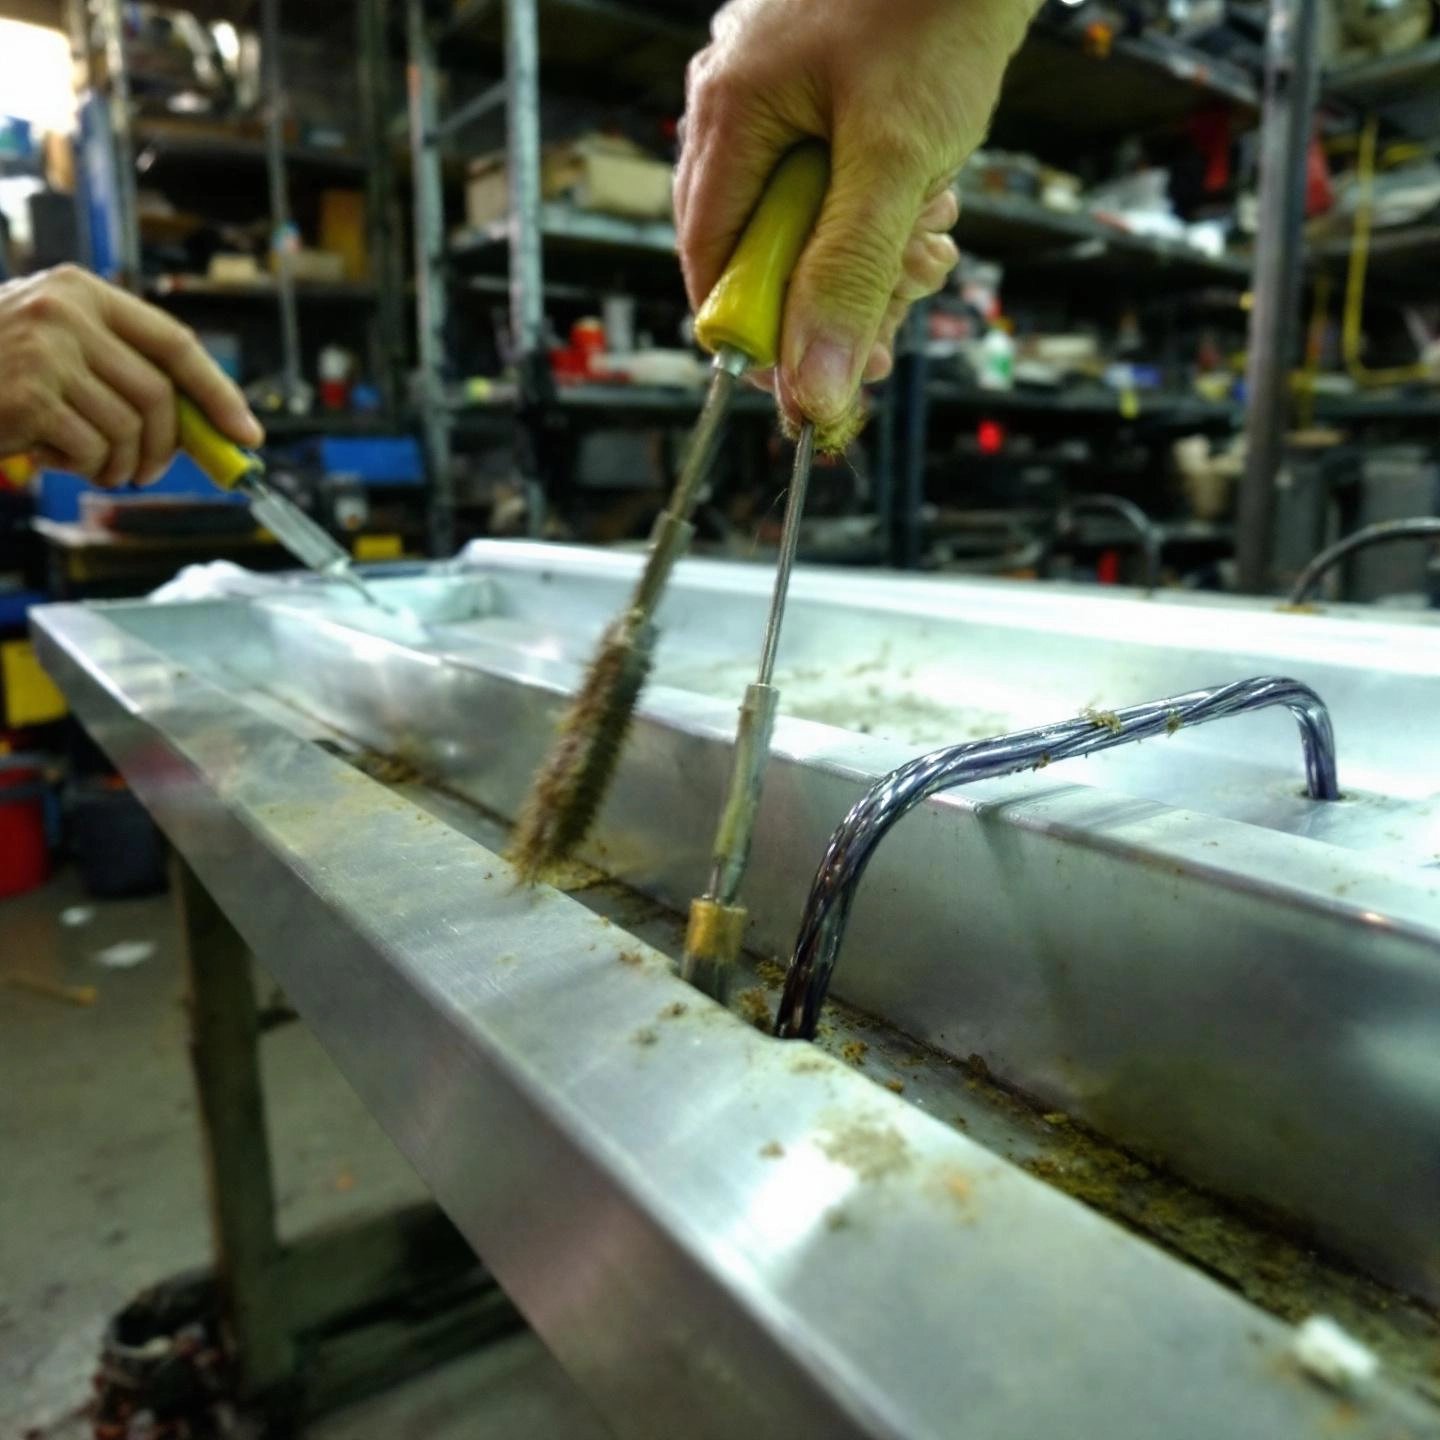
Thorough Cleaning: Remove the aluminum oxide layer using a dedicated stainless steel wire brush or chemical cleaner. Make sure the surface is free from oil, grease, and moisture, which can introduce impurities and cause porosity.
-
Joint Preparation: Clean, well-fitted joints are essential. Because aluminum doesn’t change color before melting, it’s easy to accidentally overheat or under-penetrate. Use tight-fitting joints and avoid gaps that could lead to burn-through.
-
Alloy Identification: Not all aluminum alloys weld the same way. For example, 1xxx, 3xxx, and 5xxx series alloys are generally easier to weld, while some 2xxx and high-strength 7xxx series are more prone to cracking and may require special techniques or even alternative joining methods (TWI Global).
-
Proper Storage: Keep aluminum dry and stored vertically if possible. This helps prevent contamination and surface damage.
-
Parameter Settings: Because of aluminum’s high thermal conductivity and low melting point, you’ll often need higher amperage and faster travel speeds. Adjust your welder’s settings accordingly for the best results.
How to Weld Aluminum?
Still wondering how to weld aluminum if you’re just getting started? Here’s a quick checklist to guide you:
|
Step
|
Action
|
Why It Matters
|
|
1
|
Identify the aluminum alloy
|
Different alloys have different weldability and may need specific filler metals or processes
|
|
2
|
Clean the workpiece thoroughly
|
Removes oxide and contaminants that can cause defects
|
|
3
|
Choose the right welding process (TIG or MIG)
|
TIG is best for thin or intricate work; MIG is faster for thicker sections
|
|
4
|
Set welder parameters for aluminum
|
Higher amperage and correct polarity (often AC for TIG) help manage heat and oxide removal
|
|
5
|
Use appropriate filler metal and shielding gas
|
Prevents cracking and porosity; pure argon is commonly used as shielding gas
|
|
6
|
Practice proper technique
|
Maintain a steady hand and consistent speed to avoid burn-through and ensure a clean bead
|
Remember, patience and attention to detail are your best friends when learning to weld aluminum. Even seasoned welders find this material challenging at first, but with the right prep and mindset, you’ll soon be creating strong, beautiful welds.
Ready to dive deeper? Next, we’ll compare the most popular welding processes for aluminum—TIG, MIG, and Stick—so you can choose the best fit for your next project.
When you’re faced with an aluminum project, have you ever wondered, “Which welding process will give me the strongest, cleanest results?” Or maybe you’ve heard conflicting advice about TIG welding aluminum versus MIG welding aluminum, and you’re not sure which to choose. Let’s break down the three most common aluminum welding methods—TIG (GTAW), MIG (GMAW), and Stick (SMAW)—so you can make the best decision for your needs.
Understanding the Core Processes
Imagine you’re in your workshop with a shiny sheet of aluminum in front of you. Each welding method brings its own set of tools, techniques, and results. Here’s a quick introduction before we dive into a side-by-side comparison.
-
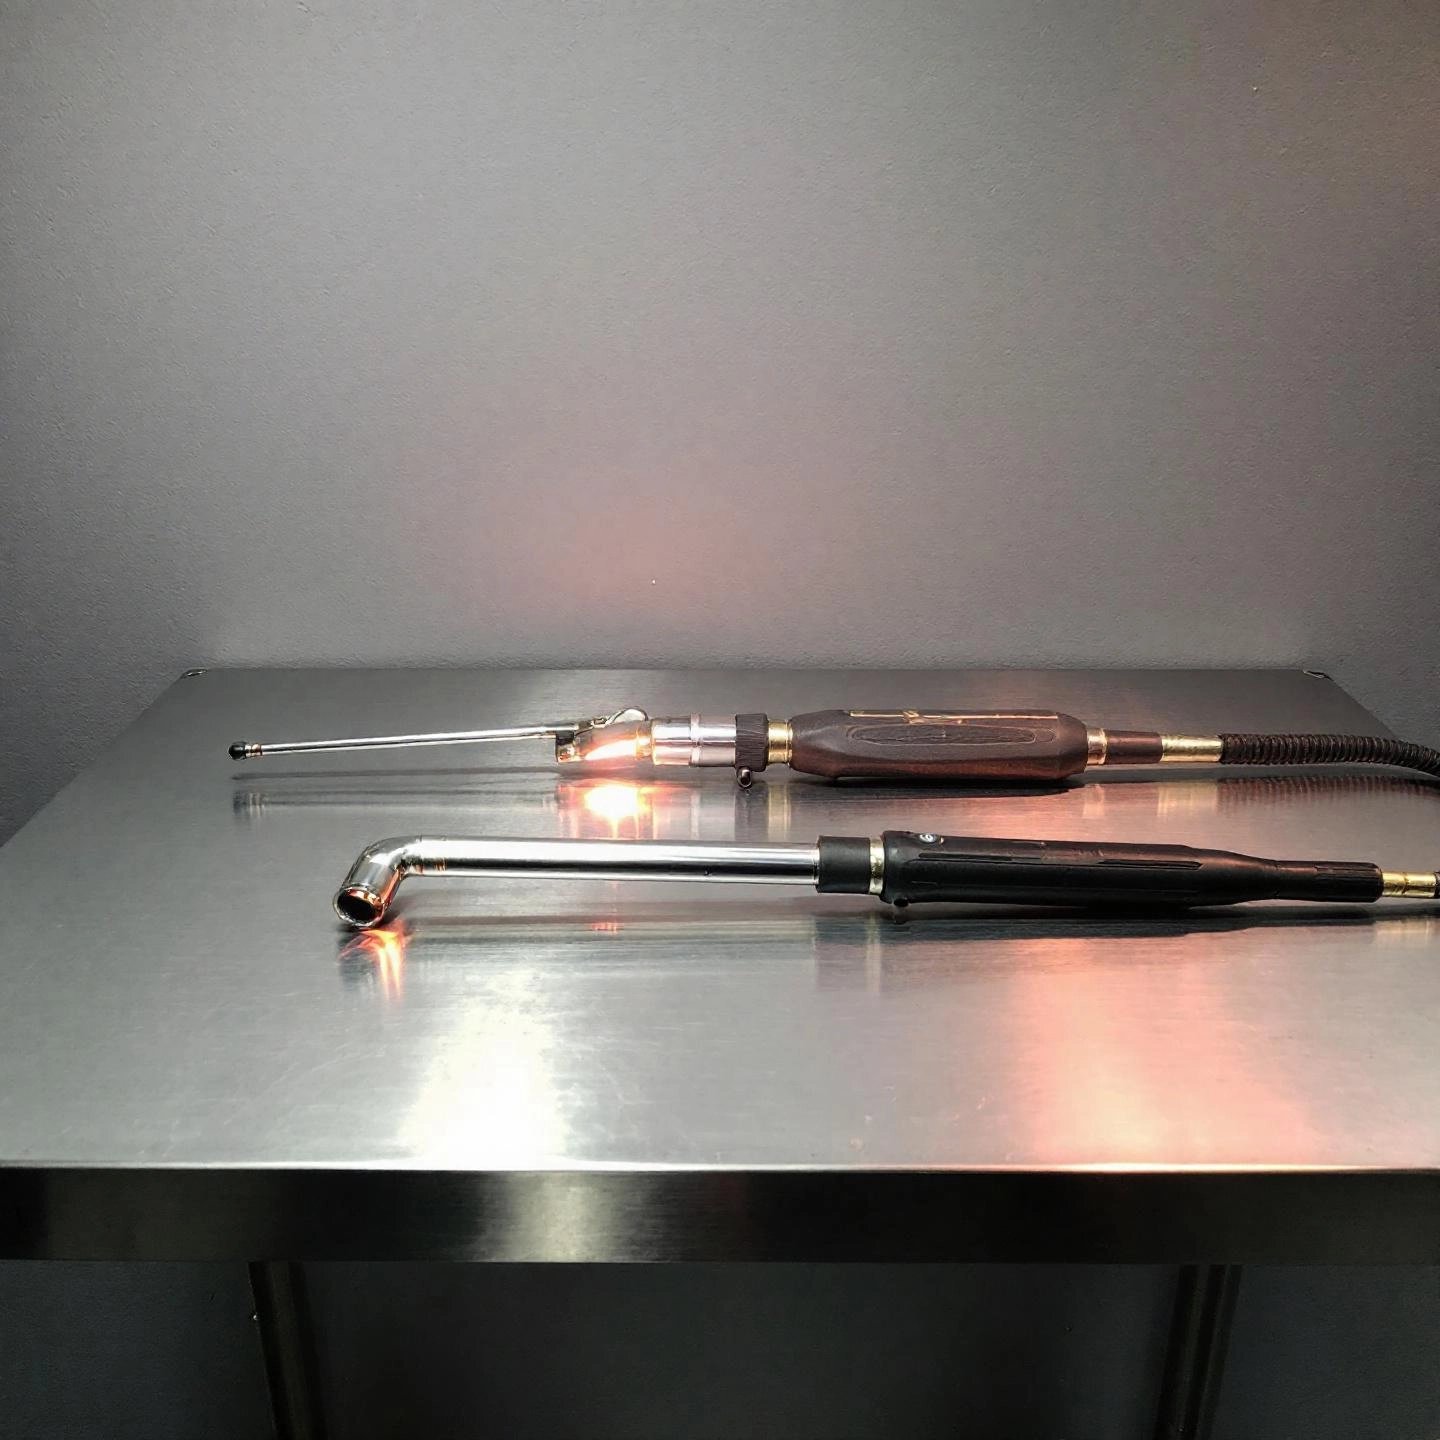
TIG (Tungsten Inert Gas/GTAW): Uses a non-consumable tungsten electrode to create the arc and requires a separate filler rod. Known for precision and clean welds.
-
MIG (Metal Inert Gas/GMAW): Utilizes a consumable wire electrode that’s automatically fed through a spool gun, offering speed and ease of use.
-
Stick (Shielded Metal Arc/SMAW): Relies on a flux-coated rod (electrode) that melts to form the weld, with the flux providing protection from contamination.
Side-by-Side Comparison Table
|
Process
|
Principle
|
Pros
|
Cons
|
Typical Applications
|
Skill Level
|
|
TIG (GTAW)
|
Non-consumable tungsten electrode, separate filler rod, inert gas shielding
|
-
Highest weld quality and precision
-
Clean, aesthetically pleasing beads
-
Excellent for thin or intricate work
-
Strong, reliable joints
|
-
Slower process overall
-
Requires extremely clean surfaces
-
Demands high skill and coordination
|
-
Automotive and aerospace components
-
Artistic and ornamental welding
-
Critical structural welds
|
Advanced
|
|
MIG (GMAW)
|
Consumable wire electrode fed via spool gun, inert gas shielding
|
-
Fast and efficient for long welds
-
Easy to learn and use
-
Good for thicker materials
-
Minimal post-weld cleaning
|
-
Requires clean, paint-free surfaces
-
Not ideal for outdoor/windy conditions
-
Less precise than TIG for thin/intricate work
|
-
General fabrication (frames, panels)
-
Automotive repair
-
Medium-to-heavy gauge aluminum
|
Beginner to Intermediate
|
|
Stick (SMAW)
|
Flux-coated electrode, no external shielding gas required
|
-
Simple and cost-effective equipment
-
Works on dirty or rusty metals
-
Good for outdoor/windy environments
|
-
Messy welds with more spatter
-
Frequent electrode changes
-
Lower weld quality and appearance
-
Slower and less efficient
|
-
Maintenance and repair
-
Heavy-duty structural work
-
Non-cosmetic applications
|
Beginner
|
When Should You Choose Each Process?
-
TIG welding aluminum is the top choice when appearance, precision, or weld integrity are critical. If you’re fabricating visible joints, working with thin sheets, or creating parts for aerospace or automotive use where every detail matters, TIG delivers unmatched results. However, it demands patience and practice.
-
MIG welding aluminum is ideal for quick, strong welds on medium or thick materials. If you need to cover long seams or you’re new to welding, MIG is forgiving and efficient. Just remember to clean your workpiece thoroughly and avoid welding outdoors in windy conditions for best results (Fractory).
-
Stick welding is best reserved for heavy-duty repairs, outdoor jobs, or situations where surface cleanliness can’t be guaranteed. While it’s the most forgiving on dirty or rusty aluminum, it produces rougher welds and is less efficient for production work.
Key Takeaways
-
TIG: Highest quality, best for thin/intricate work, but slow and skill-intensive.
-
MIG: Fast, easy to learn, great for thicker aluminum and longer welds.
-
Stick: Simple and rugged, but messier and less precise—best for repairs and tough environments.
Choosing the right process depends on your project’s requirements, the thickness of your material, and your own skill level. Next, we’ll explore how to select the perfect welder for your aluminum needs, so you can match your project goals with the right equipment.
Ever stared at a wall of welding machines and wondered, “Which aluminum welder is right for my project?” Or maybe you’ve heard that picking the wrong machine can turn a promising job into a frustrating mess. Let’s break down what really matters when selecting an aluminum welder—and how to make sure your investment pays off with flawless, strong welds every time.
TIG vs. MIG: Matching the Welder to Your Project
Imagine you’re planning to weld thin, intricate aluminum parts for an aerospace prototype—or maybe you’re fabricating thick structural pieces for a trailer. The welding process you choose (TIG or MIG) will shape your results and the features you’ll need in your machine.
-
TIG welders (GTAW): Offer unmatched precision and control, perfect for thin materials, delicate joints, and projects where bead appearance matters. They’re the go-to for high-end fabrication, artistic work, or anything requiring a clean, beautiful finish.
-
MIG welders (GMAW): Deliver speed and efficiency, making them ideal for thicker aluminum sections, long seams, or high-volume jobs. MIG is easier for beginners and great for general fabrication, repairs, and industrial work.
Essential Features for Aluminum TIG Welders
Not all TIG welders are created equal—especially when it comes to aluminum. Here’s what you should look for in an aluminum TIG welder to ensure top-quality results:
-
AC Output: Alternating current (AC) is a must for welding aluminum. It breaks up the tough oxide layer and penetrates the base metal for strong, clean welds (ArcCaptain).
-
AC Balance Control: Fine-tunes the cleaning action vs. penetration, so you can adjust for different alloys or surface conditions.
-
High-Frequency Start: Provides easy, non-contact arc initiation—crucial for preventing contamination and achieving a smooth start.
-
Pulse Capabilities: Allows precise control of heat input, making it easier to weld thin aluminum without burn-through and to produce attractive, ripple-free beads.
-
Amperage Range: Look for a wide range—lower settings for thin sheets, higher (e.g., 200A+) for thick plates.
-
Foot Pedal or Remote Amperage Control: Lets you adjust heat on the fly for ultimate control, especially on complex or variable-thickness welds.
-
Quality Cooling System: Prevents overheating during prolonged or high-amperage work.
-
Clear, User-Friendly Interface: Makes setup and parameter adjustments simple, even for less experienced welders.
Must-Have Features for Aluminum MIG Welders
If you’re leaning toward a MIG welder for aluminum, pay close attention to these critical features:
-
Spool Gun Compatibility: Aluminum wire is soft and prone to tangling (“bird-nesting”). A spool gun feeds wire directly at the torch, ensuring smooth, reliable delivery.
-
Synergic Controls: Automatically adjust wire feed speed and voltage together for optimal results—especially helpful for beginners or when switching between materials.
-
High Amperage Output: Aluminum’s high thermal conductivity requires more heat; choose a machine that can deliver enough amps for your thickest projects.
-
Multi-Process Capability (Optional): Some advanced welders combine MIG, TIG, and Stick functions for maximum flexibility in your shop.
-
Robust Power Supply: Ensure your welder matches your workshop’s voltage (120V, 240V, or both) and has a sufficient duty cycle for extended welds.
Quick Comparison Table: TIG vs. MIG Aluminum Welders
|
Feature
|
TIG Welder
|
MIG Welder
|
|
Precision & Appearance
|
Excellent (for thin/intricate work)
|
Good (for thicker/faster jobs)
|
|
Speed
|
Slower
|
Faster
|
|
Skill Level Needed
|
Advanced
|
Beginner-Intermediate
|
|
Key Features
|
AC output, HF start, pulse, pedal
|
Spool gun, synergic, high amps
|
|
Best For
|
Thin, detailed, aesthetic welds
|
Thick, long, production welds
|
Why the Quality of Your Base Aluminum Matters?
Even the most advanced welder can’t overcome poor base material. High-quality aluminum—like the precision-engineered profiles from leading manufacturers such as Shengxin Aluminum—ensures consistent weldability, fewer impurities, and optimal results, especially in demanding industrial or high-tech applications. When your project’s success depends on both the machine and the material, it pays to start with the best foundation possible.
Ready to dial in the rest of your setup? Next, we’ll guide you through choosing the perfect wires, rods, and consumables to match your base aluminum and welding process—so every weld you make is strong, clean, and built to last.
Ever stood in front of a rack of aluminum welding rods or spools of aluminum welding wire and wondered, “Which one will give me the strongest, cleanest weld for my project?” Or maybe you’ve had a weld crack unexpectedly and realized later that the filler metal wasn’t the best match for your base alloy. Selecting the right consumables isn’t just a detail—it’s the foundation for weld quality, strength, and long-term performance. Let’s break down how to pair filler metals, tungsten electrodes, shielding gases, and cleaning supplies with your aluminum alloys, so you can weld with confidence every time.
Matching Filler Metals to Base Aluminum Alloys
Choosing the correct aluminum filler metal is all about compatibility, crack resistance, and achieving the mechanical properties your application demands. The wrong choice can lead to hot cracking, poor appearance, or even premature failure. The right choice? It makes your welds strong, ductile, and ready for the real world.
|
Base Alloy (Series)
|
Recommended Filler Metal
|
Key Characteristics
|
Best For
|
|
1XXX (Pure Aluminum)
|
1100
|
High purity, good conductivity, low cracking risk
|
Electrical, food-grade, matching 1XXX alloys
|
|
2XXX (Al-Cu, e.g., 2219)
|
2319
|
High strength, matches 2219, heat-treatable
|
Aerospace, armor applications
|
|
3XXX (Al-Mn, e.g., 3003)
|
4043, 4943
|
Good fluidity, crack resistance, moderate strength
|
General fabrication, sheet metal
|
|
4XXX (Al-Si, e.g., 6061, 6063)
|
4043, 4943
|
Excellent fluidity, crack resistance, smooth bead
|
Welding 6XXX series, castings, non-anodized parts
|
|
5XXX (Al-Mg, e.g., 5083, 5454)
|
5356, 5183, 5556, 5554
|
High strength, good ductility, suitable for anodizing
|
Marine, structural, anodized parts
|
|
Castings (3XX, 4XX series)
|
4043, 4047
|
Lower melting point, good for leak-tight joints
|
Repairing cast aluminum, automotive parts
|
-
For 6XXX series (like 6061), both 4043 and 5356 are common. Use 4043 for better crack resistance and appearance; choose 5356 when maximum strength or color match after anodizing is needed.
-
Never use 4XXX fillers (4043, 4047) on high-magnesium 5XXX base alloys (e.g., 5083) due to risk of brittle welds.
-
When welding for marine or high-corrosion environments, match the filler to the base alloy’s corrosion resistance—5XXX series fillers are preferred.
Remember: The quality of your base aluminum matters just as much as your filler. Precision-engineered profiles from manufacturers like Shengxin Aluminum offer consistent composition and minimal impurities, ensuring your chosen filler performs at its best—especially in demanding or high-tech applications.
Picking the Right Aluminum Welding Rods and Wire
Sounds complex? Here’s how to make it simple:
-
Aluminum welding rods (TIG): Choose rods that match your filler alloy selection above. For intricate or thin work, 4043 is often easier to use due to its fluidity.
-
Aluminum welding wire (MIG): Select wire diameter based on your welder and material thickness. Use a spool gun or push-pull system for smooth feeding—aluminum wire is soft and can easily tangle.
-
Store all rods and wire in a dry, clean environment to prevent contamination and porosity.
Choosing Tungsten Electrodes for Aluminum TIG Welding
The type and preparation of your tungsten electrode can make or break your weld quality. Here’s what works best for aluminum:
-
2% Lanthanated (Blue): Excellent all-purpose choice for both AC (aluminum) and DC welding, with stable arc and easy starts (Miller Welds).
-
2% Ceriated (Grey): Good for low- and medium-current work; easy arc starts, minimal spitting.
-
Zirconiated (White): High current capacity, excellent arc stability, and ideal for AC welding on aluminum and magnesium alloys.
-
Pure Tungsten (Green): Traditional for AC welding, but less common with modern inverter machines.
Tip: Use a balled tip for pure or zirconiated tungsten on AC; a pointed or truncated tip is best for lanthanated and ceriated types. Always grind tungsten with scratches parallel to the electrode for a stable arc.
Shielding Gases and Cleaning Supplies
-
Shielding Gas: Pure argon is standard for both TIG and MIG aluminum welding. For thicker sections, a mix of argon and helium can improve penetration and speed.
-
Cleaning Supplies: Use a dedicated stainless steel wire brush, acetone, or specialized aluminum cleaners to remove oxide and contaminants before welding. Never use a brush that’s touched other metals.
Why Consumable and Base Material Quality Go Hand-in-Hand?
Imagine spending time and money on premium filler metals, only to be held back by inconsistent, impure base aluminum. High-quality base material, like that from Shengxin Aluminum, ensures your chosen rods and wires deliver their full potential—stronger welds, fewer defects, and a finish you can be proud of. This synergy is especially vital in high-tech, structural, or safety-critical applications.
With your consumables dialed in, you’re ready to tackle the next step: mastering the TIG welding process for flawless, professional-grade aluminum joints.
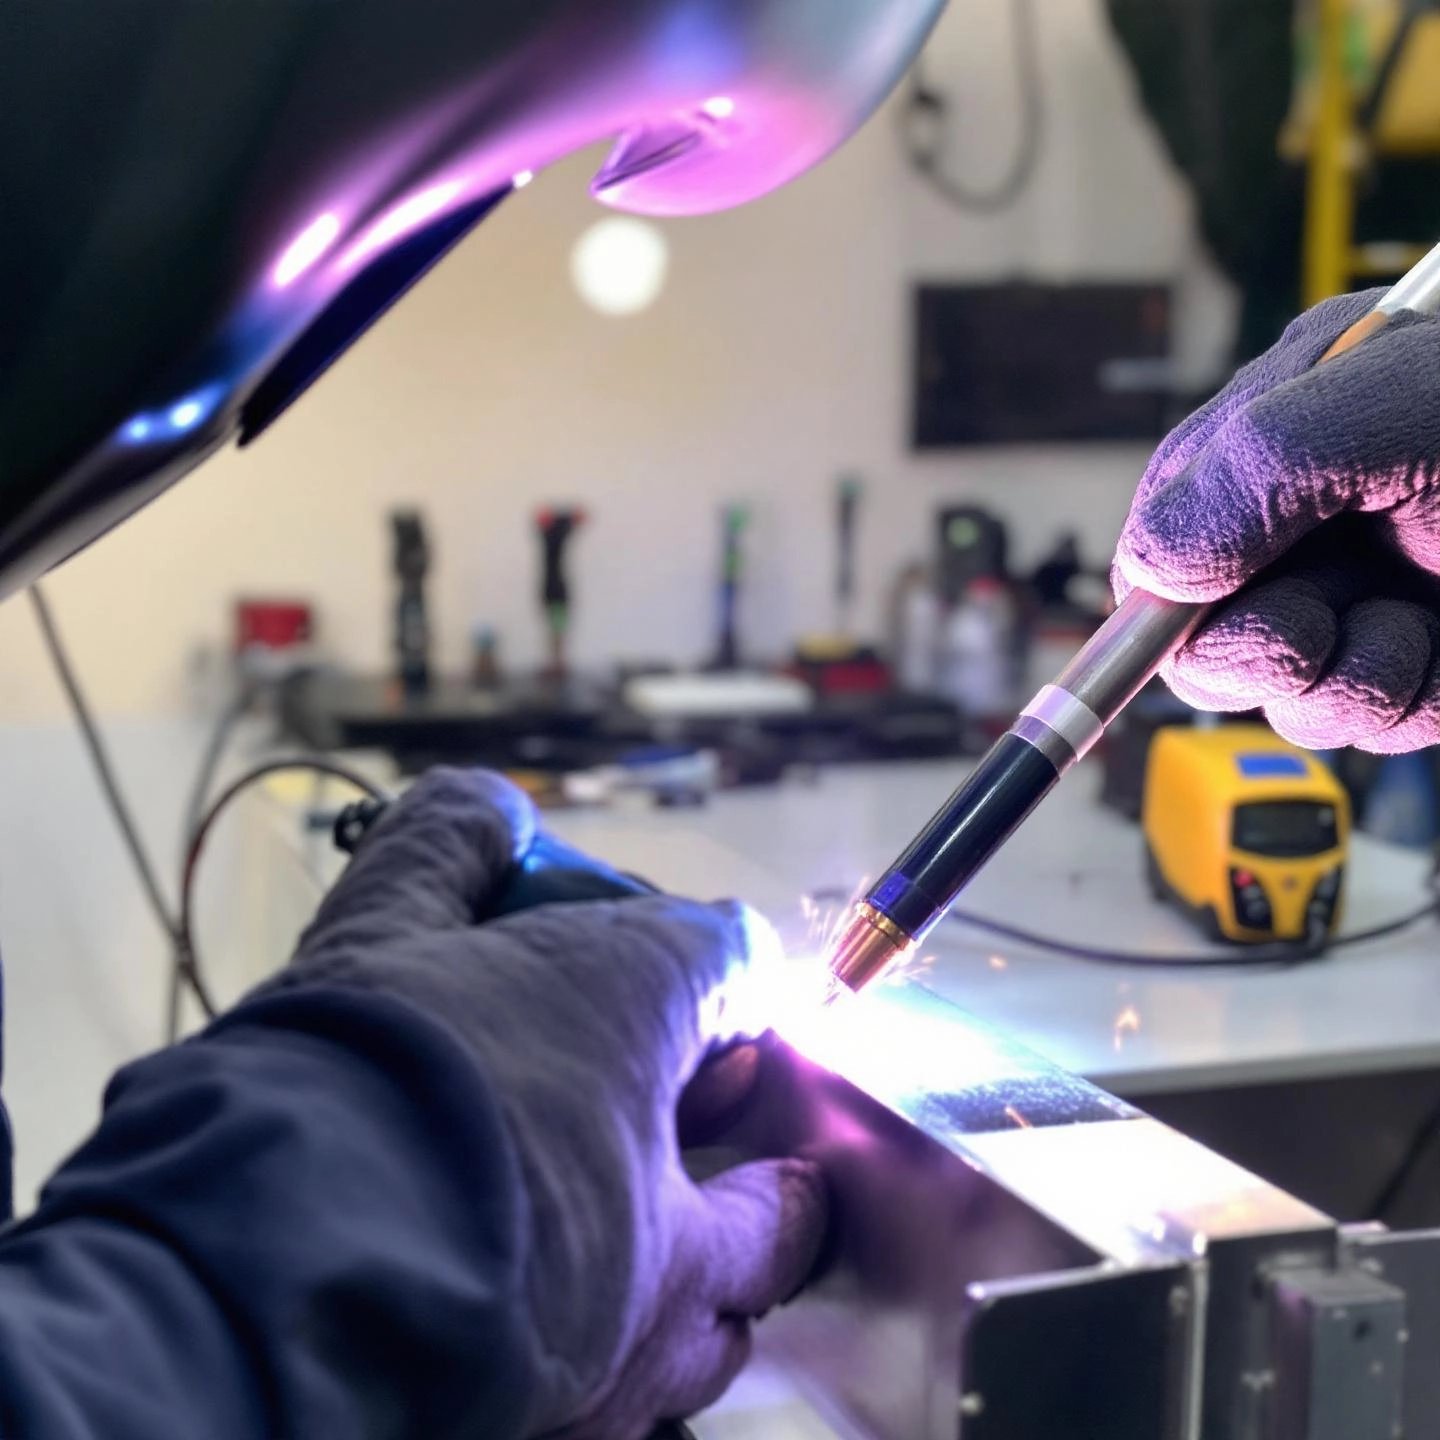
Ever watched a pro lay down a flawless aluminum TIG weld and wondered, "How do they make it look so easy?" Or maybe you’ve tried aluminum TIG welding yourself and ended up with a mess of burn-throughs, porous beads, or wandering arcs. If this sounds familiar, you’re not alone—mastering how to TIG weld aluminum is a journey, but with the right steps and a bit of practice, you can achieve professional, eye-catching results.
1. Preparation: Setting the Stage for Success
-
Cleanliness is Non-Negotiable: Use a dedicated stainless steel brush to remove the oxide layer from your aluminum. Brush in one direction, all the way off the edge, to avoid smearing contaminants back onto the surface (UNIMIG).
-
Degrease with Care: Wipe down the joint with acetone or rubbing alcohol and a clean rag. This removes oils and moisture that can cause porosity.
-
Check Your Fit-Up: Ensure joints are tightly fitted and evenly aligned. Gaps or uneven edges make it much easier to burn through and lead to inconsistent welds.
-
Prepare Your Filler Rod: Match the rod size to your material thickness. For thin work, you can even straighten MIG wire to use as a TIG rod if standard rods are too thick.
2. Machine Setup: Dialing in the Right Parameters
-
Polarity: Set your TIG welder to AC (alternating current). AC breaks up the tough oxide layer and provides the cleaning action aluminum needs.
-
AC Balance: Start with a 30% positive / 70% negative ratio. Adjust for more cleaning if the weld looks dirty, or less if your tungsten is balling excessively.
-
Frequency: For general work, 60Hz is a solid starting point. Increase to 120Hz for tighter, more focused arcs on thin or corner welds; decrease for wider, deeper weld pools.
-
Amperage: Set amperage based on material thickness—roughly 1 amp per 0.001" of thickness is a good rule of thumb, but always test on scrap first (YesWelder).
-
Shielding Gas: Use pure argon at 15–20 cubic feet per hour. Ensure your gas lens and cup are clean and free of spatter.
-
Tungsten Electrode: Use a 2% lanthanated or zirconiated tungsten for best AC performance. Ball the tip slightly for a stable arc.
-
Post-Flow: Set post-flow to protect the tungsten after the arc stops—this keeps it shiny and prevents contamination.
3. Torch and Hand Placement: Practice Before You Strike an Arc
-
Steady Hands: Practice sliding your hand and torch smoothly across the table, simulating the welding motion before striking an arc.
-
Correct Angles: Hold the torch at 15–20° from vertical, and keep the filler rod approximately 90° to the torch. Always push the torch, never drag.
-
Standoff Distance: Keep the tungsten tip about its own diameter from the workpiece (e.g., 2mm for 2.4mm tungsten).
4. Welding Technique: Creating the Perfect Bead
-
Start with a Good Tack: Tack your pieces together using filler metal, not just fusion. Make your tacks the same size as your intended weld bead for a smooth start.
-
Initiate the Arc: Strike the arc and pause for a second or two. Let the cleaning action break through the oxide and allow a weld puddle to form. Aluminum takes longer than steel to puddle, so be patient.
-
Control the Puddle: Watch the puddle closely. It should sink slightly into the plate for good penetration. If it gets too wide or hot, ease off the foot pedal or travel faster.
-
Add Filler Metal: Dab the filler rod into the leading edge of the puddle, establishing a steady rhythm. Too little filler can overheat the plate; too much can cause cold laps and poor fusion.
-
Advance the Weld: Move the torch forward smoothly, maintaining the arc length and consistent speed. Use the foot pedal to adjust heat as you progress—aluminum heats up quickly, so you may need to reduce amperage toward the end.
-
Finish Strong: Add a little extra filler at the end of the weld to prevent crater cracking, then let the arc fade out gently. Hold the torch in place for post-flow shielding as the weld cools.
5. Post-Weld Inspection and Finishing Touches
-
Visual Inspection: Look for uniform bead width, smooth ripples, and no signs of porosity or cracks.
-
Clean Up: If the weld will be visible, polish with aluminum polish and a soft cloth for a gleaming finish. Tape off the area to avoid scratching the base metal.
-
Test for Penetration: On practice pieces, cut through the weld to check for full fusion and absence of internal defects.
Pro Tips for Flawless Aluminum TIG Welding
-
Keep Consumables Clean: Replace dirty or oxidized tungsten, and clean your gas lens and cup regularly to prevent gas deflection and contamination.
-
Practice Rhythm and Independence: Train your hands to work independently—one controlling the torch, the other the filler rod. Practice on scrap to develop muscle memory.
-
Adjust Settings as Needed: Don’t be afraid to tweak AC balance, frequency, and amperage based on weld appearance and joint design.
-
Patience Pays Off: Aluminum TIG welding rewards careful preparation and attention to detail. Take your time, especially when learning.
With these steps and best practices, you’ll be well on your way to producing clean, strong, and visually stunning aluminum TIG welds. Next, we’ll cover how to master MIG welding techniques for aluminum projects—so you can choose the right process for every application.
Ever tried MIG welding aluminum and ended up with tangled wire, burn-through, or messy beads? Or maybe you’re wondering if aluminum spool gun welding is really necessary for your next project. MIG welding aluminum can seem daunting, but with the right preparation, setup, and technique, you’ll be laying down strong, clean welds in no time. Let’s break down the process into practical, easy-to-follow steps—so you can tackle aluminum projects with confidence.
1. Surface Preparation: The Foundation of Every Great Weld
-
Clean the Aluminum Thoroughly: Use a dedicated stainless steel wire brush to remove the oxide layer and any surface contaminants. Brush in one direction, and never use a brush that has touched steel to prevent cross-contamination.
-
Degrease: Wipe the joint with acetone or a suitable aluminum cleaner to remove oils and moisture, which can cause porosity.
-
Fit-Up Matters: Ensure tight, well-aligned joints. Gaps can lead to burn-through, especially on thin material.
2. Machine and Spool Gun Setup: Ensuring Smooth Wire Feeding
Aluminum wire is much softer than steel and prone to tangling ("bird-nesting") if not fed properly. Here’s how to set your equipment up for success:
-
Spool Gun vs. Standard Torch: While a spool gun isn’t strictly required, it dramatically improves wire feeding by keeping the wire path short and straight—especially helpful for beginners or longer torches (Weldclass).
-
Torch Liner: Replace the steel liner with a Teflon or polymer liner to reduce friction and prevent wire shaving.
-
Drive Rollers: Use U-groove rollers designed for aluminum. V-groove rollers (for steel) can deform or jam soft wire.
-
Wire Size: For most jobs, 1.0mm (0.040") wire is the best all-purpose size. For thinner material, 0.9mm can work—but avoid 0.8mm unless using a spool gun.
-
Torch Length: Keep torch cables as short as possible (ideally 3m/10ft) to minimize feeding issues. If you need a longer reach, a spool gun is highly recommended.
-
Contact Tip: Use a tip slightly larger than the wire diameter (e.g., a 1.0mm aluminum tip for 1.0mm wire) to account for wire expansion.
3. Parameter Settings: Dialing In for Aluminum
-
Polarity: Set the welder to DC+ (reverse polarity)—torch is positive, work clamp is negative.
-
Shielding Gas: Use 100% argon. Mixed gases with CO2 will cause weld contamination and porosity.
-
Gas Flow: Start at 30–35 cubic feet per hour (cfh) and adjust as needed. Too little gas creates soot and porosity; too much can cause turbulence.
-
Voltage and Wire Feed: Refer to your machine’s chart for starting points based on material thickness and wire size. Aluminum needs higher voltage and faster wire feed than steel. For example, welding 3mm (1/8") aluminum may require 18–21V and 350–400 ipm wire speed. Always test on scrap first.
-
Inductance and Soft-Start: If available, use these controls to fine-tune arc characteristics and improve bead appearance.
4. MIG Welding Aluminum: The Step-by-Step Process
-
Tack Weld: Secure your workpieces with small tacks at the corners and along the joint. This prevents movement from heat distortion.
-
Set Your Technique: Always push the gun (never pull/drag) at a 10–20° angle. This ensures proper shielding gas coverage and cleaner welds.
-
Maintain Proper Stickout: Keep 1/2" to 3/4" (12–19mm) of wire extending from the tip for optimal arc stability (Miller Welds).
-
Travel Speed: Move quickly—aluminum absorbs heat fast, so a slow pace leads to burn-through and wide, sloppy beads. Watch for a smooth, consistent weld pool that just fills the joint.
-
Watch the Weld Pool: The pool should be shiny and fluid. If you see dullness or excessive soot, adjust your speed, voltage, or gas flow.
-
Crater Fill: At the end of each weld, briefly trigger the gun again to fill the crater and avoid cracking.
5. Troubleshooting Common MIG Aluminum Issues
-
Wire Bird-Nesting: Double-check drive roller type, liner condition, and torch length. Use a spool gun if persistent.
-
Burn-Through: Lower voltage, increase travel speed, or use a pulse-capable MIG if available. Practice on scrap to refine technique.
-
Sooty Welds: Confirm push technique, check for adequate gas flow, and ensure the work area is draft-free.
-
Porosity: Clean material thoroughly, use 100% argon, and check for leaks or drafts around the weld zone.
-
Lack of Fusion/Cold Starts: Increase voltage slightly or preheat the workpiece if possible. On thicker plates, a hot start or pulse feature can help.
Pro Tips for Flawless MIG Aluminum Welds
-
Practice Makes Perfect: Each alloy and thickness behaves differently—test settings on scrap before welding your actual project.
-
Keep Consumables Clean: Replace dirty tips or liners, and store wire spools in a dry, dust-free environment.
-
Use Short Welds on Thin Material: Stitch or pulse weld to avoid overheating and distortion.
-
Minimize Torch Movement: A steady, even travel is better than excessive weaving or manipulation—let the wire do the work.
By following these steps and tips, you’ll overcome the unique challenges of MIG welding aluminum and achieve strong, attractive welds—whether you’re using a standard torch or an aluminum spool gun. Next up: learn how to solve the most common aluminum welding problems, from porosity to distortion, and discover what to do when you need to join aluminum to steel.
Ever finished a weld only to find tiny holes, unexpected cracks, or warped metal staring back at you? Or maybe you’ve wondered, “Can you weld aluminum to steel?”—only to hear it’s nearly impossible. Aluminum welding can be challenging, but understanding the root causes of common issues—and knowing how to fix or avoid them—can turn frustration into flawless results. Let’s break down the most frequent aluminum welding problems and their solutions, then tackle the tricky subject of joining aluminum to steel and explore reliable repair alternatives.
Common Aluminum Welding Problems and How to Fix Them
Imagine you’re halfway through a project when you spot porosity, cracks, or distortion in your welds. Sounds familiar? Here’s a quick-reference guide to help you identify, prevent, and fix these issues:
|
Problem
|
Likely Cause
|
Solution
|
|
Porosity (tiny holes in the weld bead)
|
-
Contaminated base or filler metal (oil, grease, moisture)
-
Improper storage of filler rods/wire
-
Shielding gas leaks or drafts
|
-
Thoroughly clean base and filler metal with solvent and a dedicated stainless steel brush
-
Allow aluminum to acclimate to shop temperature to prevent condensation
-
Store filler metals in a dry, heated area
-
Check for leaks and ensure proper gas flow and coverage
|
|
Cracking (hot/stress cracks during or after welding)
|
-
Incorrect filler metal choice
-
Improper joint design (restricts filler addition)
-
Excessive shrinkage stresses or rapid cooling
|
-
Select a filler metal with low crack sensitivity for your alloy (consult filler metal guides)
-
Use a beveled groove joint to allow more filler metal
-
Preheat thicker or crack-sensitive alloys to reduce stress
-
Increase travel speed to narrow the heat-affected zone and reduce base metal melting
-
Fill weld craters at the end to prevent crater cracks
|
|
Distortion/Burn-Through
|
-
High heat input, especially on thin aluminum
-
Poor fit-up or joint gaps
-
Slow travel speed
|
-
Use pulsed MIG or TIG to control heat input on thin material
-
Increase travel speed and avoid lingering in one spot
-
Ensure tight, even joint fit-up
-
Clamp or fixture parts to minimize movement
-
For thick sections, ensure adequate amperage and consider adding helium to the shielding gas for deeper penetration
|
|
Discoloration/Smut (sooty deposits)
|
-
Improper shielding gas coverage
-
High magnesium content in filler/base
-
Incorrect gun angle or CTWD (contact-to-work distance)
|
-
Use appropriate filler metal (e.g., 4000 series for less soot)
-
Shorten CTWD and use a push angle
-
Increase nozzle size and keep it clean
-
Check for drafts and maintain proper gas flow
|
Can You Weld Aluminum to Steel? Understanding the Challenge
Picture this: you need to join an aluminum bracket to a steel frame. Can you just weld them together? Unfortunately, direct fusion welding between aluminum and steel isn’t practical. Here’s why:
-
When molten aluminum comes into direct contact with steel, they form brittle intermetallic compounds at the joint. These compounds are extremely weak and prone to failure.
-
Standard arc welding methods (MIG, TIG) cannot prevent this reaction, resulting in poor or unusable welds.
So, can you weld aluminum to steel? Not directly—but there are proven workarounds:
-
Bimetallic Transition Inserts: These are commercially available sections with aluminum bonded to steel (by explosion welding, friction welding, or other solid-state processes). You weld aluminum-to-aluminum on one side and steel-to-steel on the other, keeping the dissimilar metals separated.
-
Coating the Steel: The steel can be hot-dip aluminized or coated with silver solder. You then weld the aluminum to the coated steel, being careful not to burn through the barrier layer. These methods are generally limited to sealing or non-structural joints.
-
Mechanical Fastening: Bolting, riveting, or using threaded inserts to join aluminum and steel parts—especially effective for repairs or when welding isn’t feasible.
-
Adhesive Bonding: Modern structural adhesives can provide surprisingly strong, durable joints between aluminum and steel, especially when surface prep is meticulous.
Repairing Aluminum Without Welding
What if you don’t have access to welding equipment, or the job is too small to justify a full weld? There are several reliable alternatives for repairing aluminum holes or cracks—no arc required:
-
Epoxy Fillers: Metal-reinforced epoxies are easy to use and ideal for small to medium holes in non-structural applications. Clean the area thoroughly, apply the epoxy, let it cure, then sand smooth. Epoxy repairs are durable but not suitable for high-stress or load-bearing parts.
-
Low-Temperature Soldering: Aluminum-specific solder and flux can be used to fill holes or join parts with a propane torch. This method restores up to 85–90% of original strength when done correctly, but requires careful cleaning and technique.
-
Adhesive Bonding and Patching: For larger holes or structural repairs, bonding an aluminum patch with industrial adhesive or using rivets can restore strength and integrity. Modern adhesives can match the strength of riveted joints in many applications, provided the surfaces are properly prepared.
What about JB Weld or similar products? While JB Weld (an epoxy) is popular for quick fixes, it’s best reserved for non-structural, low-stress repairs. Its strength and durability are limited compared to welding or high-performance adhesives, and it should not be relied on for critical joints or load-bearing components.
Key Takeaways and Next Steps
-
Most aluminum welding problems—porosity, cracking, distortion—are preventable with proper preparation, correct filler selection, and careful technique.
-
Directly welding aluminum to steel isn’t practical due to brittle intermetallics, but bimetallic inserts, coatings, and mechanical or adhesive joining methods offer reliable alternatives.
-
For repairs where welding isn’t possible, epoxy fillers, soldering, and aluminum patching provide strong, lasting solutions—just be sure to follow best practices for surface prep and application.
Understanding these troubleshooting strategies and alternatives will help you tackle virtually any aluminum joining challenge. Next, we’ll explore when it makes sense to call in a professional—and how to find the right aluminum welding or fabrication expert for your project.
Ever started an aluminum project and wondered, “Should I tackle this myself, or is it time to call in the pros?” Or maybe you’ve searched for aluminum welding near me after realizing your garage setup just isn’t cutting it. Let’s break down when DIY makes sense, when it doesn’t, and what alternatives you have for joining aluminum—plus practical tips for finding and choosing the right professional help when you need it most.
When DIY Aluminum Welding Isn’t the Best Choice?
Imagine you’re working on a complex frame, a high-pressure vessel, or a part that absolutely can’t fail. While DIY welding can be a rewarding hobby and a way to save money for simple jobs, it’s not always the safest or most cost-effective route for every project. Here’s why:
-
Equipment and Safety Costs: Professional-grade welders and safety gear can be expensive, often costing as much or more than hiring a pro for a single job. Rental fees, insurance, and potential damage charges can add up quickly (PrimeWeld).
-
Skill and Experience: Aluminum welding demands years of practice to master. Without proper technique, you risk weak joints, cracks, or even damaging your project beyond repair.
-
Project Complexity: Jobs requiring tight tolerances, critical alignments, or adherence to industry codes (like ASME or aerospace standards) are best left to certified professionals.
-
Safety Risks: Welding exposes you to electrical, thermal, and chemical hazards. Inexperience can lead to serious injuries or property damage.
So, when is it okay to go DIY? For non-structural repairs, simple brackets, or practice pieces where aesthetics and precision aren’t critical, DIY welding is a great way to learn and build skills. But for anything safety-related, load-bearing, or mission-critical, professional aluminum welding is the safer, smarter choice.
Alternative Methods for Joining Aluminum
Can’t weld, or don’t want to? You have several reliable options that don’t require a torch or advanced skills. Here’s a quick rundown of popular alternatives:
|
Method
|
Pros
|
Cons
|
Best For
|
|
Riveting
|
Strong, vibration-resistant, can join dissimilar materials, clean appearance
|
Requires drilling, possible distortion of soft materials, can loosen over time
|
Permanent joints in thin sheets, vibration-prone assemblies
|
|
Bolting
|
High strength, removable, easy to source hardware
|
Needs access to both sides, heavier than other options, can loosen with vibration
|
Structural connections, joints requiring future disassembly
|
|
Adhesive Bonding
|
Joins dissimilar materials, distributes stress evenly, no heat distortion
|
Requires surface prep, curing time, limited high-temp performance
|
Panel bonding, joining thin or delicate parts
|
|
Brazing
|
Strong joints, can join dissimilar metals, no melting of base metal
|
Requires precise fit-up and cleanliness, skill-intensive for aluminum
|
Non-safety-critical fabrications, repairs, joining aluminum to copper or steel
|
Each method has its place—sometimes a combination (like adhesive plus rivets) gives the best results. Choose based on the strength, appearance, and service environment your project demands.
Should You Hire a Professional?
Still on the fence? Use this checklist to decide if it’s time to search for professional aluminum welding help:
-
Your project is safety-critical, load-bearing, or must meet industry codes
-
You lack access to proper welding equipment or safety gear
-
The job involves thick, thin, or dissimilar materials that require advanced technique
-
You need a guarantee of quality, appearance, or long-term durability
-
Previous DIY attempts resulted in failed or unsightly joints
If any of these sound familiar, it’s time to consult a professional. Not only will you benefit from their experience and equipment, but many pros also offer warranties or satisfaction guarantees—giving you peace of mind that your project is built to last.
Tips for Finding and Vetting Aluminum Welding Experts
-
Search Locally: Use terms like “aluminum welding near me” or “aluminum fabrication services” to find nearby shops or freelancers.
-
Check Qualifications: Look for certifications such as AWS or ASME, and ask about experience with aluminum specifically—skills from steel welding don’t always translate.
-
Review Past Work: Ask for photos or references from similar projects. Inspect weld quality, bead consistency, and finish.
-
Ask About Guarantees: Does the shop offer warranties or satisfaction guarantees? This can be a sign of professionalism and confidence in their work.
-
Discuss Timeline and Communication: Clear expectations about turnaround, pricing, and project updates help avoid surprises.
Choosing the right professional isn’t just about price—it’s about trust, quality, and the confidence that your aluminum project will stand the test of time. Up next, we’ll wrap up with key takeaways and expert tips to ensure your next aluminum welding adventure is a success from start to finish.
Ever finished a weld and wondered, “Did I do everything right?” Or maybe you’re planning your next big project and want to make sure you’re setting yourself up for successful aluminum welding from the start. Let’s bring together the most important lessons from this guide—so you can approach every aluminum weld with confidence, skill, and a clear path to professional-quality results.
Core Takeaways for Successful Aluminum Welding
-
Know Your Material: Aluminum is unique—its high thermal conductivity, tough oxide layer, and low melting point mean you can’t treat it like steel. Always identify your alloy, understand its properties, and tailor your approach accordingly (UTI).
-
Preparation Is Everything: Cleanliness, tight joint fit-up, and proper storage are non-negotiable. Taking the time to prep your material and workspace is one of the most effective aluminum welding tips for avoiding porosity, cracking, and other common issues.
-
Choose the Right Process and Equipment: Match your welding method (TIG, MIG, or Stick) and machine features to your project’s thickness, complexity, and appearance needs. Don’t hesitate to invest in a welder with AC output, pulse capability, or a spool gun for the best results on aluminum.
-
Dial In Consumables: Select filler metals, tungsten electrodes, and shielding gases that are compatible with your base alloy and application. High-quality rods and wire, paired with a clean, premium base material, make all the difference in weld strength and appearance.
-
Master Technique Through Practice: Whether it’s controlling heat input, maintaining a steady hand, or troubleshooting issues on the fly, practice and patience are the keys to mastering aluminum welding. Even seasoned pros keep learning and refining their skills.
-
Troubleshoot and Adapt: Don’t get discouraged by setbacks. Use checklists and tables from this guide to diagnose porosity, cracking, or distortion—and remember, there’s almost always a solution or alternative joining method available.
The Path to Welding Excellence
Imagine the satisfaction of laying down a flawless bead on your next project, or confidently tackling a new alloy or joint design. The best welders are lifelong learners—always seeking new techniques, materials, and tools. Stay curious by:
-
Practicing on scrap before tackling critical projects
-
Reading industry resources and joining welding forums
-
Attending workshops or certification courses to deepen your expertise
-
Consulting with experienced welders or suppliers when facing new challenges
Build on a Strong Foundation: The Role of Quality Aluminum Suppliers
Even with the best skills and equipment, your results depend on the quality of your base material. Imagine investing hours in setup and technique, only to be held back by inconsistent or contaminated aluminum. That’s why partnering with reputable suppliers—such as Shengxin Aluminum—is a smart move for anyone serious about welding success. Top suppliers offer:
-
Consistent, high-purity aluminum profiles and alloys for optimal weldability
-
Expert guidance on material selection, storage, and handling
-
Custom processing and a wide product range to suit any application—from aerospace to construction
-
Reliable service and support for both small businesses and large-scale industrial projects
With the right supplier, you’ll notice fewer defects, better appearance, and stronger, longer-lasting welds—especially in demanding or high-tech environments.
Ready for Your Next Aluminum Welding Challenge?
Whether you’re just starting out or leveling up your skills, remember: every great weld begins with knowledge, preparation, and the right materials. Keep this guide handy, keep practicing, and don’t hesitate to reach out to experts or trusted suppliers for advice on your next project. Here’s to your ongoing success in aluminum welding—may every bead be strong, clean, and built to last!
1. Is it difficult to weld aluminum compared to steel?
Welding aluminum is more challenging than steel due to its high thermal conductivity, tough oxide layer, and low melting point. These properties require special preparation, precise control of heat input, and the right equipment, but with practice and proper setup, strong and clean aluminum welds are achievable.
2. What is the best way to weld aluminum for beginners?
For beginners, MIG welding with a spool gun is often easier and more forgiving, especially on thicker materials. TIG welding provides higher precision but requires more skill. Regardless of method, thorough cleaning, correct machine settings, and matching filler metals to the base alloy are essential for successful results.
3. Can you weld aluminum to steel directly?
Directly welding aluminum to steel is not recommended because it creates brittle intermetallic compounds that weaken the joint. Instead, use bimetallic transition inserts, mechanical fastening, or specialized adhesives to join aluminum and steel safely and effectively.
4. What should I look for in an aluminum welder?
Choose a welder with AC output for TIG, high-frequency start, pulse capabilities, and spool gun compatibility for MIG. Ensure it matches your material thickness and project needs. Quality base aluminum from reputable suppliers like Shengxin Aluminum also enhances weld strength and consistency.
5. When should I hire a professional aluminum welder?
Hire a professional for safety-critical, load-bearing, or code-compliant projects, or when you lack specialized equipment and experience. Professionals ensure weld quality, structural integrity, and compliance with industry standards, saving time and preventing costly mistakes.


 Onlineservice
 0086 136 3563 2360
 sales@sxalu.com
 +86 136 3563 2360
 Deutsch
 English
 français
 русский
 español
 português
 العربية
 ไทย
ไทย Việt
Việt Українська