Ever noticed condensation streaming down your windows on a cold morning? That moisture buildup is more than just an annoyance. It signals a ventilation problem that can lead to mold growth and poor indoor air quality. Window trickle vents offer a simple yet effective solution, providing continuous fresh air circulation without compromising your home's security or warmth.
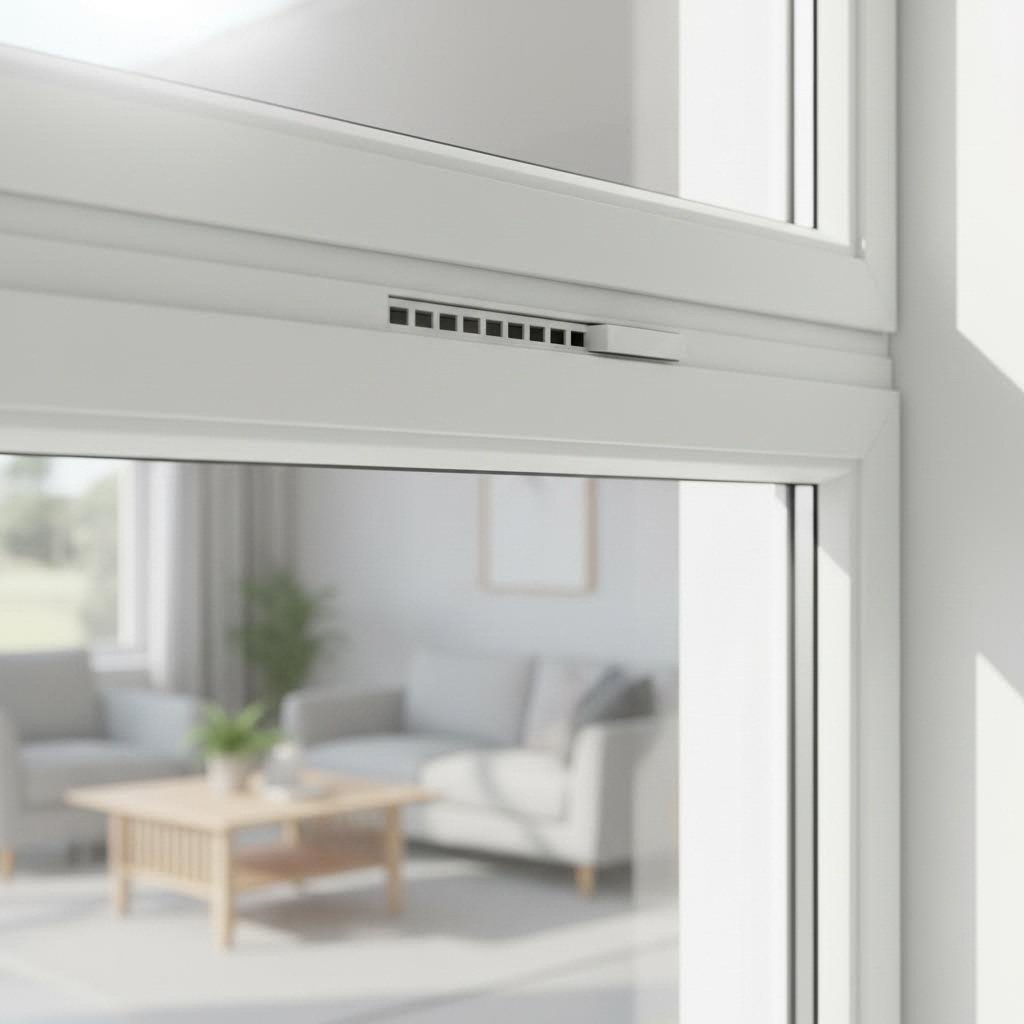
Trickle vents are small, controllable openings integrated into window frames that allow a constant "trickle-feed" of airflow from outside to inside your home. These background ventilators are essentially staggered slits in the frame, fitted with covers you can open or close as needed. While you have control over them, they're designed to remain open for continual trickle ventilation windows provide throughout the day.
Imagine your home as a sealed container. Modern uPVC windows are incredibly airtight, which is fantastic for energy efficiency but creates a problem: stale, moisture-laden air gets trapped inside. Trickle air vents for windows solve this by working on passive ventilation principles.
Here's how it works: warm air naturally rises and escapes through upper openings, while cooler fresh air enters to replace it. This creates a gentle, continuous air exchange without any mechanical assistance or electricity. The vent's staggered design prevents direct drafts while still allowing sufficient airflow to displace moisture-heavy indoor air.
You'll typically find these vents positioned at the top of window frames, either through the frame itself or through the opening sash above the glazing unit. The placement maximizes their effectiveness since warm, humid air naturally rises to that level.
Think about your daily activities: showering, cooking, drying laundry, even breathing. All of these release significant moisture into your home's air. Without adequate ventilation, this moisture settles on cold surfaces as condensation, creating ideal conditions for mold growth.
The health implications are serious. Mold thrives in damp, cold locations, and exposure can trigger respiratory issues, allergies, and other significant health problems. Trickle vents help reduce airborne toxins by maintaining consistent air circulation.
Beyond health concerns, there's a legal dimension. The Building Regulations Approved Document Part F, updated in June 2022, specifically focuses on improving ventilation as buildings become more airtight. Under current regulations, most replacement windows require background ventilators. When replacing windows that already have trickle vents, your new windows must include vents of at least the same size. For existing windows without vents, you must demonstrate that new replacements won't reduce ventilation, which typically means adding trickle vents to comply.
It's worth noting that windows with night latches allowing a small security gap aren't accepted as sufficient background ventilation under these regulations. Proper trickle vents remain the standard solution for achieving compliant, healthy indoor air quality.
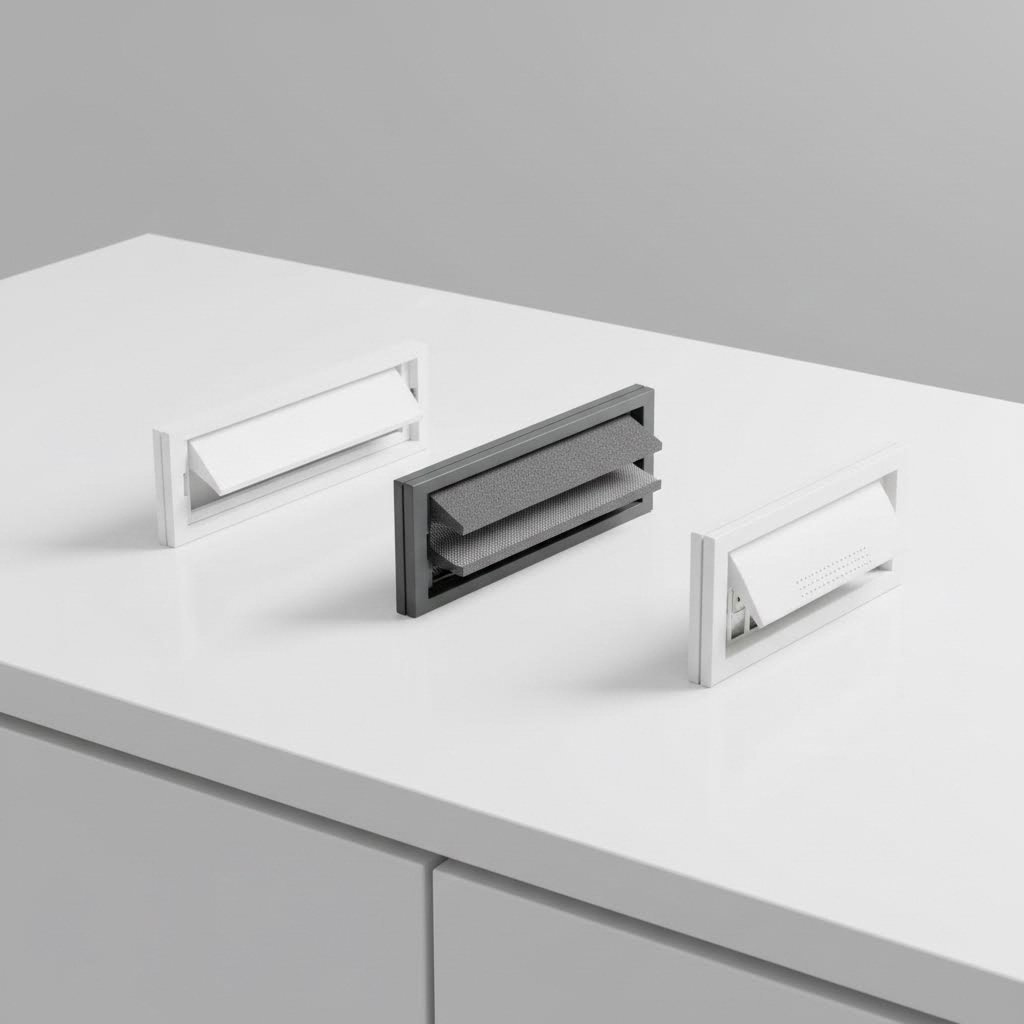
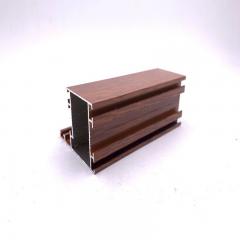
Not all trickle vents in windows are created equal. When you're fitting vents to your uPVC frames, you'll encounter three main categories, each designed for different living situations and challenges. Understanding these options helps you select the right solution for your specific circumstances, whether you're battling traffic noise, excessive humidity, or simply need reliable background ventilation.
These are the workhorses of window ventilation. Standard manual trickle vents feature a simple slider mechanism that gives you complete control over airflow. Pull the slider open, and fresh air flows through. Close it during a storm or particularly cold night, and you seal off the opening.
What makes them popular? They're straightforward, affordable, and remarkably effective for most homes. Typically covering ventilation areas between 2000-8000mm² equivalent area, they satisfy building regulation requirements when properly sized for your rooms. The internal canopy includes a closure plate that you can position to direct airflow away from occupants, reducing the sensation of drafts while still circulating fresh air.
Installation is relatively simple since they don't require electrical connections or specialized maintenance. For the average homeowner looking to address condensation issues without overcomplicating things, standard manual vents deliver excellent value.
Living near a busy road, railway line, or flight path? Standard air vents in double glazed windows might solve your condensation problem while creating a new one: noise intrusion. Acoustic trickle vents address this challenge with specialized internal designs that attenuate sound while maintaining adequate airflow.
Here's how they work differently from standard options:
Acoustic performance is measured using the Dn,e,w rating in decibels. According to ERA's technical specifications, their 2500 Link Vent achieves 35 dB sound attenuation when open and 40-46 dB when closed, depending on rout size. Higher ratings indicate better sound reduction. For context, BS 8233:2014 recommends that noise levels in habitable rooms shouldn't exceed 35 dB, with restful sleep requiring ambient noise below 30 dB.
Imagine a vent that thinks for itself. Humidity-controlled trickle vents automatically adjust their opening based on moisture levels in your home. When humidity rises from cooking, showering, or drying laundry, they open wider. When conditions normalize, they partially close to conserve heat.
These smart vents use humidity-sensitive materials that expand or contract in response to moisture in the air. No batteries, no wiring, no apps to manage. The mechanism responds purely to environmental conditions, making them ideal for households where occupants might forget to adjust manual vents or aren't home during peak moisture-generating activities.
The trade-off? They cost more upfront and remove some user control. However, for bathrooms, kitchens, or utility rooms where humidity fluctuates significantly, they provide targeted ventilation exactly when needed.
Choosing between these types depends on your priorities. The following comparison breaks down the key differences:
| Feature | Standard Manual | Acoustic | Humidity-Controlled |
|---|---|---|---|
| Noise Reduction | Basic (25-30 dB typical) | Enhanced (32-46 dB) | Basic to Moderate |
| Airflow Capacity | 2000-8000mm² EA | 2500-5000mm² EA | Variable based on humidity |
| Price Range | £8-£20 per unit | £25-£60 per unit | £30-£50 per unit |
| User Control | Full manual control | Full manual control | Automatic adjustment |
| Best Use Cases | Most residential properties in quieter areas | Properties near roads, airports, railways, or nightlife | Kitchens, bathrooms, homes with variable occupancy |
| Installation Complexity | Straightforward | Moderate (may need canopy) | Straightforward |
For most homeowners tackling condensation in typical suburban or rural settings, standard manual trickle vents windows provide the best balance of performance, simplicity, and value. They meet regulatory requirements, offer reliable ventilation, and keep costs manageable. However, if external noise is disrupting your comfort or you want hands-free moisture management, the specialized alternatives justify their higher price points.
Once you've identified the right vent type for your situation, the next critical decision involves whether you're adding vents to existing windows or installing them as part of a complete window replacement.
So you've chosen the right type of trickle vent for your needs. Now comes the pivotal question: can you add window air vents to your existing uPVC frames, or does the job require complete window replacement? This distinction affects everything from cost and complexity to warranty protection and long-term performance. Let's break down both approaches so you can make an informed decision.
Good news first: yes, you can retrofit trickle vents to existing uPVC windows. According to Astraframe's installation guide, adding vents to already-installed frames is achievable with careful planning and the right tools. However, it's not as simple as drilling a few holes and screwing in a vent.
Here's what retrofitting involves:
Frame thickness is critical. Most retrofit trickle vents require a minimum frame depth of 24mm to provide adequate material for secure mounting. Thinner frames may not offer sufficient support, and forcing installation could weaken the structure.
What about structural concerns? This is where homeowner discussions often heat up. Some worry that drilling into house window vents locations compromises the frame's strength. In reality, the top section of most uPVC window frames is designed with hollow chambers that can accommodate modifications. The key is staying within the outer chamber and avoiding the sealed glazing unit entirely. As one manufacturer notes, maintaining adequate distance from the double-glazed panel is essential since contact with the glass during drilling causes extensive damage requiring full replacement.
When ordering new uPVC windows, trickle vents can be factory-fitted during manufacturing. This approach offers several advantages over retrofitting:
If you're planning window replacement anyway, specifying trickle vents from the outset eliminates the need for later modification. Many reputable window companies now include drip vents in windows as standard on new installations, recognizing their importance for meeting ventilation regulations.
Here's an honest assessment that many guides skip: drilling into existing uPVC frames may void your manufacturer warranty. Most window warranties explicitly exclude damage caused by customer modifications, and creating vent openings definitely qualifies.
Before retrofitting, consider these questions:
For windows still under warranty, contact your supplier before proceeding. Some manufacturers offer professional retrofit services that preserve warranty coverage, while others may provide guidance on acceptable modification methods.
Retrofitting trickle vents is technically a DIY-friendly project for confident homeowners with basic power tool experience. However, several situations call for professional involvement:
When in doubt, requesting a quote from a local window specialist provides clarity on whether DIY makes sense for your situation. The consultation often costs nothing and reveals potential complications before you've committed time and money to the project.
With the retrofitting versus new installation decision settled, your next step involves precise measurements to ensure the vents you purchase actually fit your frames correctly.
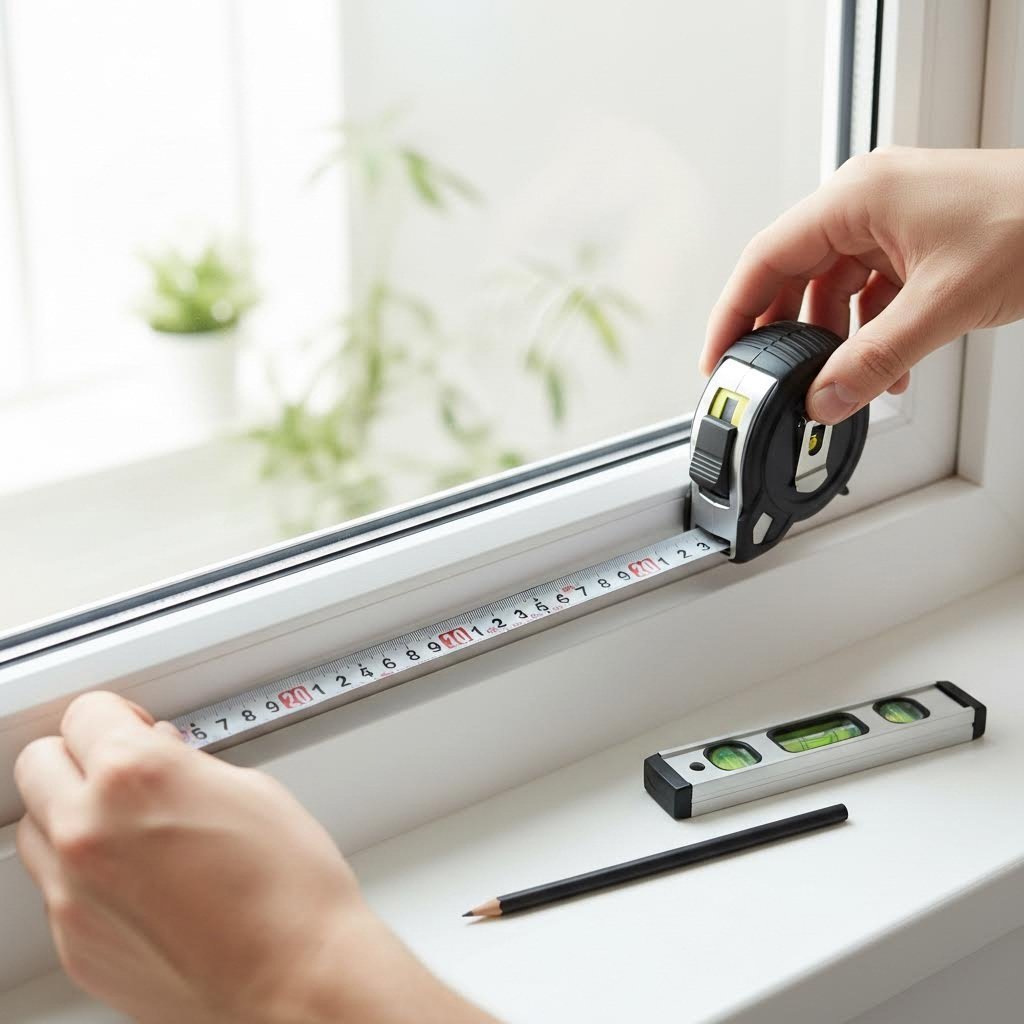
You've decided to retrofit a window trickle vent to your existing uPVC frames. But here's where many DIY projects go wrong: ordering the wrong size. A vent that's too long won't fit, one that's too short leaves gaps, and inadequate ventilation capacity means your condensation problem persists. Getting measurements right the first time saves money, frustration, and return shipping fees.
This measuring guide walks you through every dimension you need to capture before purchasing. Take your time here. Accurate measurements are the foundation of a successful installation.
Before reaching for your tape measure, understand what you're measuring and why. A trickle vent window installation requires three critical frame dimensions: width, depth, and available flat surface area.
Start with the horizontal measurement across the top rail of your window frame. This determines the maximum vent length you can accommodate. Here's the process:
Common trickle vent sizes in the UK market include 300mm, 400mm, and 525mm lengths. According to GB DIY Store's sizing guidance, a 300mm vent suits windows up to 600mm wide, while 400mm vents work for larger windows exceeding 600mm width. Always choose a vent slightly shorter than your available space rather than forcing a tight fit.
Frame depth is where many homeowners encounter problems. Your uPVC frame must have sufficient material thickness to support drilling through-holes without compromising structural integrity. Here's what to check:
Why does this matter? Windows vents require holes drilled completely through the frame from inside to outside. If your frame is too shallow, the vent components won't seat properly, leading to air leaks, water ingress, and a poor aesthetic finish. Most modern uPVC window profiles exceed the 24mm minimum, but older or budget frames may fall short.
The vent needs a flat mounting surface on both the interior and exterior of your frame. Curved profiles, decorative moldings, or chamfered edges can interfere with proper installation. Run your finger along the top rail to identify any contours that might prevent the vent from sitting flush.
Accurate measurement requires the right equipment. Gather these items before you begin:
A simple tip: measure twice, order once. Double-check every dimension before finalizing your purchase. The few extra minutes invested here prevent the headache of returning incorrectly sized components.
Selecting the right vent isn't just about physical fit. You also need adequate ventilation capacity to meet building regulations and actually solve your condensation problem. This is where the concept of equivalent area (EA) becomes important.
Equivalent area measures the aerodynamic performance of a ventilator, expressed in square millimeters (mm²). Think of it as the effective opening size through which air can flow. A higher EA means greater airflow capacity.
According to Building Regulations Approved Document Part F, background ventilators must provide minimum equivalent areas based on room type and building configuration:
| Room Type | Multi-Story Minimum EA | Single-Story Minimum EA |
|---|---|---|
| Living spaces | 8,000mm² | 10,000mm² |
| Kitchen | 8,000mm² | 10,000mm² |
| Bathroom | 4,000mm² | 4,000mm² |
| Utility room & toilet | No minimum specified | No minimum specified |
Here's a practical example: if you're installing vents in a living room of a two-story house, you need background ventilators providing a combined EA of at least 8,000mm². A single large vent might achieve this, or you could distribute the capacity across multiple windows in the room.
The regulations also specify that living spaces and kitchens should have no fewer than five background ventilators in houses with two or more bedrooms. For one-bedroom properties, the minimum drops to four. This distribution ensures airflow throughout the space rather than concentrated in one location.
When shopping for your trickle vent, check the manufacturer's stated equivalent area. Standard vents typically range from 2,500mm² to 8,000mm² EA per unit. Here's how common vent lengths correlate with ventilation capacity:
For rooms requiring 8,000mm² EA minimum, you might need two 400mm vents across different windows, or a single 525mm high-flow model. Always verify the specific EA rating on your chosen product rather than assuming based on physical size alone.
To simplify your selection, here's a quick reference matching typical window widths with appropriate vent lengths:
Remember, these are guidelines rather than rigid rules. Your specific frame profile and obstruction locations may require adjustments. When in doubt, contact the vent manufacturer with your exact measurements for a recommendation.
Measure the opening slot length precisely before ordering. This is the part where air flows through, not including the fixing flanges on either end.
With your measurements recorded and ventilation requirements calculated, you're ready to proceed with confidence. The next phase involves gathering your tools and walking through the actual installation process step by step.
You've measured your frames, selected the right vent type, and confirmed retrofitting makes sense for your situation. Now comes the hands-on work. Fitting trickle vents for windows is manageable for most DIY enthusiasts, but success depends on methodical execution and attention to detail. Rush through drilling or skip the sealing step, and you'll create problems worse than the condensation you're trying to solve.
This installation guide breaks down every stage of the process. Follow each step in sequence, and you'll achieve professional-quality results that provide years of reliable background ventilation.
Before starting, gather everything you need. Nothing derails a project faster than stopping mid-drill to hunt for a missing tool. Here's your complete checklist:
With everything assembled and within reach, you're ready to begin the installation.
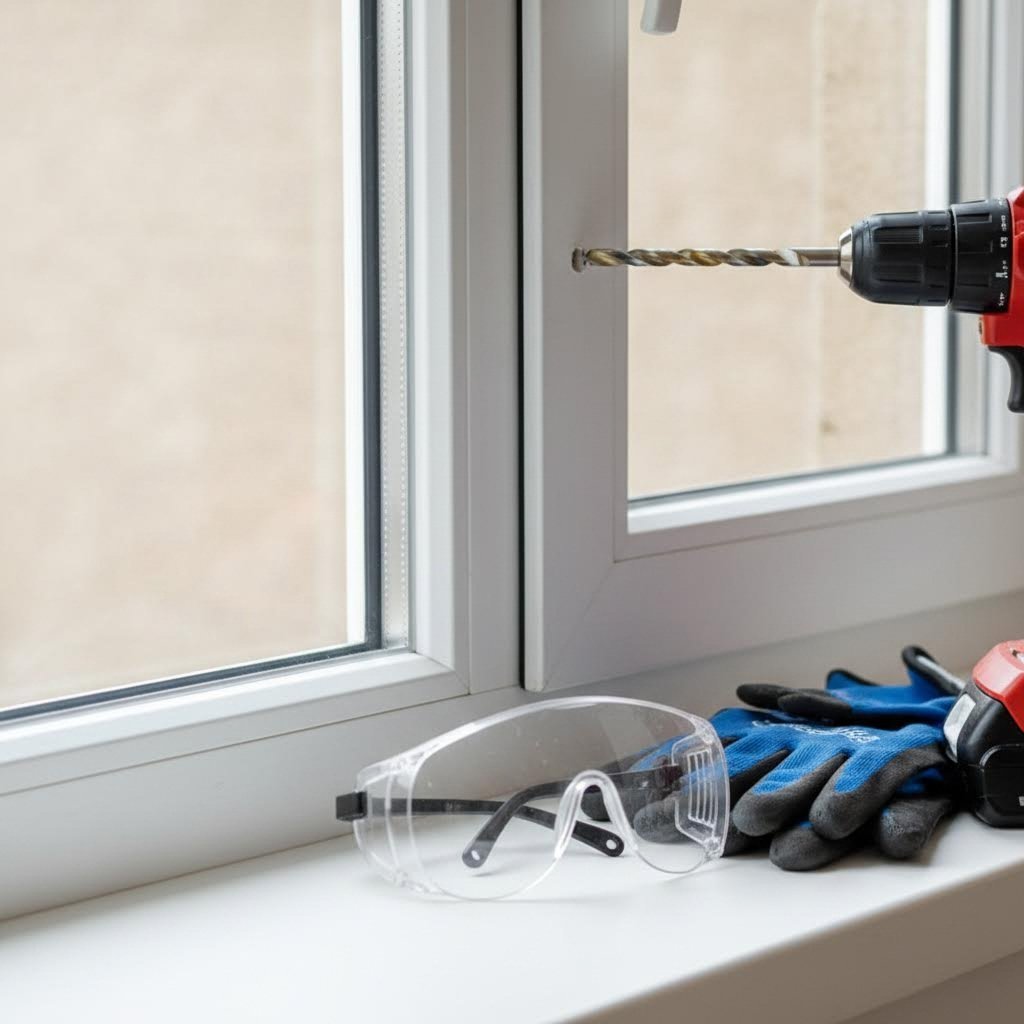
According to Astraframe's retrofitting guide, the process involves careful positioning, precise drilling, and secure fitting. Here's exactly how to proceed:
Start by determining where on the frame your vent will sit. Trickle vents are typically installed near the top of the window frame. Use your measuring tape to find the center point of the frame's width, then mark this with a light pencil line. Position the vent itself against the frame as a template to identify exactly where the fixing holes and slot need to go. Mark both the inside and outside surfaces to ensure perfect alignment when drilling through.
Wrap a small piece of masking tape around your drill bit at the depth you need to drill. This prevents going too deep and damaging the frame or, worse, hitting the glazing unit. Double-check all your measurements one final time before proceeding. As the Stewart Milne installation guide emphasizes, this verification step prevents costly mistakes that are difficult to correct once you've started drilling.
Select your high-speed metal drill bit suitable for uPVC. Begin drilling pilot holes from the inside of the frame at each marked fixing point. Keep the drill perpendicular to the frame surface to ensure straight holes. Apply steady, moderate pressure and let the drill bit do the work rather than forcing it through.
Move to the exterior of your window and repeat the drilling process. Your pilot holes from inside should guide the bit to break through at the correct positions. This two-sided approach ensures cleaner holes and proper alignment between internal and external components.
For air to flow through, you'll need to create a slot or series of holes between the fixing points. Some vents use a single elongated slot, while others work with multiple smaller holes. Follow your specific vent manufacturer's template for the correct slot dimensions and positioning. Remove material carefully to avoid cracking the surrounding frame.
After drilling, use sandpaper or a fine file to remove any rough edges, burrs, or plastic shards around the holes. Ensure the openings are completely clean and free from debris before fitting the vent components. A soft cloth helps remove dust and particles.
Take the external canopy or cover piece and align it with the drilled holes on the outside of your frame. Insert the provided screws through the vent and into the frame. Tighten securely but avoid overtightening, which can distort the uPVC or crack the vent housing. Check that the component sits flush against the frame.
Move inside and position the internal vent piece to align with the external component already installed. The internal section typically includes the slider control for regulating airflow. Secure with screws through the provided fixing points, again being careful not to overtighten. Verify that both pieces line up perfectly.
Run a continuous bead of low-modulus silicone sealant around the edge where the external vent meets the frame. This weatherproofs the installation and prevents water ingress. Smooth the sealant with a gloved finger or sealant tool for a neat finish. Allow adequate curing time before exposing to rain.
Open and close the trickle vent slider to confirm smooth operation. Verify that the mechanism allows adequate airflow when open and seals properly when closed. Apply screw cover caps to conceal the fixing screws for a professional appearance. Clean any pencil marks or fingerprints from the frame and vent surfaces.
Working with uPVC requires specific techniques to prevent damage and ensure your safety. Keep these precautions front of mind throughout the installation.
uPVC responds differently to drilling than wood or metal. Too fast, and friction generates heat that melts the plastic, creating messy holes with ragged edges. Too slow, and the bit may grab and crack the material.
Many uPVC frames contain internal steel or aluminum reinforcement for structural rigidity. Drilling into these bars can damage your drill bit, throw off your alignment, and compromise the frame's strength.
First-floor and higher windows require ladder work, adding significant risk to the project.
uPVC can become brittle, especially in cold weather. Follow these tips for clean results:
Measure twice, drill once. A hole in the wrong position cannot be undone, and covering mistakes with blanking plates affects both appearance and performance.
With your easy glaze trickle vents or other chosen air vents for double glazed windows now installed, the work isn't quite finished. Even careful installations sometimes encounter issues that need troubleshooting, from unexpected drafts to sticky sliders. Understanding how to diagnose and fix common problems ensures your ventilation system performs as intended.
Even the most careful DIY installation can hit snags. Perhaps your drill slipped, creating a hole slightly off-center. Maybe the vent rattles every time the wind picks up. Or despite your new vents, condensation still streams down the glass each morning. These window vent installation problems frustrate homeowners, but most have straightforward solutions once you understand what's gone wrong.
This trickle vent troubleshooting guide addresses the issues you're most likely to encounter after fitting vents to your uPVC windows. We'll cover fixes you can handle yourself and be honest about when it's time to call in a professional.
Drilled in the wrong spot? You're not alone. Misalignment is one of the most common mistakes during retrofit installations, and the consequences range from cosmetic annoyance to genuine functionality problems.
If your fixing holes are only a few millimeters off, you may still be able to salvage the installation:
Larger errors require a different approach. If holes are drilled too far from where the vent needs to sit, you have two realistic options:
Option 1: Use a trickle vent blanking plate
Blanking plates are designed precisely for this situation. These cover pieces fit over incorrect holes, allowing you to start fresh in the correct position. According to VENTI Group's technical resources, blanking plates seal unused openings while maintaining the frame's weatherproofing. Apply silicone sealant behind the plate before fixing it in place to prevent moisture ingress through the abandoned holes.
Option 2: Fill and redrill
For small pilot holes, you can fill them with a two-part uPVC repair compound or color-matched filler. Allow full curing time (typically 24 hours) before drilling new holes in the correct position. This approach works best for minor errors where the new holes won't overlap with the filled areas.
Learn from the mistake. When repositioning or installing additional vents:
Fixing trickle vent leaks ranks among the most common post-installation tasks. You installed vents to control airflow, not create drafts that make rooms uncomfortable. If you're feeling unwanted cold air streaming through, the sealing wasn't adequate.
Before applying solutions, confirm where air is entering:
Once you've pinpointed the leak, apply the appropriate fix:
Perimeter leaks: Remove any old or failed sealant using a craft knife or sealant remover tool. Clean the surfaces thoroughly with isopropyl alcohol to remove residue. Apply fresh low-modulus silicone sealant in a continuous bead around the entire vent edge. Press firmly to ensure contact with both the vent housing and frame. Smooth with a gloved finger and allow 24-48 hours to cure fully before testing.
Internal seal failures: If the vent's slider mechanism doesn't seal properly when closed, the issue lies within the vent itself. Some vents have replaceable gaskets or seals available as spare parts. Contact the manufacturer with your model details. If replacement seals aren't available, you may need to replace the entire vent with a higher-quality unit featuring better internal weatherstripping.
External canopy leaks: These often result from insufficient initial sealing. Carefully lift the edge of the external canopy (without removing it entirely) and inject additional sealant behind it using a fine-nozzle applicator. Press the component back into place and wipe away any excess. Adding a bead along the top edge of the external canopy prevents rainwater running behind it.
Not all sealants work equally well on uPVC:
Here's an uncomfortable truth: installing trickle vents doesn't guarantee condensation will vanish overnight. If moisture still appears on your windows after fitting vents, don't assume the installation failed. Several factors influence whether background ventilation alone resolves your problem.
According to research cited by VENTI Group, even functional trickle vents may inadequately ventilate highly airtight modern homes. Consider these possibilities:
If condensation persists, try these interventions before concluding the vents don't work:
Before calling a professional, work through this checklist covering the most common post-installation complaints:
Some problems exceed DIY solutions. Be honest with yourself about when professional intervention makes sense:
A qualified window installer or ventilation specialist can diagnose issues you might miss and provide solutions backed by professional guarantees. The cost of a consultation often proves worthwhile compared to repeated failed DIY attempts.
Understanding what things can go wrong helps you address them quickly, but prevention through proper installation remains the best strategy. Equally important is understanding the true costs involved, both for DIY projects and professional alternatives.
Wondering what this project will actually cost you? Whether you're retrofitting a single bathroom window or tackling every opening in your home, understanding the full financial picture helps you budget appropriately and decide between DIY and hiring a professional. Let's break down the real trickle vent installation cost, including the expenses that catch many homeowners off guard.
The good news? Trickle vents themselves are remarkably affordable. According to Federation of Master Builders, standalone trickle vents range from around £15 for basic models to at least £25 for advanced designs with features like enhanced noise reduction. Our earlier research indicates standard manual vents typically cost £8-£20 per unit, while acoustic versions run £25-£60 and humidity-controlled options fall between £30-£50.
But upvc window vent prices only tell part of the story. Here's what you'll actually spend on a complete DIY project:
If you already own basic DIY equipment, your diy window vent cost stays low. However, starting from scratch means budgeting for:
For a single window installation where you own basic tools, expect to spend £15-£30 total. Fitting vents to five windows with quality units and no existing tools might run £100-£200, depending on vent type selected.
When does professional trickle vent fitting make financial sense? According to Double Glazing Direct, homeowners should plan to spend around £30 to £80 for each new trickle vent when including professional installation fees.
Professional pricing typically breaks down as follows:
Consider hiring a professional when:
The following table provides an honest comparison to help you decide which approach suits your situation:
| Factor | DIY Installation | Professional Installation |
|---|---|---|
| Cost per vent | £15-£30 (materials only) | £30-£80 (all-inclusive) |
| 5-window project total | £75-£200 | £150-£400 |
| Time investment | 45-90 minutes per vent | 15-30 minutes per vent |
| Skill level required | Basic DIY competence with power tools | None required |
| Risk of errors | Moderate (drilling mistakes possible) | Low (experienced installers) |
| Warranty implications | May void window warranty | Often preserves or includes workmanship guarantee |
| Best suited for | Confident DIYers, single or few windows, budget-conscious | Multiple windows, warranty concerns, limited DIY experience |
Fitting trickle vents falls into the "moderately easy" category for DIY projects. If you've successfully hung shelves, assembled flat-pack furniture, or completed basic home repairs involving power tools, you possess the skills needed. The drilling is straightforward, and the components essentially snap together once holes are correctly positioned.
However, be honest about your comfort level. Drilling through window frames feels intimidating because mistakes are visible and difficult to hide. If you're anxious about the process, that stress might not justify the £50-£100 savings per window compared to professional installation.
Here's where many budget-conscious homeowners trip up: buying the cheapest vents available seems sensible until problems emerge within months. Low-quality trickle vents commonly suffer from:
A £5 vent that fails within two years costs more than a £15 quality unit that performs reliably for a decade. When calculating your budget, factor in the labor of reinstalling replacements, not just the initial purchase price. Reputable brands with clear specifications and positive reviews justify their slightly higher prices through durability and consistent performance.
Spending an extra £5-£10 per vent on quality components typically delivers better long-term value than replacing cheap units every few years.
With costs understood and your installation approach decided, the final consideration involves how your new trickle vents integrate with other ventilation systems in your home to create a comprehensive airflow strategy.
Here's a common misconception that trips up many homeowners: installing trickle vents alone will solve all your ventilation problems. While passive ventilation windows provide essential background airflow, they're just one component of a complete whole house ventilation system. Understanding how trickle vents interact with other ventilation methods helps you create a healthier, more comfortable home environment.
Think of your home's ventilation like a breathing system. Trickle vents act as the nostrils, providing a constant, gentle intake of fresh air. But without lungs to process and circulate that air, or mechanisms to expel stale air, the system remains incomplete. Let's explore how background ventilation for homes works alongside mechanical systems to achieve optimal indoor air quality.
Ever wondered why your bathroom extractor fan seems ineffective, leaving mirrors steamed up despite running for ages? The culprit is often inadequate makeup air. Extractor fans work by pulling air out of a room, but that air needs replacing from somewhere. In airtight modern homes without background ventilators, extract fans struggle to create the pressure differential needed to function effectively.
This is where trickle vents and extractor fans form a powerful partnership. According to KJM Group's ventilation guide, homes using continuous mechanical extract ventilation specifically require passive trickle vents to provide the background supply of fresh air. Without this intake, extractor fans work harder, consume more energy, and move less air than designed.
Imagine cooking a meal that generates significant steam and cooking odors. Here's what happens in a well-ventilated home:
Without adequate background ventilation, this chain breaks down. Extractor fans create negative pressure that pulls air through any available gap, potentially drawing pollutants from crawlspaces, attached garages, or flue systems rather than clean outdoor air through controlled openings.
For best results with this combined approach:
The U.S. Department of Energy notes that exhaust ventilation systems work by depressurizing your home, with makeup air infiltrating through intentional passive vents. This same principle applies to individual extractor fans in kitchens and bathrooms, making background ventilators essential supporting infrastructure.
Mechanical Ventilation with Heat Recovery (MVHR) represents a different approach entirely. These sophisticated systems supply fresh air while simultaneously extracting stale air, recovering up to 80% of the heat from outgoing air to warm incoming air. Sounds ideal, but where do trickle vents fit into this picture?
Here's the key distinction: if your home has a properly designed and installed MVHR system, you typically should not install trickle vents. According to building regulation guidance, homes with MVHR do not require background ventilators because the mechanical system handles both air supply and extraction more efficiently than passive vents.
Installing trickle vents in an MVHR-equipped home actually undermines the system's performance:
If you're considering window replacement in a home with MVHR, discuss ventilation requirements with your installer. Building control officers may require evidence that your MVHR system provides adequate ventilation before approving windows without trickle vents.
Many homes fall between fully natural ventilation and complete MVHR systems. You might have:
In these scenarios, trickle vents remain essential. As the Department of Energy explains, exhaust ventilation systems rely partly on random air leakage and intentional passive vents for makeup air. Your background ventilators provide that controlled fresh air supply, allowing extract systems to function as designed.
Let's address the elephant in the room. Trickle vents provide essential background ventilation, but expecting them to handle all your home's air quality needs sets you up for disappointment. Understanding their limitations helps you build a realistic ventilation strategy.
A typical shower generates several liters of water vapor in under ten minutes. Cooking a meal involving boiling water releases significant moisture. Trickle vents, designed for gentle background airflow of perhaps 4,000-8,000mm² equivalent area per room, simply cannot evacuate this moisture quickly enough to prevent condensation.
This is why building regulations require extract ventilation in kitchens and bathrooms in addition to background ventilators. The extract fan handles rapid moisture removal during and after steam-generating activities, while trickle vents maintain baseline air quality between these events.
Passive ventilation relies on pressure differentials created by wind and temperature differences between inside and outside. On still, mild days, this driving force diminishes, reducing airflow through trickle vents to a trickle indeed. Mechanical systems provide consistent airflow regardless of weather conditions.
While trickle vents help dilute indoor air pollutants by introducing fresh outdoor air, they don't filter incoming air effectively. Homes near busy roads may find standard vents introduce as many pollutants as they remove. In such cases, acoustic vents with filtration media or mechanical systems with integrated filters offer better solutions.
For most homes, effective ventilation combines multiple approaches:
| Ventilation Type | Purpose | Where Required |
|---|---|---|
| Background ventilation (trickle vents) | Continuous fresh air supply and stale air dilution | All habitable rooms, kitchens, bathrooms |
| Extract ventilation (fans) | Rapid removal of moisture and pollutants at source | Kitchens, bathrooms, utility rooms |
| Purge ventilation (openable windows) | Occasional rapid air exchange for odor or heat removal | All habitable rooms |
Each component plays a distinct role. Trickle vents maintain baseline air quality around the clock. Extract fans tackle moisture and pollutant peaks. Openable windows allow occasional purge ventilation when you need rapid air exchange, such as after painting or during summer heat.
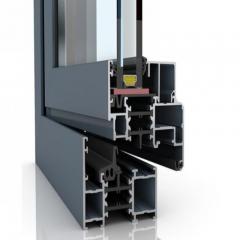
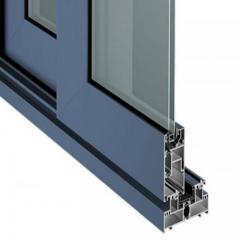
For homeowners seeking quality slim-profile trickle vents that integrate seamlessly with existing uPVC systems while supporting this comprehensive approach, products like Shengxin Aluminium's Slim uPVC Window Trickle Vents offer manual slider control for regulated airflow while maintaining thermal efficiency. Their low-profile design complements modern window aesthetics without compromising the background ventilation your extract systems depend upon.
Trickle vents are the foundation of healthy home ventilation, but they work best as part of a complete system that includes extract ventilation and the option for purge ventilation through openable windows.
With a clear understanding of how passive and mechanical ventilation systems complement each other, you're now equipped to make informed decisions about your home's air quality strategy. The final step involves pulling together everything we've covered into actionable recommendations for choosing and installing the right trickle vents for long-term success.
You've journeyed through everything from understanding what trickle vents do to troubleshooting installation hiccups. Now comes the moment to pull it all together into actionable guidance. Whether you're tackling a single bathroom window or ventilating an entire property, these final recommendations ensure your investment delivers years of reliable performance and healthier indoor air.
Choosing window ventilation isn't complicated once you know what factors actually matter. Let's distill the key decision points and leave you with the confidence to move forward with your project.
With dozens of products available, how do you identify the best trickle vents for uPVC windows in your specific situation? Focus on three primary criteria that determine whether a vent will serve you well.
Where does your property sit? If you're in a quiet suburb or rural setting, standard manual vents deliver excellent value without unnecessary features. However, living near a busy road, railway line, or flight path changes the equation entirely.
Remember, acoustic performance comes at a price premium. If noise isn't disrupting your comfort, spending extra for sound attenuation wastes money better allocated elsewhere.
Think about who uses each room and what activities happen there. A bedroom occupied only at night has different ventilation demands than a busy family bathroom or kitchen where moisture spikes occur daily.
Your trickle vent buying guide wouldn't be complete without honest budget talk. Here's the reality: quality matters more than you might expect with these components.
| Budget Level | Price Per Vent | What You Get | Best For |
|---|---|---|---|
| Economy | £5-£12 | Basic functionality, shorter lifespan, potential seal issues | Rental properties, temporary solutions |
| Mid-range | £15-£25 | Reliable performance, durable materials, proper seals | Most homeowners, long-term installations |
| Premium | £30-£60+ | Enhanced features (acoustic, humidity control), superior build quality | Noise-sensitive locations, demanding applications |
The sweet spot for most homeowners sits in the mid-range. Quality window vents UK suppliers offer at £15-£25 per unit typically deliver the durability and performance characteristics that justify the modest premium over budget options. Spending less often means replacing units within a few years, while spending more only makes sense when specific features genuinely benefit your situation.
Before you pick up that drill, commit these essential principles to memory. They represent the distilled wisdom from everything we've covered and will save you from the most common pitfalls.
Measure carefully, measure twice, then measure once more before drilling. A hole in the wrong position cannot be undone, and the few extra minutes invested in verification prevent hours of frustration fixing mistakes.
Choose quality components from reputable manufacturers. The £10 you save on a cheap vent evaporates when it fails within two years, requiring complete reinstallation and potentially damaging your frame in the process.
Never compromise on sealing. A continuous bead of low-modulus silicone around every external junction prevents water ingress that causes far more damage than the condensation you're trying to eliminate.
DIY installation suits confident homeowners comfortable with power tools and basic home improvement tasks. But recognizing when a job exceeds your capabilities isn't admitting defeat. It's smart decision-making.
Consider professional help when:
The cost difference between DIY and professional installation typically ranges from £20-£50 per vent. For complex situations or when peace of mind matters, that investment often proves worthwhile.
Properly installed quality trickle vents deliver benefits that extend far beyond stopping condensation on your windows. When your ventilation system works as designed, you'll notice:
These benefits compound over years of use. A vent that costs £20 and lasts a decade while preventing hundreds of pounds in mold remediation or window frame damage represents exceptional value.
You now have everything needed to successfully fit trickle vents to your uPVC windows. Here's a simple action plan:
For homeowners seeking durable low-profile units designed for quiet passive ventilation and condensation reduction, Shengxin Aluminium's Slim uPVC Window Trickle Vents integrate seamlessly with existing window systems. Their manual slider control allows precise airflow regulation while maintaining thermal efficiency, and the robust construction ensures reliable performance year after year.
Fitting trickle vents to uPVC windows isn't complicated, but it does reward careful planning and quality execution. Take the time to do it right, and you'll enjoy healthier indoor air, condensation-free windows, and the satisfaction of a home improvement project that genuinely improves your daily living environment.
Yes, you can retrofit trickle vents to existing uPVC windows by drilling through the frame. You'll need a high-speed metal drill bit designed for uPVC, as you'll be cutting through layers of plastic and potentially metal reinforcement. Ensure your frame has a minimum depth of 24mm to accommodate the vent components securely. While the process is DIY-friendly, be aware that drilling into existing frames may void manufacturer warranties, so check your coverage before proceeding.
Yes, drilling into uPVC window frames is acceptable with the right tools and techniques. Use medium to high drill speeds with steady, moderate pressure to prevent melting or cracking the plastic. Position your vent installation in the outer hollow chambers of the frame profile, avoiding internal steel or aluminum reinforcement bars. Working in moderate temperatures helps prevent brittleness, and always maintain adequate distance from the double-glazed unit to avoid damaging the sealed glass.
Attach trickle vents by first marking the installation position on both internal and external frame surfaces. Drill pilot holes from the inside, then complete them from outside for proper alignment. Create the ventilation slot according to manufacturer specifications, then fit the external canopy first, securing with screws without overtightening. Install the internal component with its slider mechanism, apply low-modulus silicone sealant around the external edges for weatherproofing, and test the slider operation before finishing.
Trickle vents have several potential drawbacks to consider. Improper installation can allow outdoor pollutants or vehicle exhaust to enter your home. They provide minimal security as small openings may permit insects if not properly covered. Standard vents offer limited noise reduction compared to acoustic models. Additionally, trickle vents alone cannot handle peak moisture events from cooking or showering—they require complementary extractor fans. In highly airtight modern homes, passive vents may provide inadequate ventilation without mechanical support systems.
DIY trickle vent installation costs approximately £15-£30 per vent for materials, including standard manual units priced at £8-£20 each. Professional installation ranges from £30-£80 per vent, including materials and labor. For a five-window project, expect £75-£200 for DIY or £150-£400 for professional fitting. Quality acoustic vents cost £25-£60 each, while humidity-controlled options run £30-£50. Factor in tools if you don't own a drill, appropriate bits, and sealant, which can add £50-£150 to first-time DIY projects.


 Onlineservice
 0086 136 3563 2360
 sales@sxalu.com
 +86 136 3563 2360
 Deutsch
 English
 français
 русский
 español
 português
 العربية
 ไทย
ไทย Việt
Việt Українська