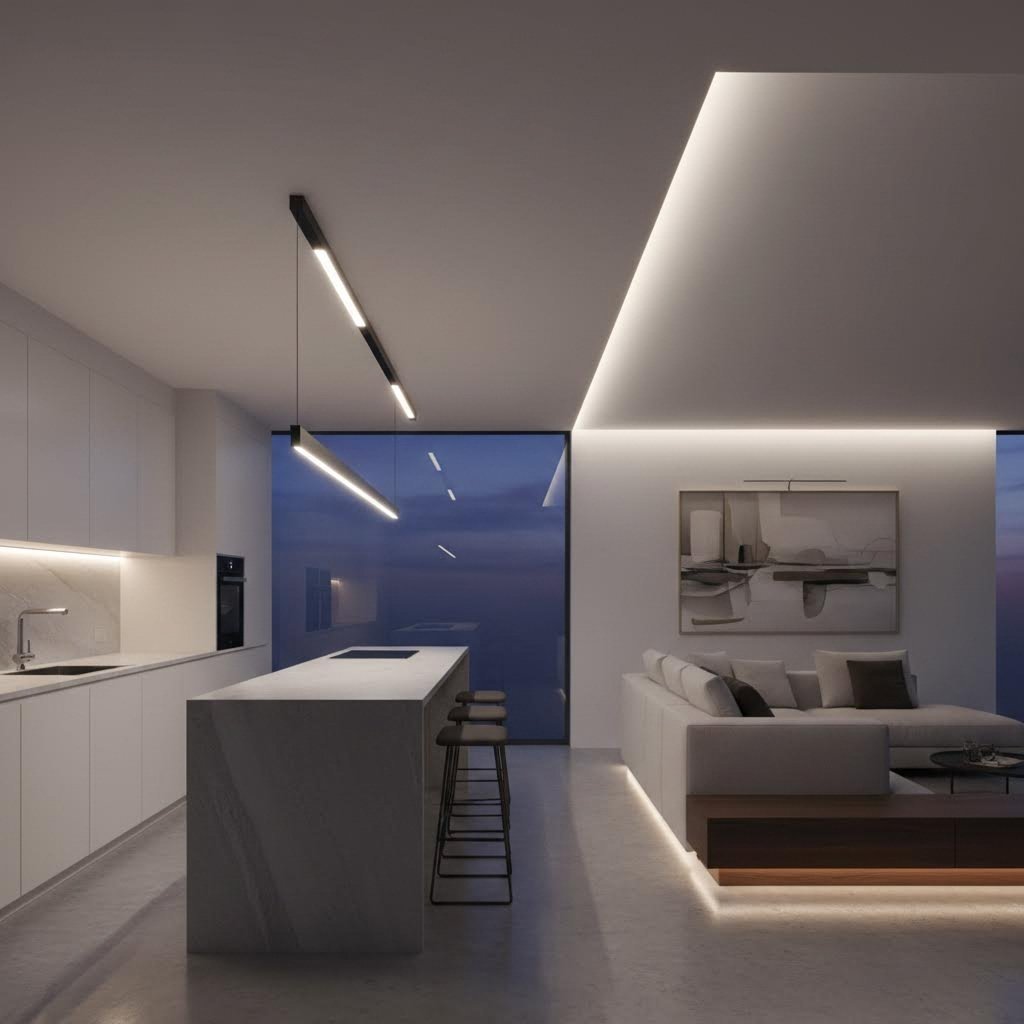
Have you ever wondered how professional lighting installations achieve that sleek, polished look while keeping LED strips protected and performing at their best? The answer lies in aluminum extrusion LED lighting—a complete system that has revolutionized modern lighting design across residential, commercial, and architectural applications.
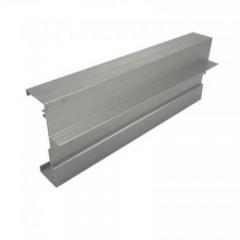
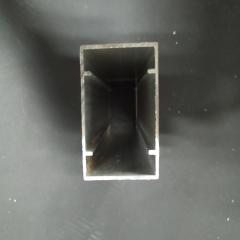
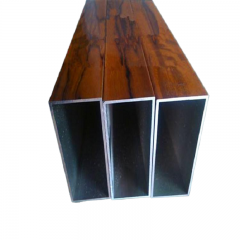
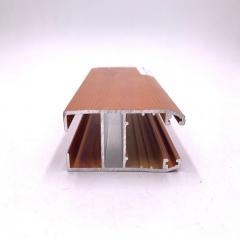
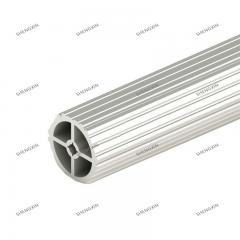
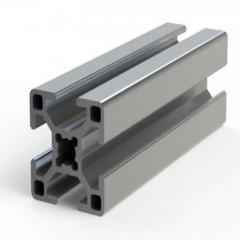
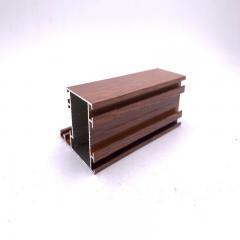
At its core, this lighting solution combines LED strip lights with specially manufactured aluminum profiles created through an extrusion process. During extrusion, heated aluminum is forced through a shaped die to create precise, consistent channels that serve as the perfect led housing for flexible LED strips. These profiles do far more than simply contain the lights—they provide critical structural support, enable clean installations, and most importantly, manage the heat that LEDs generate during operation.
When you're selecting a material to house LED strips, thermal conductivity becomes the deciding factor. So why does aluminum consistently outperform alternatives like plastic or steel? The answer comes down to physics.
Aluminum boasts a thermal conductivity of approximately 205 W/mK, which means it efficiently draws heat away from LED chips and dissipates it into the surrounding environment. This matters because LEDs, despite their energy efficiency, still generate heat at the junction where light is produced. Without proper thermal management, this heat buildup degrades LED performance and dramatically shortens lifespan.
Beyond thermal properties, aluminum offers an exceptional strength-to-weight ratio. An aluminum led channel remains lightweight enough for easy installation on ceilings and walls while providing the rigidity needed for perfectly straight lighting lines. The material also resists corrosion, accepts various surface finishes through anodizing, and can be precisely machined—making it the undisputed choice for professional led profile applications.
A complete light channel led system consists of several components working together seamlessly. Understanding each element helps you select the right combination for your specific project.
Together, these components create an integrated lighting system that protects your LED investment while delivering the aesthetic results you're aiming for. Whether you're tackling under-cabinet kitchen lighting or creating dramatic architectural accents, understanding this foundation sets you up for success throughout the selection and installation process.
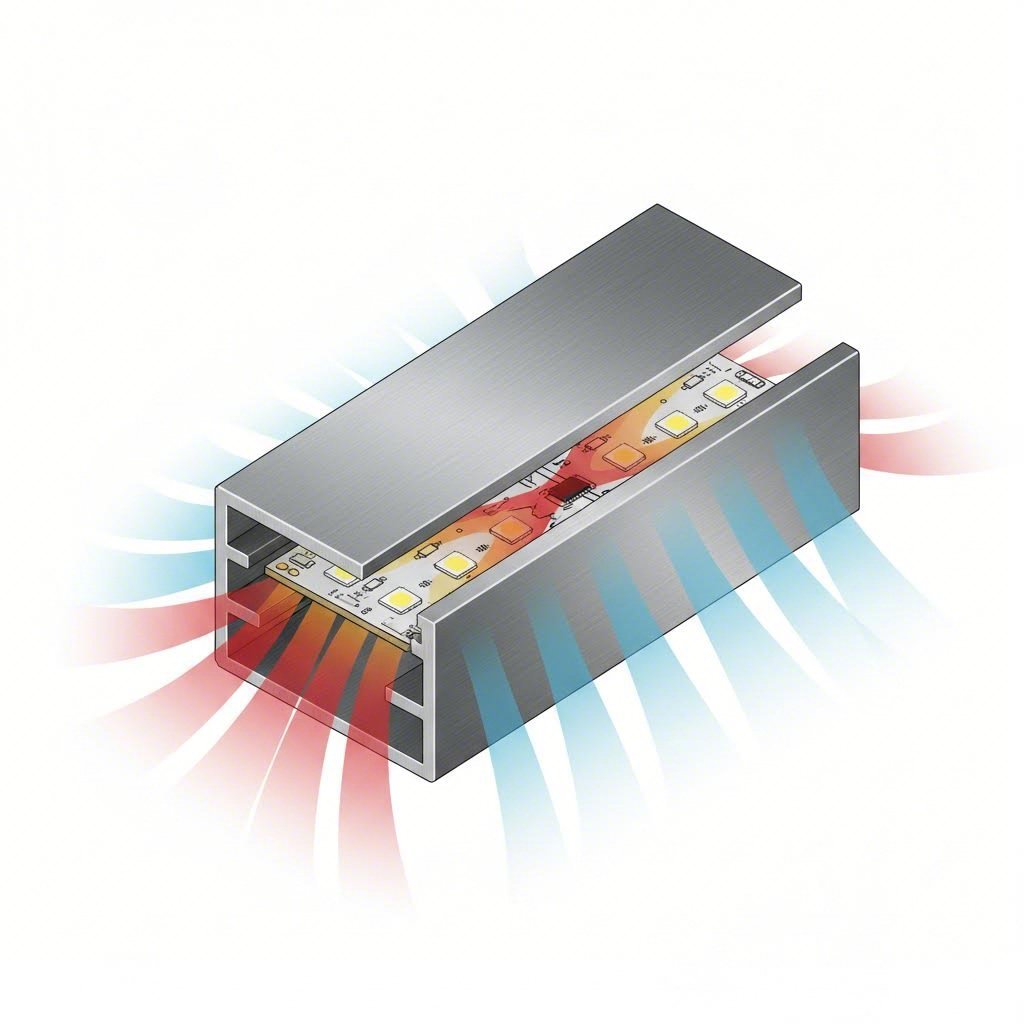
You might assume that LEDs run cool since they're so energy-efficient compared to incandescent bulbs. Sounds logical, right? Here's the reality: only about 25–35% of the electrical energy powering an LED converts into visible light. The remaining 65–75% becomes heat concentrated at the junction between the LED chip and its substrate. Without an effective way to move that heat away, your LED strips will suffer from reduced brightness, color shift, and a dramatically shortened lifespan.
This is precisely where led extrusions prove their worth. Acting as passive heat sinks, these aluminum channels continuously transfer thermal energy away from LED strips and release it into the surrounding air. The result? Your lights perform better, look better, and last significantly longer.
Understanding how heat moves through an led aluminum profile helps you appreciate why proper thermal management isn't optional—it's essential. Heat transfer in LED lighting systems occurs through three mechanisms:
The critical measurement in this system is junction temperature—the temperature at the point where the LED die meets its substrate. According to thermal analysis from SimScale's LED heat dissipation research, modern LEDs can reach junction temperatures of 100°C and beyond during operation. The ambient temperature, thermal resistance between components, and power dissipated all influence this value.
Aluminum's thermal conductivity of approximately 205 W/mK allows it to rapidly conduct heat away from the LED junction toward its external surfaces. Compare this to plastic housings, which conduct heat roughly 1,000 times less efficiently—and you'll understand why led aluminum extrusions dominate professional lighting applications.
Imagine installing beautiful LED strip lighting throughout your home, only to notice dimming and color changes within a year or two. This scenario plays out when thermal management gets overlooked during the selection process.
Two critical performance factors degrade when LEDs run too hot:
Research from SimScale demonstrates that reducing LED operating temperature by just 11°C can extend working life by approximately 25,000 hours—a compelling reason to invest in quality aluminium led strip channel solutions rather than bare LED strips or plastic housings.
For high-power LED strips (15 W/m and above), the thermal challenge intensifies. Each meter generates roughly 10 watts of heat that must be dissipated. Installing these strips without proper led extrusion channels can push PCB temperatures above 80°C, causing lumen depreciation rates that cut expected lifespan by up to 50%.
The alloy selection matters here too. Industry professionals specify 6063-T5 aluminum for LED profiles due to its excellent balance of thermal conductivity (approximately 201 W/mK), extrudability, and mechanical properties. This alloy accepts anodizing well, resists corrosion, and can be formed into precise, complex profile shapes. Lower-grade recycled aluminum with thermal conductivity below 150 W/mK simply cannot match these heat transfer capabilities—something to watch for when evaluating budget options.
Wall thickness also influences thermal performance. Upgrading from a 1mm thin-wall profile to a 2mm thick-wall 6063-T5 aluminum profile can reduce LED PCB temperature by 6–8°C under a 15 W/m load. That seemingly small improvement can extend L70 lifespan by 30–40%, making the modest cost increase a smart long-term investment.
With thermal fundamentals covered, you're ready to explore the various profile types available—each designed for specific installation scenarios and visual effects.
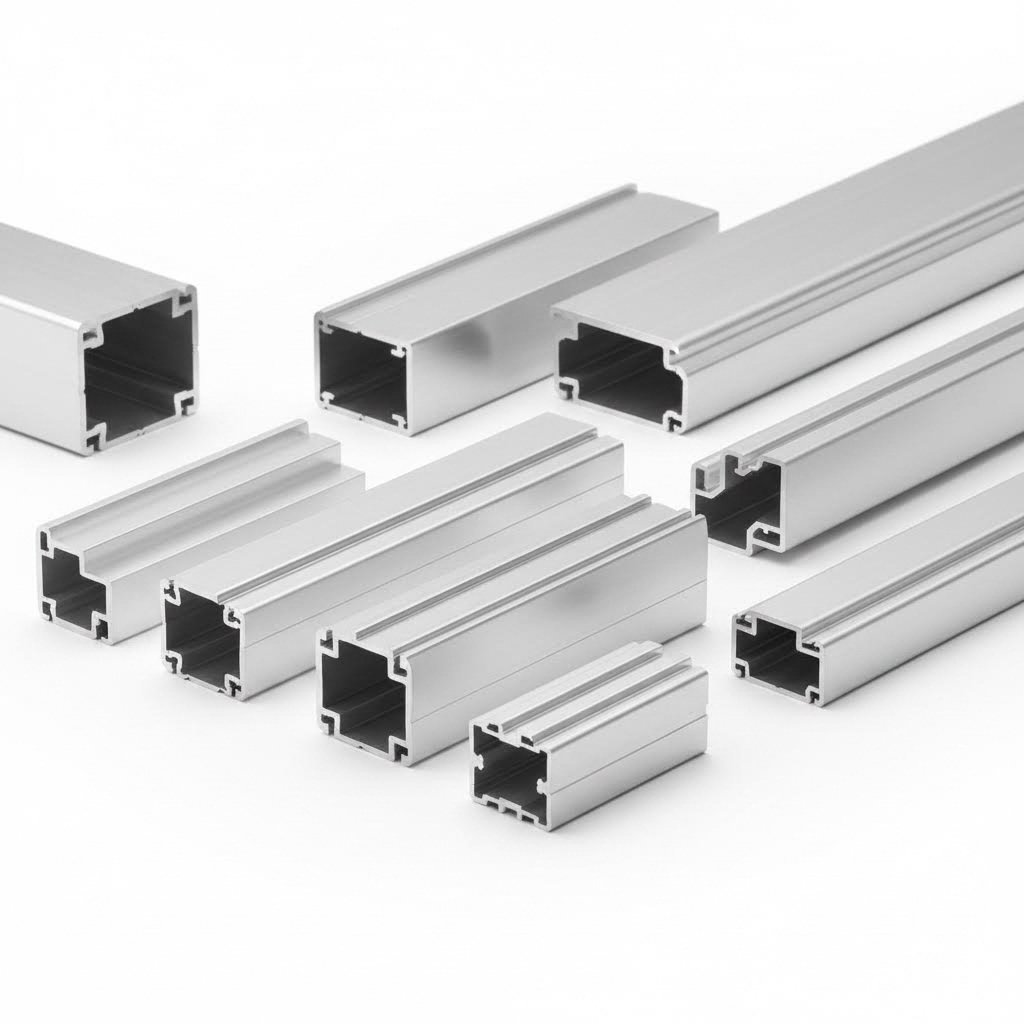
Selecting the right led strip channel feels overwhelming when you're facing dozens of profile options. Here's the reality: choosing the wrong profile means compromising either the visual effect you're trying to achieve or the installation feasibility for your specific space. The good news? Once you understand what each profile type does best, the decision becomes remarkably straightforward.
Think of profile selection as matching your installation environment with the lighting effect you want to create. A surface mount profile that works perfectly for under-cabinet lighting would look completely wrong as a pendant fixture above a dining table. Let's break down each profile type so you can confidently choose the right led extrusion channel for your project.
These two profile categories represent the most common choices for residential and commercial lighting installations—and they create distinctly different visual results.
Surface Mount Profiles attach directly to walls, ceilings, or furniture surfaces. The entire led tape channel sits visible above the mounting surface, creating a defined linear element in your space. Installation is straightforward: secure mounting clips at regular intervals, snap the profile into place, and you're done.
When does surface mounting make sense? Consider this approach when you want visible, intentional lighting lines—think under-cabinet task lighting, shelf accents, or wall-mounted reading lights. Surface profiles also excel in renovation projects where cutting into existing structures isn't practical. The trade-off is that the channel remains visible, which can be a design feature or a distraction depending on your aesthetic goals.
Recessed Profiles install flush within ceilings, walls, or custom millwork. Only the diffuser face and a thin flange (or no flange at all) remain visible once installation is complete. According to SignliteLED's installation comparison research, recessed linear lighting is favored in spaces where visual clutter needs to be minimized—hotel corridors, high-end offices, museums, and luxury retail environments.
Recessed channel lighting requires early planning during construction or significant modification to existing structures. You'll need to route channels in drywall, create slots in wooden surfaces, or coordinate with ceiling contractors. The installation complexity increases substantially, but when done right, recessed profiles deliver that seamless, architectural look where light appears to emerge directly from the surface itself.
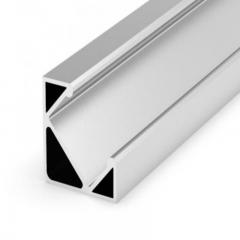
Corner Profiles mount at 45-degree angles where two surfaces meet—wall-to-ceiling junctions, inside cabinet corners, or architectural details. These led profile channel options direct light at an angle rather than straight down or outward, creating dramatic accent effects and eliminating shadows in corner areas. They're particularly effective for cove lighting applications where you want indirect illumination bouncing off adjacent surfaces.
Suspended Profiles hang from ceilings via cables or rigid rods, creating pendant-style linear fixtures. This led channel light approach works exceptionally well in spaces with high ceilings (3 meters and above) where recessed installation isn't possible and surface mounting would place lights too far from the work plane. Open-plan offices, reception areas, and retail spaces with high ceilings frequently utilize suspended profiles to define zones and add visual interest.
Suspended installations offer flexibility that other mounting methods can't match. You can adjust hanging height, create patterns with multiple runs, or install double-sided profiles that illuminate both upward and downward. However, proper alignment and cable tensioning require more attention to achieve clean, professional results.
To help you match profile types with specific project requirements, this comparison table breaks down the key selection criteria:
| Profile Type | Best Applications | Installation Complexity | Visual Effect | Ideal Environments |
|---|---|---|---|---|
| Surface Mount | Under-cabinet lighting, shelf accents, wall-mounted task lights, retrofits | Low – clips or adhesive mounting | Visible linear element, defined lighting line | Kitchens, closets, retail shelving, workshops, renovation projects |
| Recessed | Ceiling slots, wall niches, custom millwork, architectural accents | High – requires routing or structural coordination | Seamless integration, light appears from surface | Hotels, museums, luxury retail, high-end offices, new construction |
| Corner (45°) | Cove lighting, wall-ceiling junctions, cabinet interiors, architectural details | Medium – angle alignment critical | Indirect illumination, shadow elimination, accent effects | Living rooms, bedrooms, display cases, commercial lobbies |
| Suspended | Pendant fixtures, open offices, reception areas, high-ceiling retail | Medium – cable tensioning and alignment required | Floating linear fixture, spatial definition, design statement | Offices, conference rooms, showrooms, restaurants, galleries |
A few practical considerations worth noting: tape light channel selection should account for your LED strip width (covered in detail in the next section), but profile type selection comes first. Determine how and where you want the light to appear, then narrow down to profiles that fit both your mounting scenario and strip dimensions.
For renovation projects where structural modification isn't feasible, surface mount and suspended options keep installation straightforward. New construction offers the opportunity to plan recessed channel lighting from the design phase, coordinating with contractors before drywall goes up. And when you're lighting corners or creating cove effects, specialty corner profiles eliminate the awkward workarounds that occur when forcing standard profiles into angled installations.
With profile type decided, the next critical step is ensuring your chosen channel properly accommodates your LED strips—both physically and thermally.
You've selected the perfect profile type for your installation—but will your LED strip actually fit inside it? This question trips up more DIY installers and even some professionals than you might expect. Compatibility goes far beyond simply measuring strip width against channel opening. Proper fit involves thermal contact, power capacity, and optical considerations that directly impact how your led strip light channel performs over its lifespan.
Think of profile selection like choosing shoes: the right size isn't just about length. Width, arch support, and intended activity all matter. Similarly, your led strip profile must accommodate the physical strip dimensions while providing adequate thermal mass for the power level you're running and working harmoniously with your chosen diffuser.
Standard LED strips available today range from ultra-narrow 2mm specialty options up to 20mm ultra-wide configurations. However, the most common widths you'll encounter fall into three main categories:
Specialty applications push beyond these standard widths. Double-row strips typically require 15mm led strip channels to fit dual LED rows, while addressable RGB strips with larger driver ICs often need 20mm aluminum profiles for led strips. When you're working with RGBCCT strips featuring five color channels, expect to need 12mm to 15mm profiles to accommodate the additional circuitry.
Here's a critical point many installers miss: internal channel width must exceed your strip width by at least 1-2mm. Why? The LED strip needs room to lay flat without edge binding, and you need clearance for the adhesive backing and any slight manufacturing variations. An 8mm strip squeezed into an 8mm channel risks poor thermal contact and difficult installation. Target aluminium profiles for led tape with 10mm internal width for 8mm strips, and scale accordingly for wider options.
Strip width tells only part of the compatibility story. The power your LED strip draws directly determines how much heat the profile must dissipate—and this thermal requirement influences profile selection more than many realize.
Consider this relationship: a 15W/m LED strip generates approximately 10W/m of heat (remember, only 25-35% of input energy becomes light). That thermal load must transfer from the LED junction through the PCB into your aluminum channel, then dissipate into surrounding air. According to SignliteLED's thermal analysis, strips at 15W/m or higher require profiles with at least 2mm wall thickness to maintain PCB temperatures below 70°C.
The practical implications? Running high-power strips in thin-wall led strip channels creates a thermal bottleneck. Your LEDs operate hotter, degrade faster, and may show visible color shift within months rather than years. For power levels exceeding 12W/m, look for deep-channel or finned aluminum profiles for led strips that provide greater thermal mass and surface area for heat dissipation.
Color temperature adds another consideration layer. Warmer color temperatures (2700K-3000K) contain more red wavelengths, and red LEDs show greater sensitivity to thermal stress than cooler colors. If you're installing warm-white high-power strips, err toward profiles with superior thermal performance.
Diffuser selection also affects your system's thermal behavior and light output. A clear diffuser transmits 92-95% of light but shows visible LED hotspots. Frosted diffusers drop transmission to 80-85% while significantly reducing hotspots. Opal or milky diffusers sacrifice more output (65-75% transmission) but create perfectly uniform illumination. When using lower-transmission diffusers, you may need brighter strips to achieve target light levels—which circles back to thermal requirements and profile sizing.
Before finalizing your profile selection, run through this compatibility checklist:
With compatibility confirmed, you're ready to tackle the hands-on work of actually installing your LED aluminum channels—a process that rewards careful preparation and methodical execution.
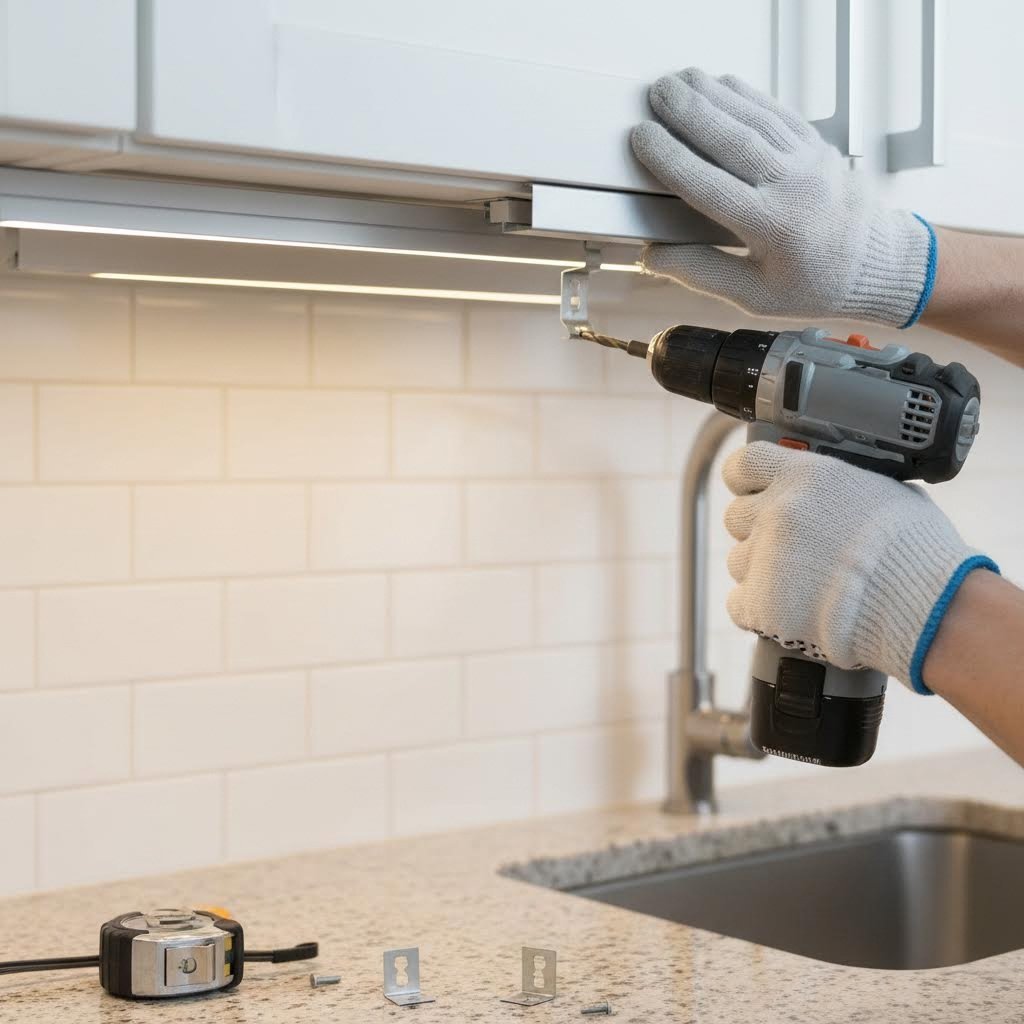
You've selected the perfect profile type and confirmed LED strip compatibility—now comes the rewarding part. Installing your led tape light channel properly means the difference between a professional result that lasts for years and a frustrating project that peels, sags, or looks uneven within months. Whether you're surface mounting under kitchen cabinets or routing recessed channels into drywall, methodical preparation and proper technique deliver clean results every time.
The good news? You don't need specialized contractor skills to achieve professional-looking installations. With the right tools, careful measurement, and attention to a few critical details, you can install aluminum channel for led tape light with confidence across virtually any mounting scenario.
Before making a single cut or drilling any holes, gather your tools and plan the complete installation. Rushing into cutting profiles without proper preparation leads to wasted materials and frustrating do-overs.
Here's what you'll need on hand:
With tools assembled, follow this preparation sequence before any cutting begins:
Cutting Aluminum Profiles Safely and Cleanly
Precise cuts determine whether your installation looks professional or amateurish. Here's how to achieve clean results:
Surface Mounting with Clips
This method offers the easiest installation path and works for most track for led strip lighting applications. The process is straightforward:
Direct Screw Mounting Method
When you want a more permanent installation or need maximum holding strength, mounting the channel directly with screws provides superior results:
Recessed Installation Considerations
Recessed led mounting channel installations require more preparation but deliver that seamless, architectural look where light appears to emerge from the surface itself. According to Wired4Signs USA's recessed lighting guide, successful recessed installations depend on proper planning before any cutting begins.
For drywall installations:
For wood surfaces (custom millwork, furniture, shelving), a router with a straight bit sized to your channel width creates clean slots. Set router depth to match channel height minus the flange dimension if your profile has one.
Corner Installation and Angle Alignment
Corner profiles require extra attention to achieve proper 45-degree alignment:
Wire Management and End Cap Installation
Clean wire management separates professional installations from amateur attempts. Before installing LED strips:
End cap installation completes the professional look:
With your channels mounted, wiring routed, and end caps in place, you're ready to install LED strips and diffusers—but before powering up, understanding environmental ratings ensures your installation performs reliably in its intended location.
You've installed your aluminum channel for led lights perfectly—but will it survive a humid bathroom environment? What about a covered patio exposed to occasional rain? Understanding environmental protection ratings prevents costly failures and ensures your led strip lighting channel performs reliably wherever you install it.
The key to selecting the right exterior led channel comes down to one critical specification: the IP rating. This two-digit code tells you exactly how well your lighting system resists dust, debris, and water intrusion. Get this wrong, and you'll face premature failures, safety hazards, or both.
IP stands for Ingress Protection—a standardized classification system that defines how effectively an electrical enclosure prevents solids and liquids from entering. According to Wired4Signs USA's comprehensive IP rating guide, every IP rating consists of two digits that work together to describe protection levels:
For aluminum lighting installations, you'll most commonly encounter four IP ratings. Each serves specific environmental conditions:
| IP Rating | Solid Protection | Liquid Protection | Appropriate Applications |
|---|---|---|---|
| IP20 | Protected against objects larger than 12.5mm | No liquid protection | Indoor dry locations: living rooms, bedrooms, closets, offices |
| IP65 | Dust-tight (complete protection) | Protected against water jets from any direction | Bathrooms, covered patios, under-eave installations, kitchens near sinks |
| IP67 | Dust-tight (complete protection) | Protected against temporary submersion up to 1 meter for 30 minutes | Exposed outdoor areas, garden borders, poolside (not submerged) |
| IP68 | Dust-tight (complete protection) | Protected against continuous submersion beyond 1 meter | Underwater installations: pools, fountains, ponds |
Here's a critical distinction many installers miss: IP65 means water-resistant, not waterproof. According to Flexfire LEDs' waterproofing guide, IP65-rated LED strips and channels handle splashes and rain exposure but should never be submerged. If your aluminum track for led strip lighting might sit in standing water—even temporarily—you need IP67 or IP68 protection.
Matching your led tape track to its installation environment involves more than just checking IP ratings. Consider these location-specific requirements:
Indoor Dry Locations
Standard IP20-rated profiles work perfectly for most indoor applications. Living rooms, bedrooms, hallways, and offices present no moisture challenges. The aluminum extrusion itself provides adequate protection when sealed with end caps, and you'll save money by not paying for waterproofing you don't need. For these environments, focus your selection criteria on thermal performance and aesthetic fit rather than environmental protection.
Bathrooms and High-Humidity Spaces
Bathroom installations require IP65 minimum—even for ceiling-mounted fixtures that seem distant from water sources. Steam from showers creates humidity levels that penetrate IP20 housings over time, corroding connections and degrading LED performance. For installations near showers, bathtubs, or directly above vanities, IP65 aluminum channels with silicone-sealed end caps prevent moisture intrusion while maintaining proper heat dissipation.
Covered Outdoor Areas
Patios, porches, pergolas, and under-eave installations occupy a middle ground. While protected from direct rainfall, these spaces still experience humidity, temperature swings, and occasional wind-driven moisture. IP65 ratings handle these conditions reliably. According to SignliteLED's outdoor lighting guide, silicone-coated LED strips paired with IP65 aluminum channels provide the protection level these semi-exposed environments demand.
Fully Exposed Outdoor Installations
Garden pathways, fence lines, building facades, and landscape lighting face direct weather exposure. These applications require IP67 protection at minimum. The led tape track must withstand heavy rain, snow accumulation, and potential flooding during storms. For installations near ground level where standing water might occur, upgrading to IP68-rated components eliminates failure risk during extreme weather events.
Additional Weatherproofing Considerations
IP ratings address water and dust—but outdoor environments present additional challenges that affect long-term performance:
With environmental protection requirements understood, you're equipped to select profiles that perform reliably in any installation scenario—from climate-controlled interiors to challenging outdoor environments. Next, we'll explore specific application scenarios and how different profile and diffuser combinations create optimal results for each use case.
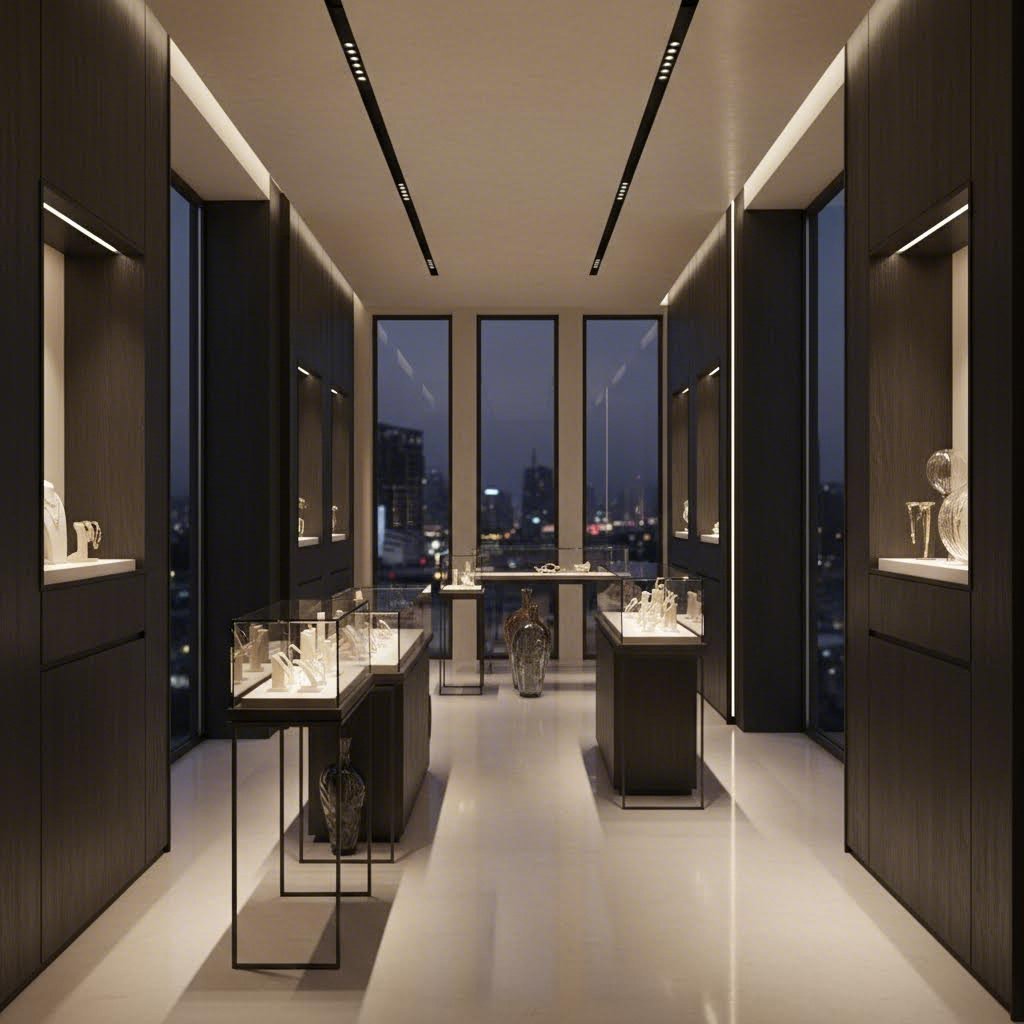
Where exactly should you use aluminum extrusion LED lighting? This question matters more than product specifications alone—because the right profile and diffuser combination for under-cabinet kitchen lighting looks completely wrong when applied to a dramatic cove ceiling installation. Understanding application-specific requirements transforms generic product selection into purpose-driven design decisions that deliver exactly the lighting effect you're aiming for.
Let's explore the most popular applications organized by environment and purpose, with specific recommendations for profile types, diffuser selections, and led light channels that work best in each scenario.
Under-Cabinet Kitchen Lighting
Kitchen countertops present the most common residential application for profile lighting. Dark shadows beneath upper cabinets make food preparation difficult and create an unwelcoming atmosphere. According to PROLIGHTING's comprehensive under-cabinet guide, an under cabinet lighting channel system not only improves brightness and functionality but also increases home resale value.
For this application, surface-mount profiles with frosted diffusers deliver optimal results. The frosted lens eliminates visible LED dots while providing even illumination across your workspace. Position your led light profile toward the front edge of cabinets—this placement prevents shadows from falling across the countertop when you're working.
Cove Lighting for Ambient Effects
Imagine soft, indirect light washing across your ceiling, creating depth and warmth without a single visible fixture. That's the magic of cove lighting—and it's where corner profiles truly excel. This application uses led light channels mounted in architectural ledges or crown molding areas to bounce light off ceilings or walls.
Corner profiles angled at 45 degrees direct light upward against the ceiling surface, where it reflects downward as diffused ambient illumination. The effect transforms ordinary rooms into inviting spaces with professional-grade lighting design. According to LEDrise's lines of light research, this technique delineates spaces, provides ambient lighting, and serves as nighttime guidance along staircases and hallways.
Entertainment and Media Wall Applications
Behind televisions, around gaming setups, and integrated into home theater designs—led rope light channel installations create immersive entertainment experiences. Bias lighting behind screens reduces eye strain during extended viewing sessions while adding visual drama to your space.
For media walls, surface-mount profiles with opal diffusers work best. The fully diffused light prevents distracting reflections on screens while creating that floating, backlit effect you see in high-end installations. RGB or RGBW strips add color-changing capabilities that sync with on-screen content or shift based on mood.
Retail Display Lighting
Product presentation drives sales—and channel for led systems excel at highlighting merchandise while remaining virtually invisible. Glass display cases, shelving units, and window displays all benefit from strategic LED profile placement.
For retail applications, profile light selection depends on what you're illuminating. Jewelry and cosmetics demand high-CRI strips (90+) with clear or lightly frosted diffusers to render colors accurately. Apparel displays benefit from warmer color temperatures that make fabrics appear inviting. According to LEDrise's lighting analysis, commercial and business applications may require up to 8000 lumens per meter for proper workplace lighting—though retail displays typically need less intensity with more precise direction.
Architectural Accent Lighting
Hotels, museums, corporate lobbies, and high-end restaurants use profile lighting to define spaces, highlight architectural features, and create memorable visual experiences. This is where recessed profiles deliver their greatest impact—creating those seamless "lines of light" that appear to emerge directly from architectural surfaces.
According to LEDrise's architectural lighting research, achieving this effect requires meticulous planning during the design phase. Recessed profiles integrate into ceiling slots, wall niches, and custom millwork to produce minimalist yet impactful lighting features. The result embodies the modern design ethos of simplicity, efficiency, and adaptability.
Office and Workspace Lighting
Suspended profile lights have transformed modern office design. Hanging from cables above desks and conference tables, these linear fixtures provide direct task lighting while adding contemporary design elements to otherwise utilitarian spaces.
For general office lighting, LEDrise recommends up to 4000 lumens per meter for residential-scale spaces and up to 8000 lumens per meter for commercial workplace applications. Double-sided suspended profiles—illuminating both upward and downward—combine ambient ceiling wash with direct desk illumination in a single elegant fixture.
How Diffuser Selection Shapes Every Application
Notice the pattern across these applications? Diffuser choice consistently determines whether your profile lighting succeeds or disappoints. Here's the quick reference:
With application requirements clarified, you'll want to ensure every component in your LED channel system—from diffusers to end caps to mounting hardware—works together as an integrated whole. Quality components determine whether your installation delivers professional results that last.
Ever purchased what seemed like the perfect LED profile only to discover the diffuser doesn't quite snap in properly, or the end caps leave visible gaps? These frustrations stem from treating aluminum extrusion LED lighting as individual parts rather than an integrated ecosystem. Each component—from the aluminium channel for led strip lighting to the smallest mounting clip—must work harmoniously with every other piece to deliver professional results.
Understanding this complete ecosystem transforms how you approach purchasing decisions. When you recognize how diffuser quality affects light output, how end cap design impacts installation flexibility, and how mounting hardware determines long-term stability, you'll make smarter choices that pay dividends for years.
The diffuser covering your led strip housing might seem like a simple plastic cover—but it's actually one of the most critical components affecting your lighting's visual quality. According to SignliteLED's comprehensive guide, diffusers made from polycarbonate (PC) or PMMA materials deliver substantial improvements to both performance and visual appeal.
Think of led lighting diffusers as the lens through which all your careful profile and strip selection gets filtered. Choose wrong, and even premium components underperform. Choose right, and your installation achieves that seamless, professional glow.
Here's how the three main diffuser categories compare:
| Diffuser Type | Light Transmission | LED Visibility | Best Applications | Trade-offs |
|---|---|---|---|---|
| Clear | 92-95% | Fully visible dots | Indirect lighting, hidden installations, maximum output needs | Hotspots visible when viewed directly |
| Frosted | 80-85% | Significantly reduced | Under-cabinet, task lighting, retail displays, general use | Slight brightness reduction |
| Opal/Milky | 65-75% | Completely eliminated | Cove lighting, media walls, architectural features, close-range viewing | Notable brightness reduction requires higher-output strips |
Material quality matters as much as diffusion level. Standard polycarbonate led lighting diffusers work fine indoors but may yellow when exposed to UV light over time. For outdoor or sun-exposed installations, specify UV-stabilized materials that maintain optical clarity for years. PMMA (acrylic) diffusers offer superior optical properties and scratch resistance but cost more and require careful handling during installation.
The fit between diffuser and aluminum diffuser channel deserves attention too. Quality profile channel systems feature precision-extruded diffuser tracks that create a positive snap-fit. Budget options often leave gaps, allow diffusers to pop out, or require excessive force to install—problems that become obvious only after purchase.
End Cap Options
End caps do more than finish off your led tape housing aesthetically—they protect internal components from dust, provide wire routing options, and affect installation flexibility. Three main styles serve different needs:
For led strip light housing installations in moisture-prone areas, end cap sealing becomes critical. Even IP65-rated channels lose protection if end caps aren't properly sealed. Apply silicone sealant around perimeters for outdoor or bathroom applications.
Mounting Clips and Brackets
The humble mounting clip determines whether your profile stays perfectly straight or develops annoying waves and sags over time. Quality clips share several characteristics:
Spacing matters as much as clip quality. For standard profiles, position clips every 12-18 inches. Longer unsupported spans invite sagging, especially with heavier profiles or in warm environments where plastic diffusers may soften slightly.
Connector Accessories
Larger installations often require joining multiple profile sections or transitioning between different profile types. Connector accessories bridge these gaps:
Why Component Quality Determines System Longevity
Imagine installing beautiful LED lighting only to have diffusers yellowing within a year, mounting clips losing grip, or end caps cracking from thermal cycling. These failures rarely stem from the aluminum channel itself—they result from inferior accessories.
The most common LED channel installation failures occur not in the aluminum profile but in the accessories: yellowed diffusers, failed mounting clips, and poorly sealed end caps account for the majority of service calls and replacements.
Sourcing components that work together seamlessly—ideally from a single supplier who manufactures or quality-controls the complete system—eliminates compatibility frustrations and ensures consistent performance. When profiles, diffusers, end caps, and mounting hardware come from the same manufacturing ecosystem, tolerances match, finishes coordinate, and replacement parts remain available.
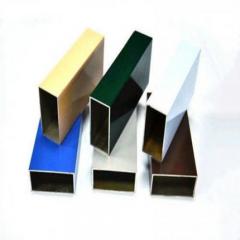
For projects requiring custom LED profile solutions, working with manufacturers who offer comprehensive aluminum extrusion and deep processing services delivers significant advantages. Shengxin Aluminium exemplifies this integrated approach with over 30 years of experience providing custom 6063 aluminum profiles. Their capabilities span from initial die development through mass production, with surface treatment options including anodizing in custom colors (champagne, rose gold, and more) and powder coating for enhanced durability. This end-to-end support means your custom LED profiles arrive ready for installation with matched accessories and consistent quality—eliminating the compatibility issues that plague projects assembled from multiple sources.
With your component ecosystem understood, the final consideration is ensuring you're sourcing these quality components from reliable suppliers who deliver consistent results project after project.
You've researched profile types, confirmed LED strip compatibility, and mapped out your complete installation—but how do you know the led profiles you're about to purchase will actually deliver professional results? This question separates successful projects from frustrating ones filled with warped channels, cloudy diffusers, and components that simply don't fit together properly.
The aluminum extrusion for led strip lights market includes everything from premium manufacturer-direct options to budget imports of questionable quality. Learning to identify quality indicators before purchasing protects your investment and ensures your installation performs as expected for years rather than months.
When evaluating led aluminium profile options, several physical characteristics reveal manufacturing quality that product photos simply can't convey. Knowing what to look for—and what red flags to avoid—transforms you from a hopeful buyer into an informed purchaser.
Aluminum Wall Thickness and Consistency
Wall thickness directly impacts both structural rigidity and thermal performance. Quality profile lights feature consistent wall thickness throughout—typically 1.5mm to 2mm for standard applications. Thinner walls (under 1mm) save material costs but compromise heat dissipation and create profiles that flex, bow, or dent during installation.
How do you verify thickness without cutting a profile open? Weight provides a reliable indicator. A one-meter section of quality 6063 aluminum LED channel should feel substantial in your hand. If it feels flimsy or lightweight compared to samples from other suppliers, wall thickness has likely been reduced.
Anodizing Quality and Finish Consistency
Anodizing creates the protective oxide layer that prevents aluminum from developing that dull, chalky appearance over time. Quality anodizing appears uniform in color with no streaks, spots, or variations along the profile length. Run your finger along anodized surfaces—they should feel smooth and consistent, not gritty or rough.
Poor anodizing reveals itself through visible defects: uneven coloring, pitting, or areas where the coating appears thinner. These flaws aren't just cosmetic—they indicate compromised corrosion resistance that will become visible problems within months of installation, especially in humid environments.
Diffuser Clarity and Fit
Test diffusers before committing to bulk purchases. Quality diffusers snap into profile channels with a positive click and stay firmly seated without excessive pressure. They should slide into position smoothly—not require forcing or leave gaps along the edges.
Hold diffusers up to light and examine for optical clarity. Frosted diffusers should appear uniformly hazy without streaks, bubbles, or cloudy patches. Clear diffusers should be optically pure. Any visible defects become magnified once LED strips illuminate behind them.
Extrusion Tolerance and Straightness
Professional installations demand straight profiles. Place potential purchases on a flat surface and check for bowing, twisting, or waviness along the length. According to industry standards, quality extrusions maintain straightness within 1mm deviation per meter. Profiles with visible curvature create wavy lighting lines that no installation skill can correct.
Consistent extrusion tolerances also affect component compatibility. When internal dimensions vary between profile sections, diffusers fit perfectly in some areas while binding or gapping in others. This inconsistency signals manufacturing quality control issues that likely extend to other product aspects.
Use this checklist when evaluating led tape light extrusion suppliers—quality manufacturers meet all these criteria:
When does a standard off-the-shelf led profiles option make sense, and when should you invest in custom extrusion development? This decision involves balancing project requirements against budget, timeline, and volume considerations.
Standard Profiles: The Practical Choice for Most Projects
Standard profiles suit the majority of residential and light commercial applications. Surface mount, recessed, corner, and suspended options cover most installation scenarios with proven designs that include matched accessories. Benefits include:
For projects using common LED strip widths (8mm, 10mm, 12mm) in typical mounting scenarios, standard profiles deliver professional results without custom development costs.
Custom Profiles: When Standard Options Fall Short
Certain project requirements push beyond what standard profiles can deliver. Consider custom aluminum extrusion for led strip lights when facing:
Custom development requires working with manufacturers equipped for the complete process. Shengxin Aluminium's factory-direct approach includes die development, prototype production, surface treatment application, and CNC machining for precise modifications—all under one roof. This integrated capability means your custom aluminium profile led light design moves from concept to production without coordination headaches between multiple vendors.
For custom projects, expect lead times of 4-8 weeks for die development plus production time. Tooling costs range from several hundred to several thousand dollars depending on profile complexity. However, once tooling exists, reorder costs drop significantly, and you own a proprietary design that competitors can't easily replicate.
Surface Treatment Durability Characteristics
Surface treatments affect both aesthetics and longevity. Understanding your options helps match treatments to installation environments:
Whether selecting standard profiles or developing custom solutions, supplier relationship matters as much as product quality. Manufacturers who provide technical support, maintain consistent quality across orders, and stand behind their products with responsive service transform from vendors into partners who contribute to your project success. By evaluating quality indicators carefully and choosing suppliers with demonstrated manufacturing capabilities, your aluminum extrusion LED lighting installations will deliver the professional results and long-term performance that justify the investment.
Aluminum extrusions provide critical thermal management by drawing heat away from LED chips, extending lifespan by up to 25,000 hours when operating temperatures drop just 11°C. Beyond heat dissipation, they offer structural support for clean installations, protect strips from dust and physical damage, and create professional aesthetics with diffuser options that eliminate visible LED dots. The 6063 aluminum alloy commonly used delivers thermal conductivity of approximately 205 W/mK, far superior to plastic alternatives.
Start by determining your mounting scenario: surface mount profiles work for retrofits and visible installations, recessed profiles create seamless architectural looks in new construction, corner profiles suit cove lighting at 45-degree angles, and suspended profiles serve high-ceiling spaces. Next, match internal channel width to your LED strip—ensure 1-2mm clearance beyond strip width. For high-power strips above 12W/m, select profiles with 2mm+ wall thickness for adequate heat dissipation. Finally, choose diffusers based on viewing distance: opal for close-range, frosted for general use, clear for hidden installations.
For covered outdoor areas like patios and porches, IP65-rated profiles handle humidity and wind-driven moisture effectively. Fully exposed installations such as garden pathways and building facades require IP67 minimum to withstand direct rain and potential temporary flooding. Underwater applications including pools and fountains demand IP68 ratings. Remember that IP65 means water-resistant, not waterproof—never submerge IP65 components. Additionally, specify UV-stabilized diffusers and anodized or powder-coated finishes for long-term outdoor durability.
LEDs convert only 25-35% of electrical energy into light, with the remainder becoming heat at the junction point. Elevated junction temperatures cause lumen depreciation and accelerated aging. Quality 6063-T5 aluminum profiles conduct this heat away through their 205 W/mK thermal conductivity, releasing it into surrounding air. Upgrading from 1mm to 2mm wall thickness can reduce PCB temperatures by 6-8°C, potentially extending L70 lifespan by 30-40%. High-power strips at 15W/m generate roughly 10W/m of heat, making proper profile selection essential for maintaining rated performance.
Yes, custom extrusion development suits projects requiring non-standard dimensions, integrated mounting features, or brand-specific designs. Manufacturers like Shengxin Aluminium offer end-to-end custom profile services including die development, prototype production, CNC machining, and surface treatments such as custom anodizing colors and powder coating. Expect 4-8 weeks for die development plus production time. While tooling involves upfront investment, high-volume projects often achieve lower per-unit costs than modifying standard profiles, and you gain proprietary designs unavailable to competitors.



 Onlineservice
 0086 136 3563 2360
 sales@sxalu.com
 +86 136 3563 2360
 Deutsch
 English
 français
 русский
 español
 português
 العربية
 ไทย
 Việt
 Українська